1 - 147
Chapter 1 Troubleshooting
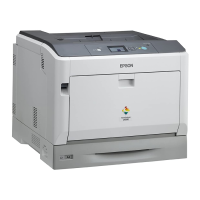
Epson AcuLaser C2900N
Revision B
Confidential
FIP-1.P7 Pitched color dots
ESS and possible causative parts
- TRANSFER ASSY (PL6.1.7)
- DRUM CARTRIDGE (PL4.1.21)
- FUSER UNIT (PL6.1.1)
Before commencing troubleshooting, check the paper transfer path. Make sure there is no foreign
materials on the transfer path, such as staples, paper clips, scraps of paper and so on.
Step Check
Remedy
Yes No
1
Checking the defective parts.
Print the [Pitch Configuration Chart] in [Chart Print] in
[Diagnosis] tab of [Tool Box].
When the partial lacks of periodicity are observed, check the
defective parts by comparing the printed partial lacks with
the Pitch Chart.
Are there any partial lack matching the chart?
Replace the
corresponding
parts.
Go to step 2.
2
Checking after cleaning Inside the Printer.
Is the image printed correctly?
End of work. Go to step 3.
3
Shake and reseat the suspected TONER CARTRIDGE (Y,
M, C, or K)
Is the image printed correctly?
End of work. Go to step 4.
4
Checking the belt surface of the TRANSFER ASSY.
Are there any damages on the belt surface of the
TRANSFER ASSY?
Replace the
TRANSFER
ASSY. (Refer to
RRP6.3.)
Go to step 5.
5
Checking the TRANSFER ASSY for connection.
Open the COVER ASSY FRONT MG.
Are four HV terminals on the TRANSFER ASSY, and four
springs on the frame (PL4.1.11, 12, 13 and 14) dirty and/or
deformed?
Clean or replace
the TRANSFER
ASSY or
SPRING(s).
Go to step 6.

 Loading...


