Epson Artisan 800/Epson Stylus Photo PX800FW/TX800FW/Epson Artisan 700/Epson Stylus Photo PX700W/TX700W Revision C
DISASSEMBLY/ASSEMBLY Disassembly Procedures 139
Confidential
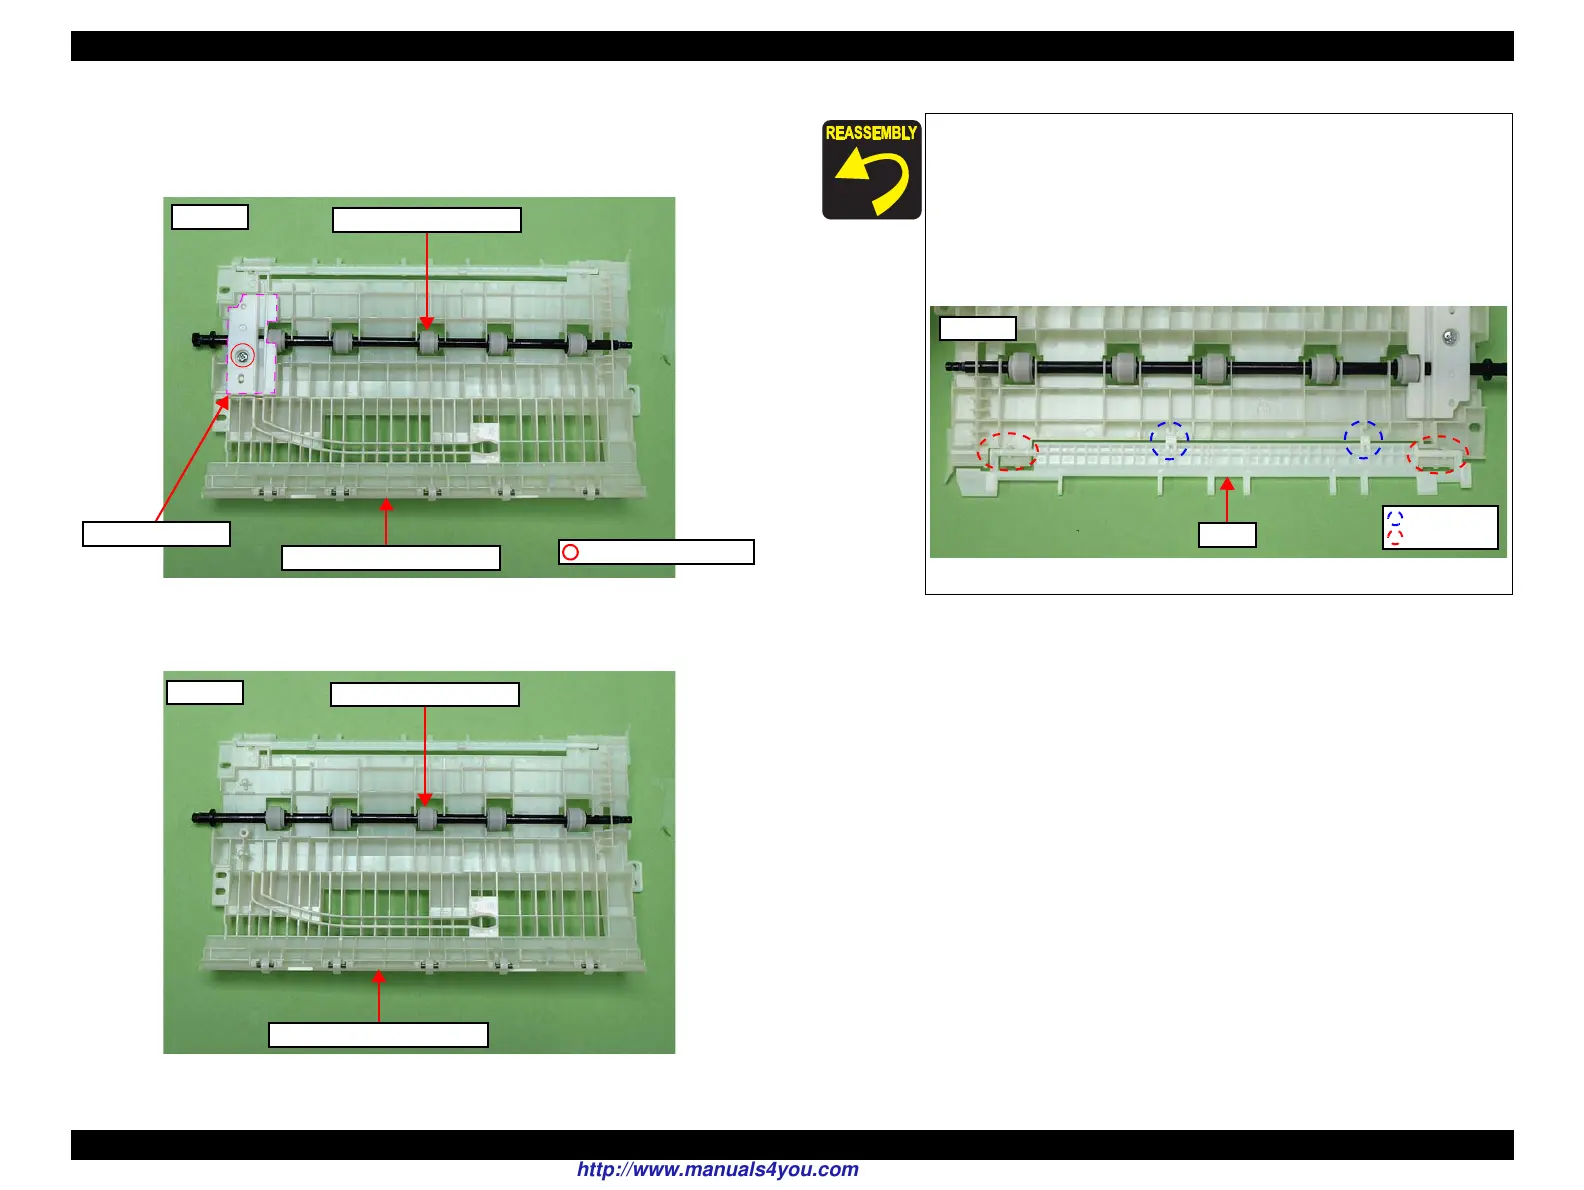
4. Remove the screw (x1) that secures the Intermediate Roller fixing plate, and
remove the Intermediate Roller fixing plate from the Lower ASF Paper Guide
Assy.
Figure 4-90. Removing the Lower ASF Paper Guide Assy (3)
5. Remove the Intermediate Roller A from the Lower ASF Paper Guide Assy.
Figure 4-91. Removing the Lower ASF Paper Guide Assy (4)
C.B.P. 3x8 (6±1Kgfcm)
Roller fixing plate
Lower ASF Paper Guide Assy
Intermediate Roller A
Rear side
Lower ASF Paper Guide Assy
Intermediate Roller A
Rear side
Paper feed defect will occur if the flap of the Lower ASF Paper
Guide Assy comes off; therefore, take care in the following
points to make sure that the flap is surely attached when
installing the Lower ASF Paper Guide Assy.
• Make sure that the shaft of the flap is surely installed.
• The ribs (x2) of the flap are positioned on the rear of the Lower
ASF Paper Guide Assy.
Figure 4-92. Installing the flap
Flap
Rib
Rear side
Flap’s shaft
http://www.manuals4you.com

 Loading...


