Epson Artisan 800/Epson Stylus Photo PX800FW/TX800FW/Epson Artisan 700/Epson Stylus Photo PX700W/TX700W Revision C
DISASSEMBLY/ASSEMBLY Disassembly Procedures 170
Confidential
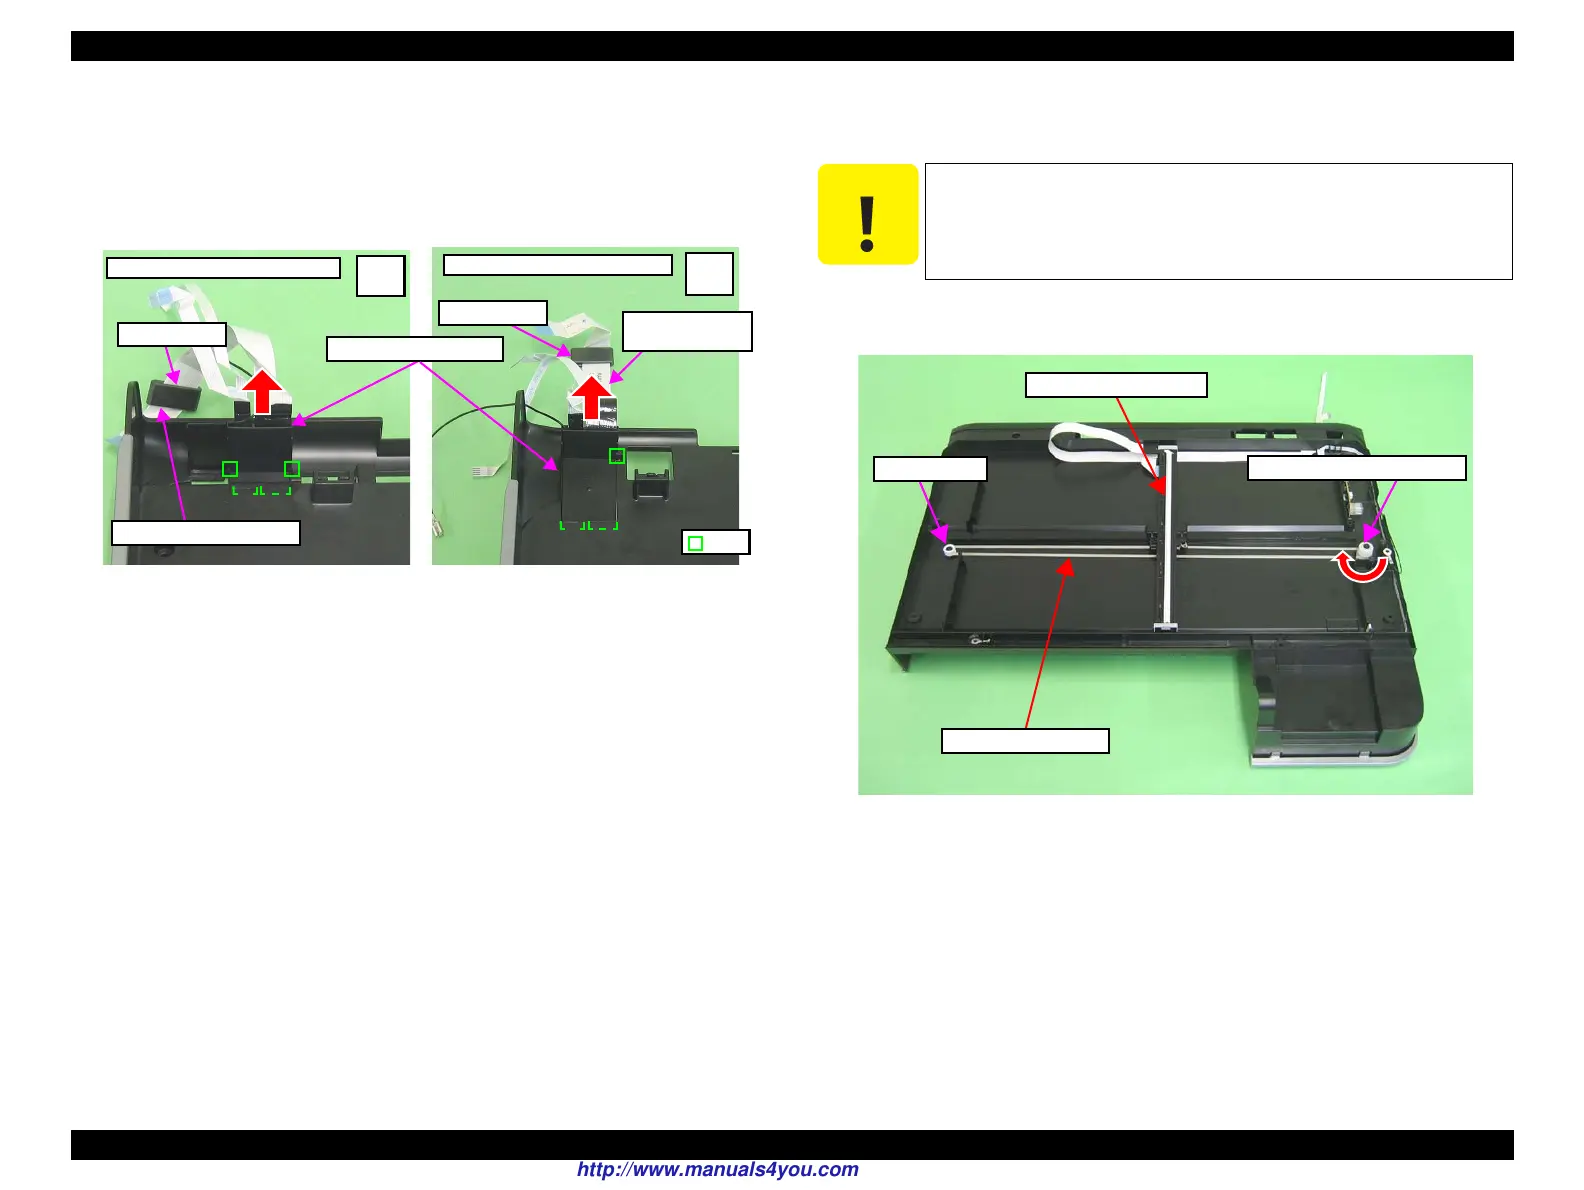
1. Release the ribs (Artisan 800/PX800FW/TX800FW: x4, Artisan 700/
PX700W/TX700W: x3) that secure the Scanner Cable Cover to the Scanner
Lower Housing, and remove the Scanner Cable Cover from the Scanner
Lower Housing in the direction of the arrow.
2. Pull out the Ferrite Core from the Scanner Carriage FFC.
Figure 4-168. Removing the Carriage Unit (1)
3. Turn the Combination Gear 12.1, 11.3 in the direction of the arrow, and move
the Scanner Carriage Unit to the center.
4. Remove the Driven Pulley and Combination Gear12.1, 11.3 from the Scanner
Lower Housing, and remove the Scanner Timing Belt.
Figure 4-169. Removing the Scanner Carriage Unit (2)
Ferrite Core
Scanner Cable Cover
Scanner Carriage FFC
Rib
Scanner Carriage
FFC
Rear
side
Artisan 800/PX800FW/TX800FW
Artisan 700/PX700W/TX700W
Rear
side
Ferrite Core
Take extra care not to contaminate the Scanner Timing Belt with
grease on the rail of the Lower Scanner Housing.
Scanner Carriage Unit
Scanner Timing Belt
Driven Pulley
Combination Gear12.1, 11.3
http://www.manuals4you.com

 Loading...


