Using Multiple Projectors
149
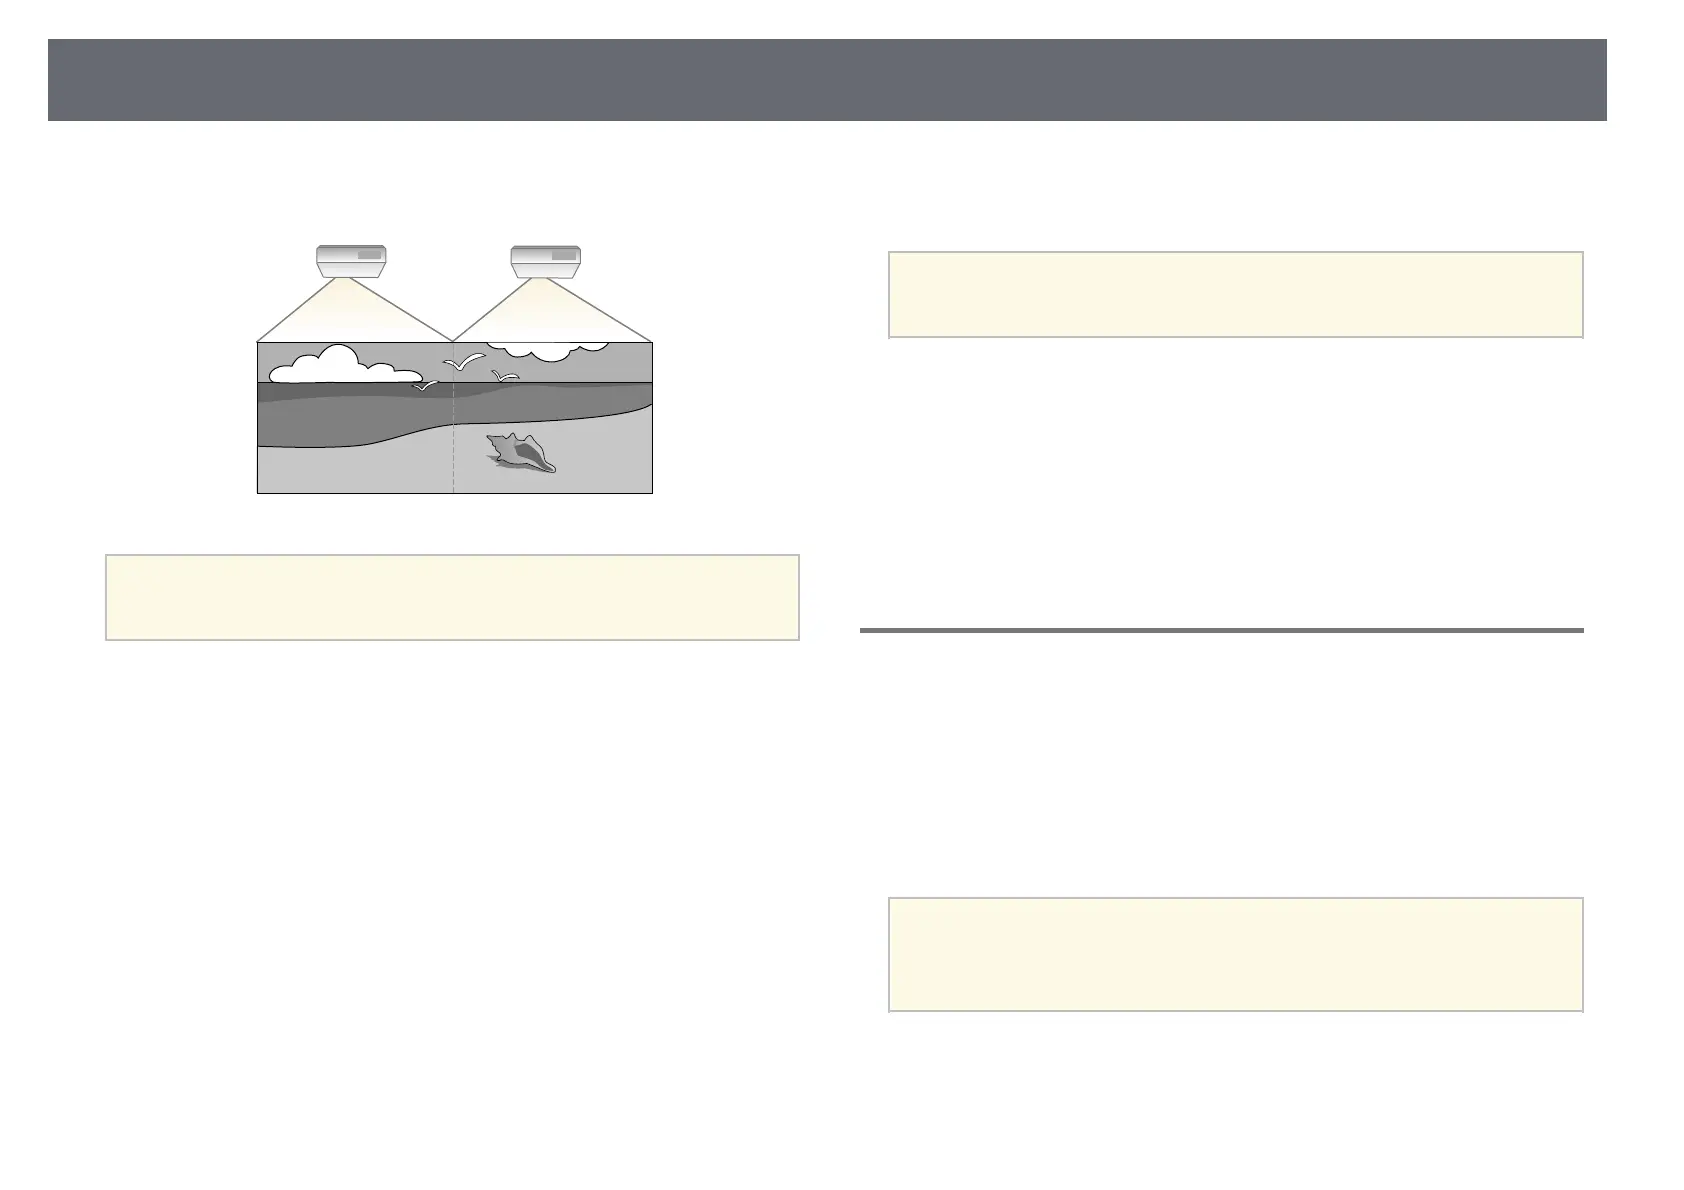
You can combine the projected images from two or more projectors to create
one unified image area.
a
• Before starting projection, make sure you set the Color Mode setting
to Multi-Projection in the projector's Image menu for all of the
projectors (EB‑755F/EB‑750F).
For best results, select settings and adjustments for multiple projector images
in this order:
EB‑‑755F/EB‑‑750F:
• Setting the Projector ID
• Adjusting Color Uniformity
• Blending the Image Edges
• Matching the Image Colors
• Adjusting the Black Level
• Adjusting RGBCMY
• Scaling an Image
EB‑‑735Fi/EB‑‑735F/EB‑‑725Wi/EB‑‑725W/EB‑‑720:
• Setting the Projector ID
• Adjusting Color Uniformity
• Setting the Light Source Mode to Custom and adjusting the Brightness
Level in the projector's Operation menu.
s Operation > Light Source Brightness Control > Light Source Mode
• Adjusting RGBCMY
a
We recommend adjusting the image at least 30 minutes after you start
projecting, because images are not stable right after turning on the
projector.
gg Related Links
• "Projector Identification System for Multiple Projector Control" p.149
• "Adjusting Color Uniformity" p.151
• "Blending the Image Edges" p.153
• "Matching the Image Colors" p.154
• "Adjusting the Black Level" p.156
• "Adjusting RGBCMY" p.158
• "Scaling an Image" p.160
Projector Identification System for Multiple Projector
Control
When lining up multiple projectors to project images, you can correct the
brightness and color tone of each projector's image so that the images match
closely.
You can set a unique projector ID for each projector to operate them
individually using a remote control, and then correct the brightness and color
for each projector.
a
• In some cases the brightness and color tone may not match
completely even after correction.
• If brightness and color tone differences become more noticeable over
time, repeat the adjustments.
gg Related Links
• "Setting the Projector ID" p.150
• "Selecting the Projector You want to Operate" p.150