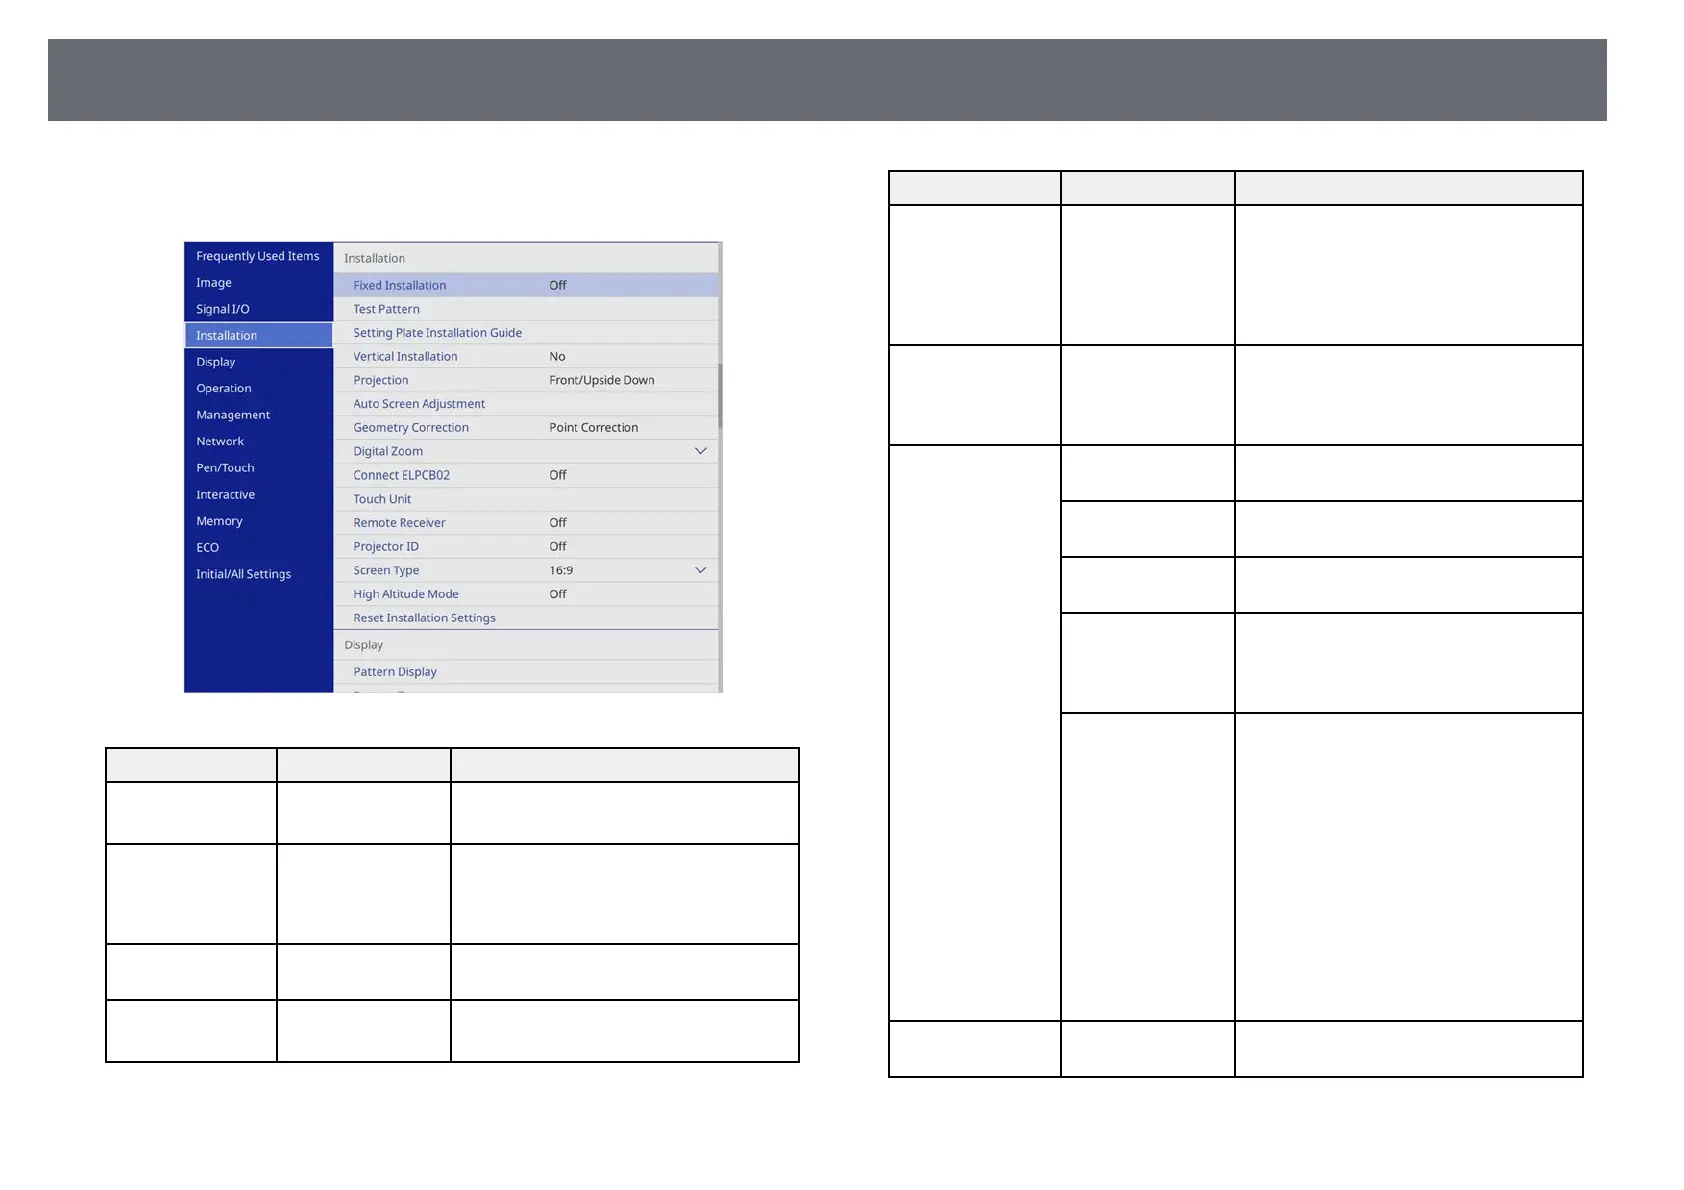
Projector Installation Settings - Installation Menu
220
Settings on the Installation menu help you set up your projector in your
installation environment.
Setting Options Description
Fixed Installation On
Off
Set to On if you installed the projector in
a fixed location.
Test Pattern — Displays a test pattern to assist in
focusing and zooming the image and
correcting image shape (press the [Esc]
button to cancel pattern display).
Setting Plate
Installation Guide
— Displays a guide screen when installing
the projector.
Vertical Installation Yes
No
Set to Yes if you installed the projector in
a vertical position.
Setting Options Description
Projection Front
Rear
Front/Upside
Down
Rear/Upside Down
Sets the way the projector faces the
screen so the image is oriented correctly.
Auto Screen
Adjustment
(EB‑735Fi/EB‑725
Wi)
— Automatically corrects the image shape
when you have placed corner markers on
the projection surface.
Geometry
Correction
H/V-Keystone Manually corrects horizontal and vertical
sides.
Quick Corner Corrects image shape and alignment
using an on-screen display.
Arc Correction Corrects the corners and sides of an
image projected on a curved surface.
Point Correction Divides the projected image into a grid
and corrects the distortion by moving the
selected point of intersection from side to
side and up and down.
Memory Save customized sets of settings to
memory.
• Save Memory: saves the current shape
of an image you have adjusted.
• Load Memory: loads the settings you
made and saved.
• Rename Memory: changes the name
of the memory settings.
• Erase Memory: deletes a saved
memory.
• Reset Memory: Resets all saved
memories.
Digital Zoom Various levels
available
Adjusts the size of the projected image.