EasyManuals Logo

Epson LX-300+II RTP User Manual

Epson LX-300+II RTP
130 pages
To Next Page IconTo Next Page
To Previous Page IconTo Previous Page
Page #77 background imageLoading...
Page #77 background image
EPSON LX-300+II/300+II RTP/1170II Revision D
Disassembly and Assembly Disassembly and Assembly 77
4.2.7.2 Platen Mechanism Removal
1. Remove the printer mechanism. (See 4.2.3 “Printer Mechanism Removal”.)
2. Remove the platen grounding wire from the platen.
3. Release 1 hook at the rotating hole of the combination gear 17.5, 27 and remove the
gear from the right frame.
Figure4-13. Hook at the Combination Gear 17.5, 27
4. Rotate right and left bushing, 11 and remove them off from the right / left frame.
5. Remove the platen.
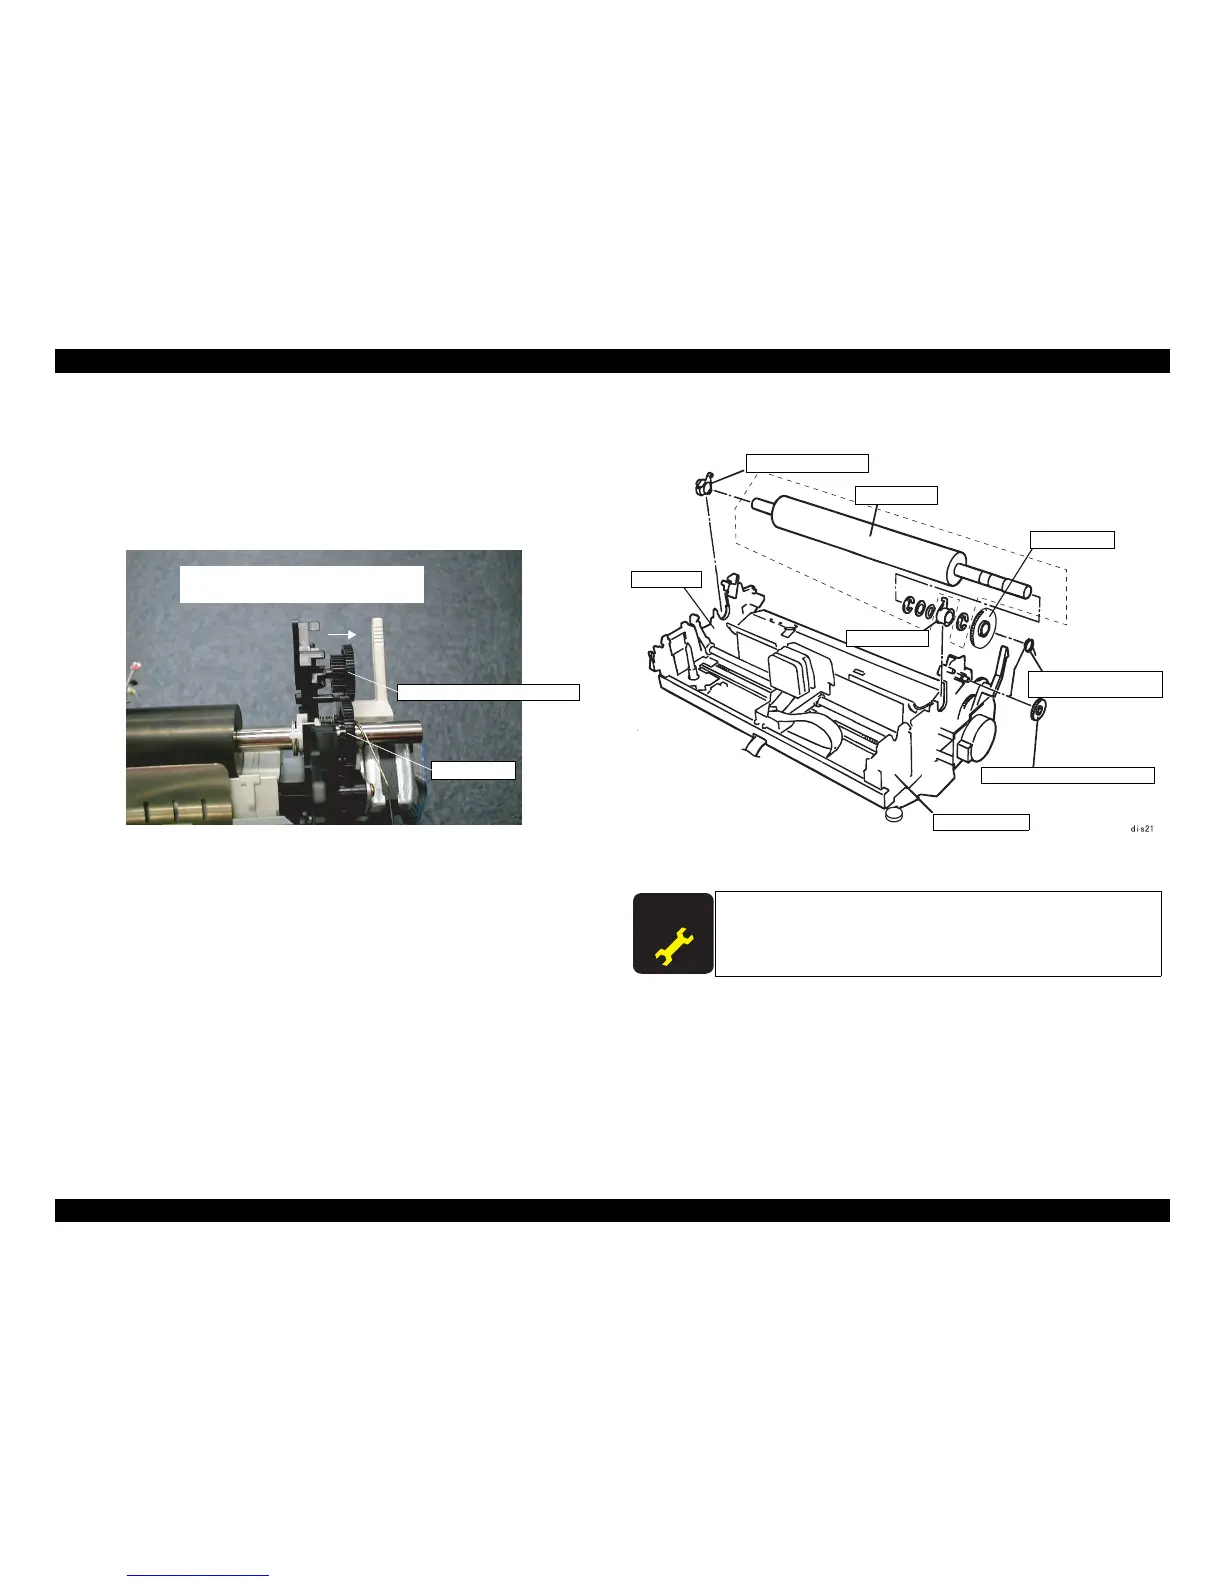
Figure4-14. Platen Removal
To unhook the combination gear 17.5, 27, hold
it and pull it in the arrow direction.
Combination gear, 17.5, 27
Gear, 34
A D J U S T M E N T
R E Q U I R E D
When the platen mechanism is removed or replaced, perform the
platen gap adjustment.
Bushing, 11
Platen
Gear, 34
Platen grounding wire
Combination gear, 17.5, 27
Right frame
Left frame
Bushing, 11

Table of Contents

Questions and Answers:

Question and Answer IconNeed help?

Do you have a question about the Epson LX-300+II RTP and is the answer not in the manual?

Epson LX-300+II RTP Specifications

General IconGeneral
BrandEpson
ModelLX-300+II RTP
CategoryPrinter
LanguageEnglish

Related product manuals