EasyManuals Logo

Epson LX-300+II RTP User Manual

Epson LX-300+II RTP
130 pages
To Next Page IconTo Next Page
To Previous Page IconTo Previous Page
Page #78 background imageLoading...
Page #78 background image
EPSON LX-300+II/300+II RTP/1170II Revision D
Disassembly and Assembly Disassembly and Assembly 78
4.2.7.3 Carriage Mechanism Removal
1. Remove the printer mechanism. (See 4.2.3 “Printer Mechanism Removal”.)
2. Remove the printhead. (See 4.2.1 “Printhead Unit Removal”.)
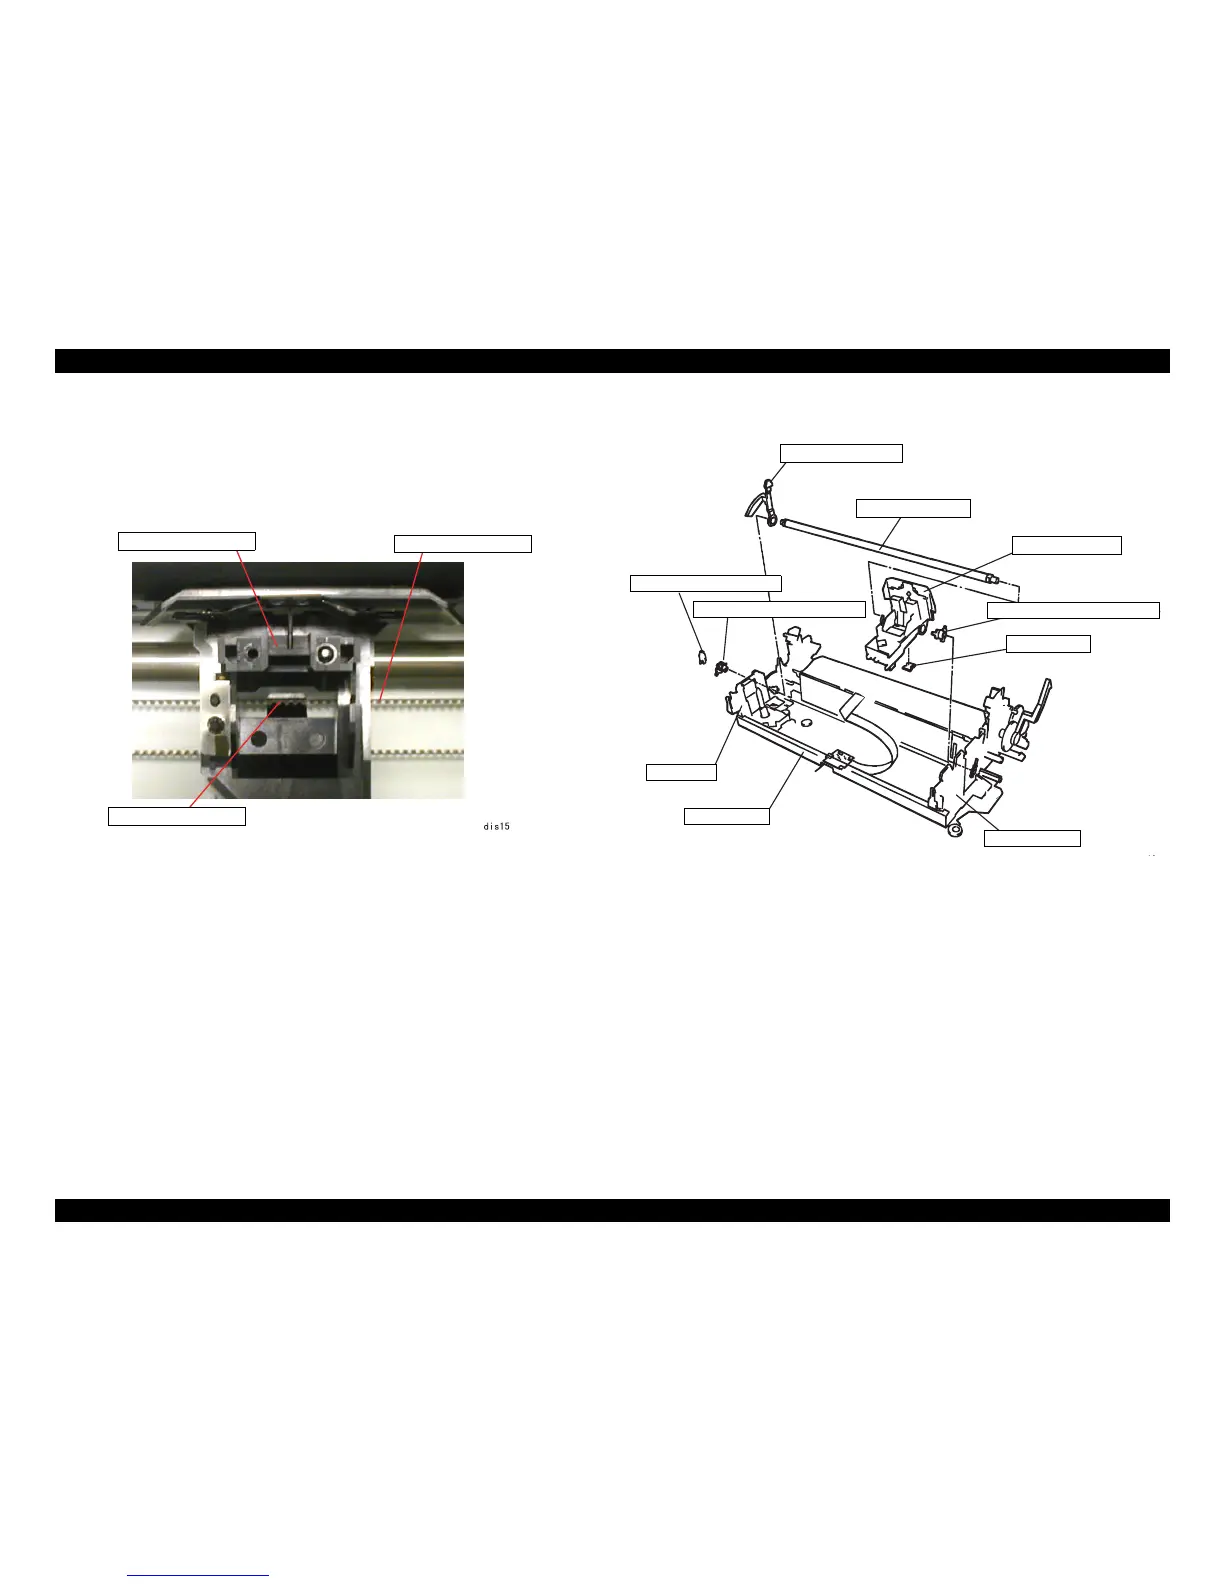
3. Remove the timing belt from the carriage installation point.
Figure4-15. Timing Belt Removal
4. Remove the CR shaft grounding plate from the base frame on the left side of the
printer.
Figure4-16. Carriage Unit Removal
5. Rotate the right and left parallelism adjust bushing and remove them from the
respective frames.
6. Release the PG adjust lever hook, connecting to the left frame.
Carriage Unit
Timing Belt
Installation Point
PG adjust lever
CR guide shaft
Carriage unit
Right frame
CR guide grounding plate
Left frame
Base frame
Parallelism adjust bushing
Oil pad
Parallelism adjust bushing

Table of Contents

Questions and Answers:

Question and Answer IconNeed help?

Do you have a question about the Epson LX-300+II RTP and is the answer not in the manual?

Epson LX-300+II RTP Specifications

General IconGeneral
BrandEpson
ModelLX-300+II RTP
CategoryPrinter
LanguageEnglish

Related product manuals