EPSON LX-300+II/300+II RTP/1170II Revision D
Disassembly and Assembly Disassembly and Assembly 79
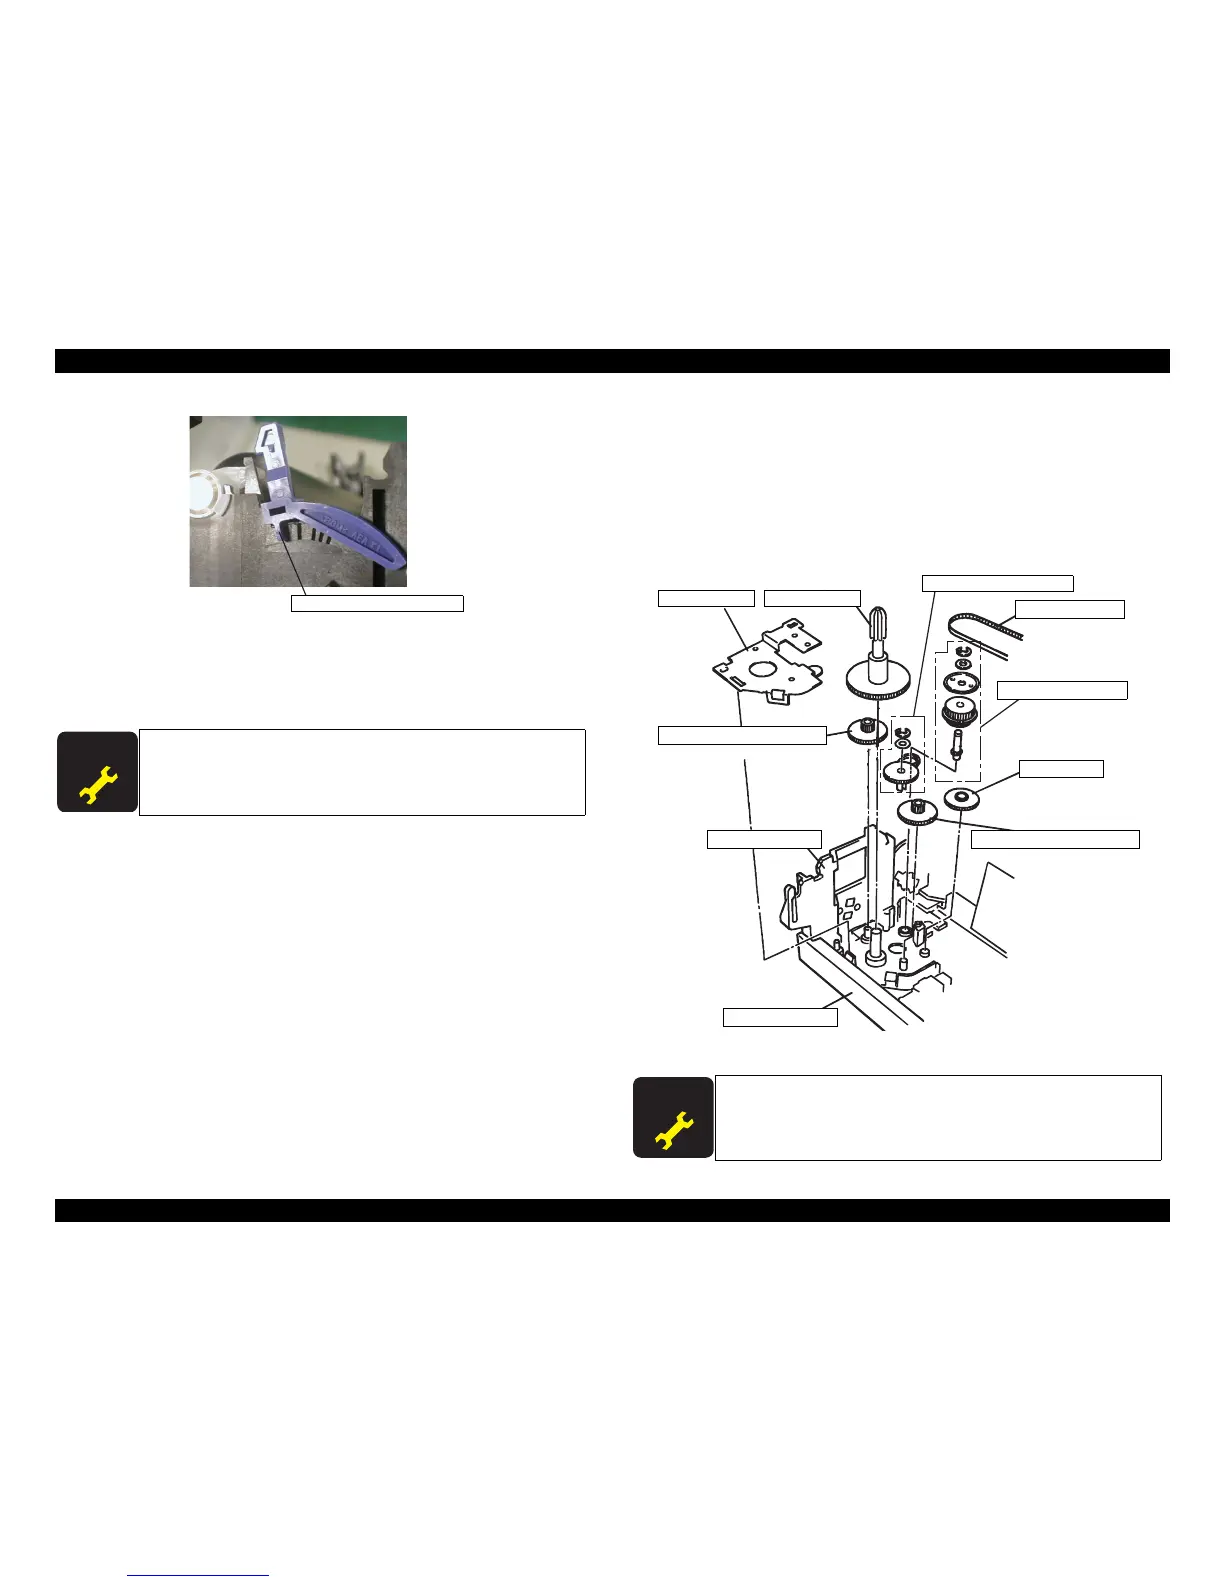
Figure4-17. Hook at the PG Adjust Lever
7. Remove the carriage unit along with the CR guide shaft and PG adjust lever from the
printer mechanism.
4.2.7.4 Ribbon Feed Mechanism Removal
1. Remove the printer mechanism. (See 4.2.3 “Printer Mechanism Removal”.)
2. Remove the tension spring, 8.10 from the motor bracket and release the tension of the
timing belt. (See 4.2.7.1 “CR Motor Mechanism Removal”.)
3. Release 3 hooks securing the RD cover to the left frame.
4. Remove the RD cover.
Figure4-18. Ribbon Feed Mechanism Removal
When the carriage mechanism is removed or replaced, perform the
platen gap adjustment and Bi-D adjustment.
When the ribbon feed mechanism is removed or replaced, perform
the platen gap adjustment and Bi-D adjustment.
Left frame
Driven pulley assy.
RD ratchet
Gear, 13.2
Base frame
RD cover
Planetary lever assy.
Timing belt
Combination gear, 51, 16.2
Combination gear, 51, 16.2
Timing belt

 Loading...


