EPSON LX-300+II/300+II RTP/1170II Revision D
Disassembly and Assembly Disassembly and Assembly 80
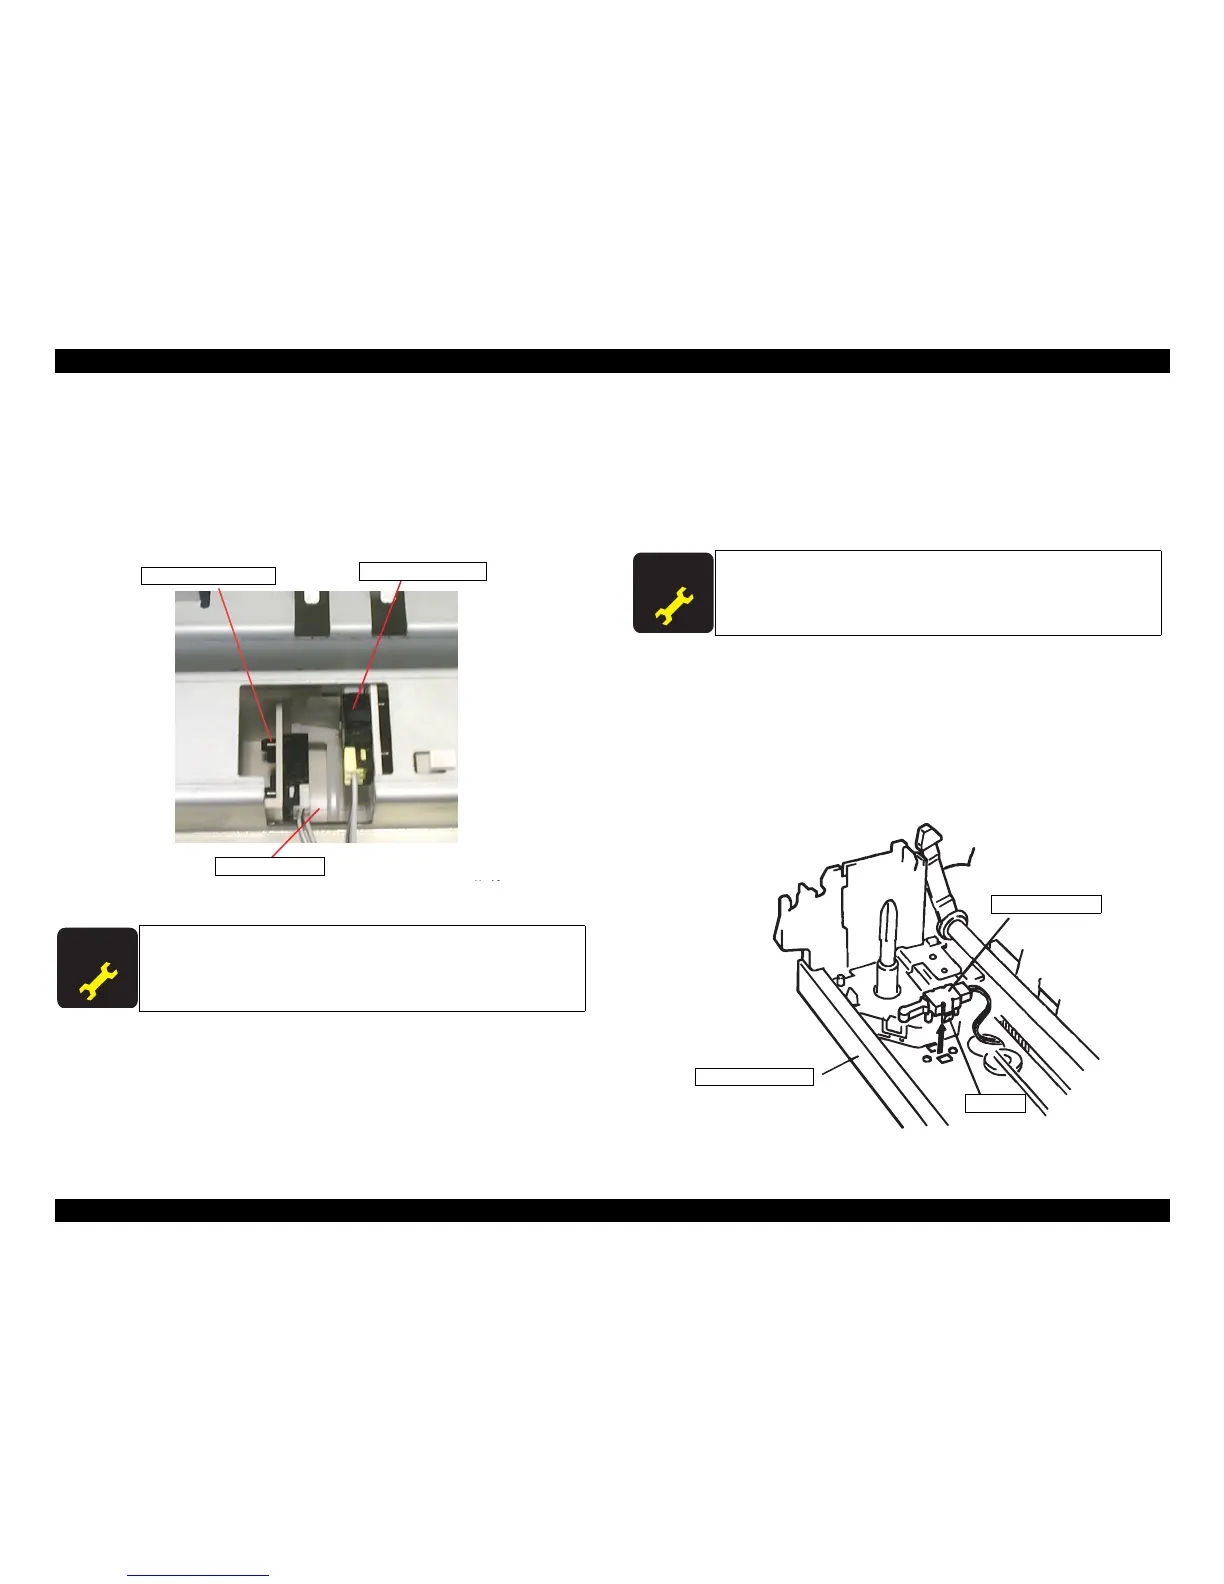
4.2.7.5 RPE Sensor Removal
1. Remove the printer mechanism. (See 4.2.3 “Printer Mechanism Removal”.)
2. Release the hook of the RPE sensor installed at the paper guide.
3. Remove RPE sensor.
4. Disconnect the harness from the RPE sensor (white).
Figure4-19. RPE/BPE Sensor Removal
4.2.7.6 BPE Sensor Removal
1. Remove the printer mechanism. (See 4.2.3 “Printer Mechanism Removal”.)
2. Release the hook of the BPE sensor installed at the paper guide.
3. Remove BPE sensor.
4. Disconnect the harness from the BPE sensor (yellow).
4.2.7.7 HP Sensor Removal
1. Remove the printer mechanism. (See 4.2.3 “Printer Mechanism Removal”.)
2. Release 2 hooks of the HP sensor securing it to the base frame with tweezers and
remove the sensor.
3. Disconnect the harness from the sensor (black).
Figure4-20. HP Sensor Removal
When the RPE sensor is removed or replaced, perform the platen
gap adjustment, Bi-D adjustment, top margin adjustment, and
bottom margin adjustment.
When the BPE sensor is removed or replaced, perform the platen
gap adjustment, Bi-D adjustment, top margin adjustment, and
bottom margin adjustment.

 Loading...


