EasyManuals Logo

Epson LX-810 Technical Manual

Epson LX-810
176 pages
To Next Page IconTo Next Page
To Previous Page IconTo Previous Page
Page #112 background imageLoading...
Page #112 background image
REV.-A
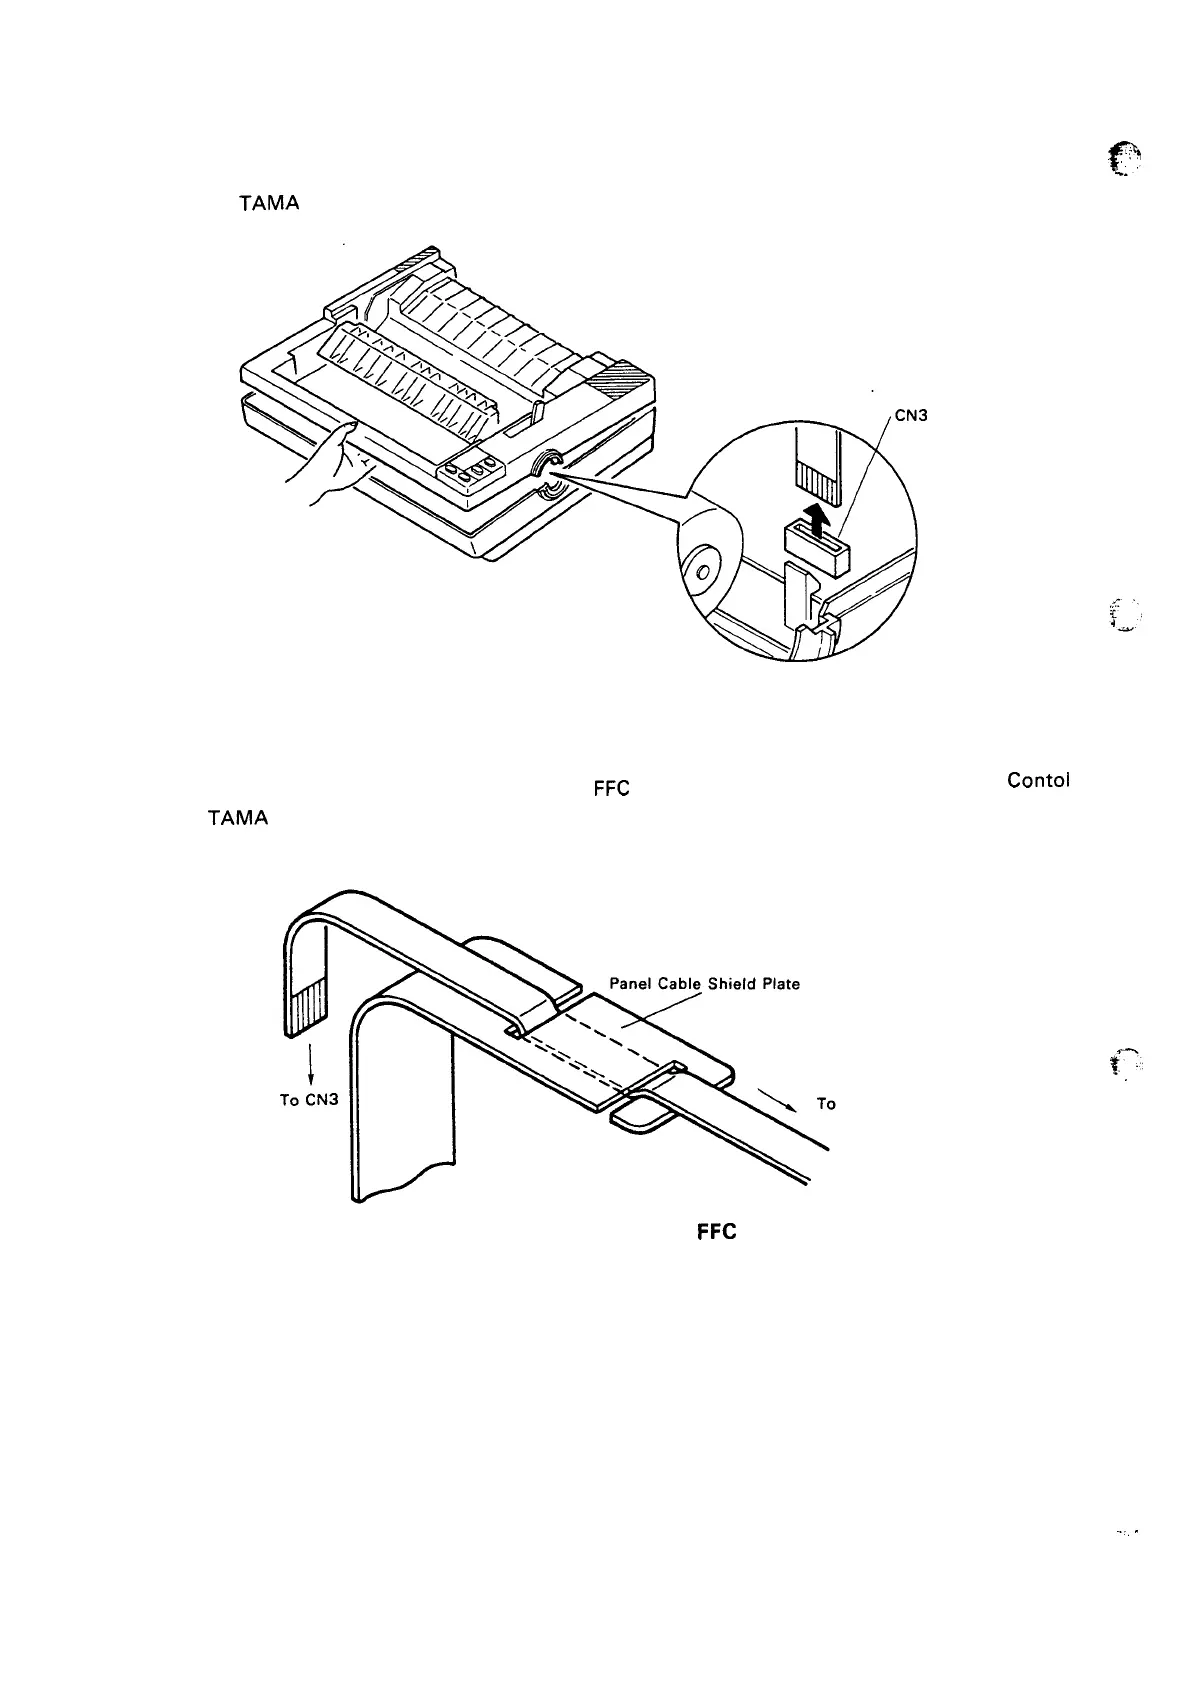
4. While lifting the upper casing, disconnect the cable of the control panel (TAPNL) from connector
CN3 on the
TAMA
board. Then remove the upper casing.
Figure 4-6. Upper Casing Removal -2
NOTE FOR REASSEMBLY:
Before reassembling the upper casing, prepare the
FFC
(Flat Flexible Cable)
Panel and
TAMA Board in such a way that it can be connected to the Panel
Figure 4-7,
that connects the
Contol
Cable Shield Plate. Refer
f?
,::
,,
.’
$-:
. .
.
,,-
Control
Panel
Figure 4-7. Control Panel
FFC
.,,
.
4-6

Table of Contents

Other manuals for Epson LX-810

Questions and Answers:

Question and Answer IconNeed help?

Do you have a question about the Epson LX-810 and is the answer not in the manual?

Epson LX-810 Specifications

General IconGeneral
Print MethodImpact dot matrix
Number of Pins9
Character Sets96 characters (USASCII)
Line Spacing1/6 inch
Paper PathRear
InterfaceCentronics parallel
Noise Level55 dB (A)

Related product manuals