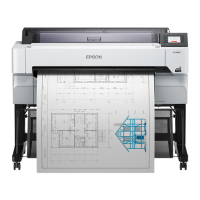
E Media holder
Place the roll core for media take-up on these holders. There are same parts on both the left and the right.
U “Using the Auto Take-up Reel Unit” on page 55
F Media support
Rest media temporarily on these supports when removing the take-up roll. There are same parts on both the
left and the right.
G Auto switch
Use this switch to select the auto take-up direction. If Off is selected, the paper is not taken up.
H Manual switch
Use this switch to take-up manually. You can use this when the Auto switch is in the Off position.
I Ink unit
U “Ink Unit” on page 14
J Optional port
Connect the connection cable supplied with the ink unit.
Regions other than North America and Latin America: U Setup Guide (booklet)
North American and Latin American users: Contact your dealer for product installation. The product must be
installed by an authorized dealer. Damage to the product from unauthorized installation will not be covered by
your Epson warranty.
K USB port
Connect to your computer with a USB cable.
L AC outlet #3
Connect the power cable supplied with the ink unit.
Regions other than North America and Latin America: U Setup Guide (booklet)
North American and Latin American users: Contact your dealer for product installation. The product must be
installed by an authorized dealer. Damage to the product from unauthorized installation will not be covered by
your Epson warranty.
M AC inlet #1/AC inlet #2
Connect the power cable supplied with the printer. Be sure to connect both cables.
N Data lamp
The data lamp lights or flashes to indicate the network connection status and whether the printer is receiving
data.
On : Connected.
Flashing : Connected and receiving data.
SC-R5000 Series/SC-R5000L Series User's Guide
Introduction
9

 Loading...