25
Installing the New Cartridge
Once you’ve removed the empty cartridge, you’re ready to install the new one.
Follow these steps:
1. Remove the new ink cartridge from its package.
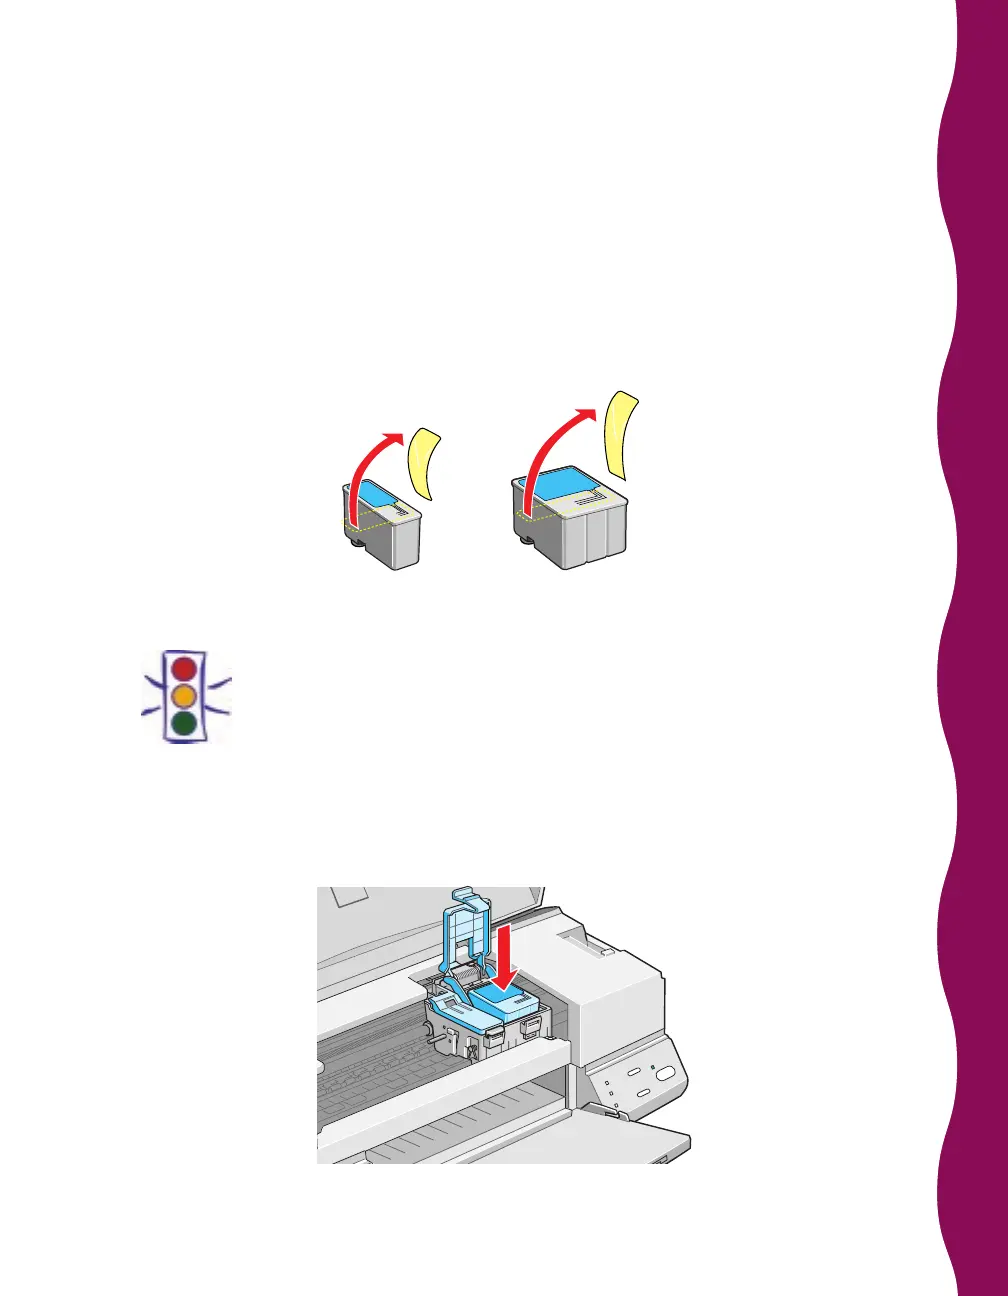
2. Remove only the yellow part of the tape seal on the top of the cartridge. Don’t
remove the blue part.
Caution:
You must remove the yellow tape seal from the top of the cartridge or
you will permanently damage it. Do not remove the clear seal from the
bottom of the cartridge; ink will leak.
3. Lower the ink cartridge into its holder with the label facing up and pointing
to the back of the printer.
black cartridge color cartridge

 Loading...


