EPSON Stylus CX7300/CX7400/DX7400/NX200/TX200 series/SX200 series/Stylus CX8300/CX8400/DX8400/NX400/TX400 series/SX400 series Revision C
DISASSEMBLY/ASSEMBLY Disassembling the Printer Mechanism 110
Confidential
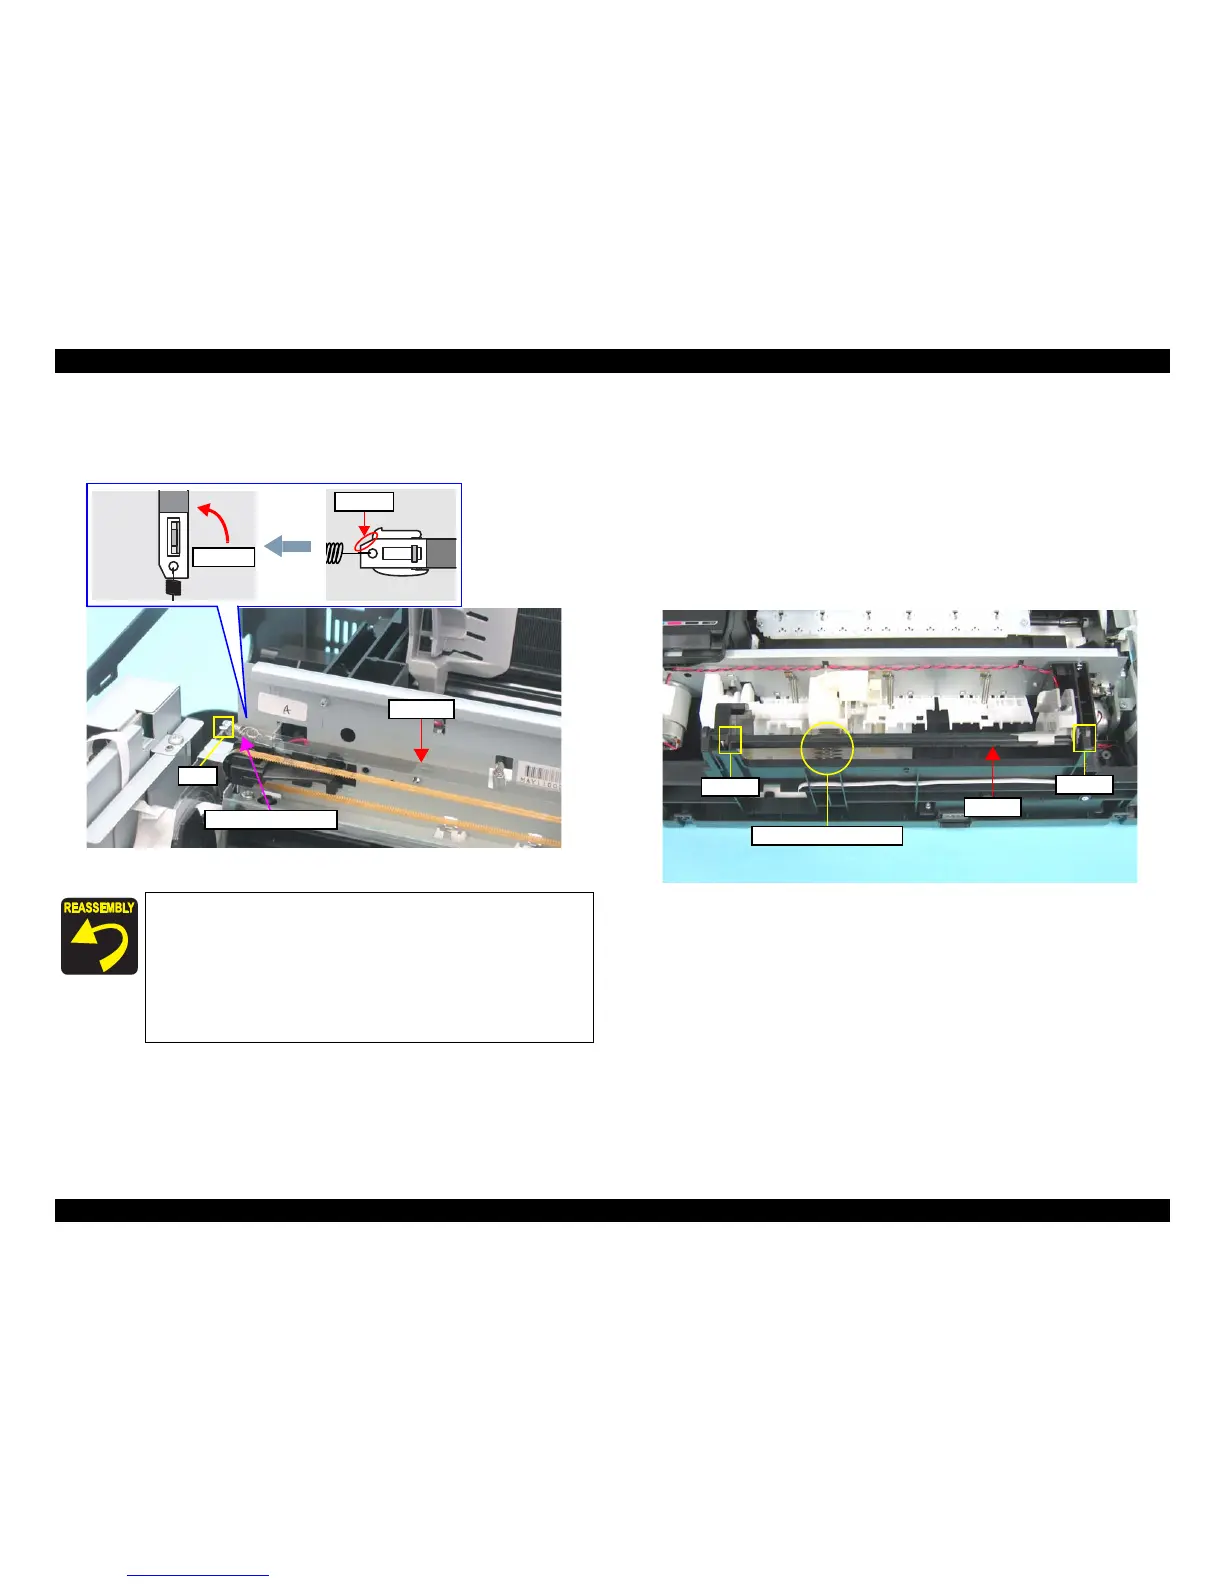
3. Release the Extension Spring 3.289 from the hook of the Main Frame.
4. Rotate the CR Scale 90 degrees as shown in the figure and remove the scale
from the Main Frame.
Figure 4-38. Removing the CR Scale (2)
4.5.3 Hopper
Parts/Components need to be removed in advance
Document Cover/ASF Cover/Scanner Unit/Panel Unit/Upper Housing/Card Slot
Cover/Lower Housing
Removal procedure
1. Release the dowel A of the Hopper.
2. Release the dowel B of the Hopper, and remove the Hopper together with the
Compression Spring 1.94.
Figure 4-39. Removing the Hopper
When installing the CR Scale, pay attention to the following
instructions:
Chipped part of the CR Scale must face upward.
CR scale should be passed through the slit of the CR Encoder
Sensor.
Make sure that the Extension Spring 3.289 is not be twisted,
and then attach its end to the hook of the Main Frame.

 Loading...


