2-2 Repair Guide Rev. B
Confidential
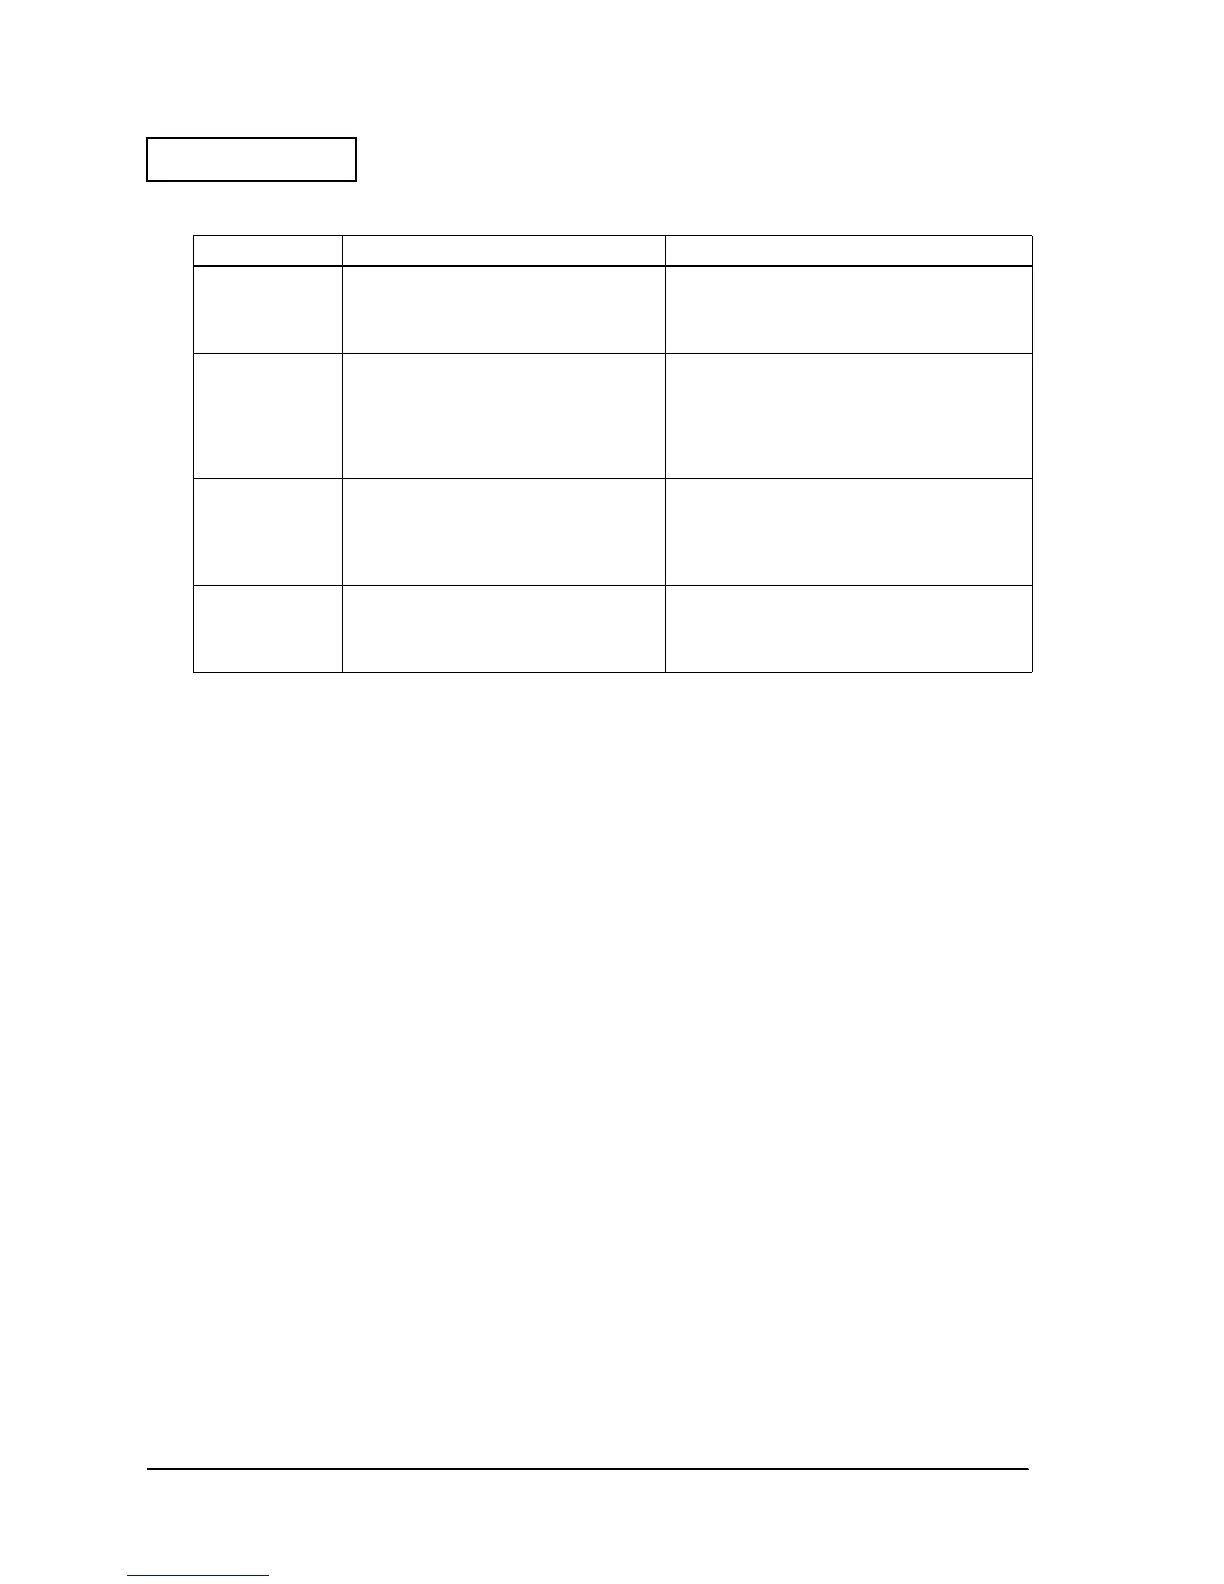
Printer Status Checks
Once you have confirmed the printer status using the table above, you can perform the
necessary functions below.
❏
Identification of defective parts. (See Chapter 3.)
❏ Preparation for replacing parts. (Read and follow the precautions and notes at the beginning
of Chapter 4.)
❏ Parts replacement, assembly, and disassembly. (See Chapter 4.)
❏
Adjustment and setting. (See Chapter 5.)
❏
Preparation for shipment. (See the Chapter 6 before sending the printer back to the
customer.)
Self-test
Operation
The self-test can be run using the service utility or by operating the control panel. See page 2-12
for information about control panel operation.
Before running the self-test, make sure the roll paper and ribbon are installed correctly in the
printer. Then, turn power off. To run the self-test, turn the power back on while holding down
the FEED button.
The first page of the self-test printout should look like the example in the table below. To print
the second part of the self-test, press FEED again.
Operation Normal printer operation When a problem occurs
Power on.
Power LED light comes on.
Mechanical initializing operation occurs.
ERROR LED light is off.
POWER LED does not light. (See page 3-3.)
ERROR LED light. (See page 3-3.)
ERROR LED flashes. (See page 3-4.)
PAPER OUT LED lights. (See page 3-6.)
Run the self-test.
*Refer to page 2-2
for operation.
POWER LED light comes on.
Prints the printer status. (See page 2-3.)
Prints the roll pattern after the FEED button
is pressed. (See page 2-3.)
Mechanical initialization occurs.
ERROR LED light is off.
Self-test cannot be performed. (See page 3-6.)
Printing cannot be performed. (See page 3-7.)
The print result is not normal. (See page 3-12.)
A paper jam occurs. (See page 3-14.)
PAPER OUT LED lights. (See page 3-6.)
Run the “all
function test” with
the service utility.
*Refer to page 2-7
for operation.
Reads printer status.
Prints the RECEIPT sheet. (See page 2-9.)
Prints the STATUS sheet after confirming the
sensor operation. (See page 2-10.)
Prints the REPORT sheet. (See page 2-12.)
The communication test fails. (See page 3-16.)
The print result is not normal. (See page 3-12.)
Drawer kick is not performed. (See page 3-17.)
The sensor does not work. (See page 3-18.)
Perform other
checks of
operation.
Normal opening/closing of roll paper
cover.
Normal opening/closing of ribbon cover.
The case is dirty.
Parts do not move smoothly. (See page 3-20.)
The case is dirty. (See page 3-20.)

 Loading...


