Rev. B Disassembly and Assembly 4-7
TM-U220 Type A Service Manual
Confidential
DIsassembly Procedures
Disassembly
steps
Part names Assembly procedures
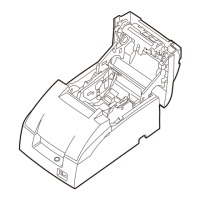
Take-up belt (523) ❏ Remove the back case (130).
❏ Remove the take-up gear shaft (139). After that, remove the
paper take-up gear assembly (131).
❏ Remove the take-up belt (523).
When reattaching the take-up gear shaft (139) and take-up
belt (523), be sure the shaft is attached correctly. (See page 4-
22.) Also, when attaching platen rotation plate 2 (137), be sure
the plate is attached correctly. (See page 4-20.)
❶
Platen rotation frame
2 (1125)
Frame rotation unit
(1005)
❏ Remove the cutter rotation plate (1129).
❏ Remove platen rotation frame 2 (1125).
❏ With platen rotation frame 1 unit closed, remove E-ring 3 (E01).
❏ Release rotation spring R (1006) from the hooks.
❏ Remove E-ring 4 (E03), and remove the rotation shaft (1009).
❏ Remove the frame rotation unit (1005).
Remove the unit while spreading its sides to the right and left.
(See page 4-10.)
6 Lubricate the frame rotation unit (1005) with G-36.
Cutter support frame
(1108)
❏ Remove 2 screws (S02), and remove the cutter support frame
(1108).
6 Lubricate the cutter support frame (1108) with G-15.
❷
Fixed blade holder
assembly (1013)
❏ Remove 2 screws (S11), and remove the fixed blade holder
assembly (1013).
❸
Roll paper guide unit
(1038)
❏ Remove 2 screws (S05), and remove the roll paper guide
(1038).
❹
Roll paper holder
(1010)
❏ Remove 2 screws, and remove the back case (130).
❏ Remove 2 screws (S08), and remove 5 screws (S05) with 1
washer (W02), and then remove the roll paper holder (1010).
❺
Cover open assembly
(515)
❏ Remove 1 screw (502) securing the cover open assembly (515).
Paper feed motor sub
assembly (1046)
❏ Remove 2 screws (S11), and remove the paper feed motor sub
assembly (1046).
❻
Platen fixing shaft R
(1049)
Middle take-up gear
(1106)
❏ Remove 1 E-ring 2.3 (E02), and remove platen fixing shaft R
(1049) and the middle take-up gear (1106).
6 Lubricate platen fixing shaft R (1049) with G-36.
Take-up transmission
shaft (1112)
Take-up transmission
gear (1105)
❏ Remove 1 E-ring 2.3 (E02), and remove the take-up transmission
shaft (1112) and take-up transmission gear (1105).
6 Lubricate the take-up transmission shaft (1112) with G-36.
Base frame (1011) After this, you can remove the base frame (1011).
6 Lubricate the base frame (1011) with G-36.
 Loading...
