3-20 Troubleshooting Rev. B
Confidential
Symptoms for other operations
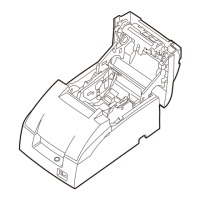
Parts do not move smoothly
Cannot take up the roll paper smoothly
Cannot open and close he ribbon cover smoothly
Cannot open and close the roll paper cover assembly smoothly
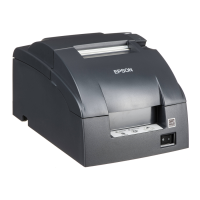
The case is dirty
Use a dry cloth or one lightly moistened with water to clean case. Be sure to disconnect the
power cord from the wall outlet before doing this.
Avoid using alcohol, benzene, thinner, trichloroethylene, or ketone-based substances to remove
dirt or foreign matter from the printer, because these substances can affect or damage plastic and
rubber parts.
Table 3-27 Opening and Closing the Roll Paper Cover Assembly is not Smooth
Probable part/probable cause Checkpoints Action to correct the problem
Paper take-up shaft assembly
(134)
Confirm that the paper take-up assembly
is attached correctly. Make sure parts are
located in the correct positions.
Confirm that the paper take-up shaft
assembly (134) is attached correctly.
Completed if the paper is taken up
correctly when you press the paper
FEED button.
Take-up belt (523)
Confirm that the belt is attached and has
no defects, such as wear and
deformation. Be sure the belt is located in
the correct position.
Confirm that the take-up belt (523) is
attached correctly. Completed if the
belt is driven correctly.
Table 3-28 Opening and Closing the Ribbon Cover is not Smooth
Probable part/probable cause Checkpoints Action to correct the problem
Ribbon cover (109)
Confirm the condition of 2 projections
on the cover. Make sure neither is
broken.
Replace the ribbon cover (109).
Completed if the cover opens and
closes smoothly.
Table 3-29 Opening and Closing the Roll Paper Cover Assembly is not Smooth
Probable part/probable cause Checkpoints Action to correct the problem
Frame rotation spacer (1050)
Confirm that the spacer is fixed. Make
sure it is located in the correct position.
Confirm that the frame rotation
spacer is attached correctly.
Completed if cover opens and closes.
Rotation springs
Confirm spring attachment. Make sure
they are located in the correct positions.
Confirm that rotation spring R (1006) is
attached correctly. Completed if
cover opens and closes.
Platen release spring (1056)
Confirm spring attachment. Make sure it
is located in the correct position.
Confirm that the platen release spring
(1056) is attached correctly.
Completed if cover opens and closes.
Hook spring C (1092)
Confirm spring attachment. Make sure it
is located in the correct position.
Confirm that hook spring C (1092) is
attached correctly. Completed if
cover opens and closes.
 Loading...
