Rev. B Adjustment and Setting 5-5
TM-U220 Type A Service Manual
Confidential
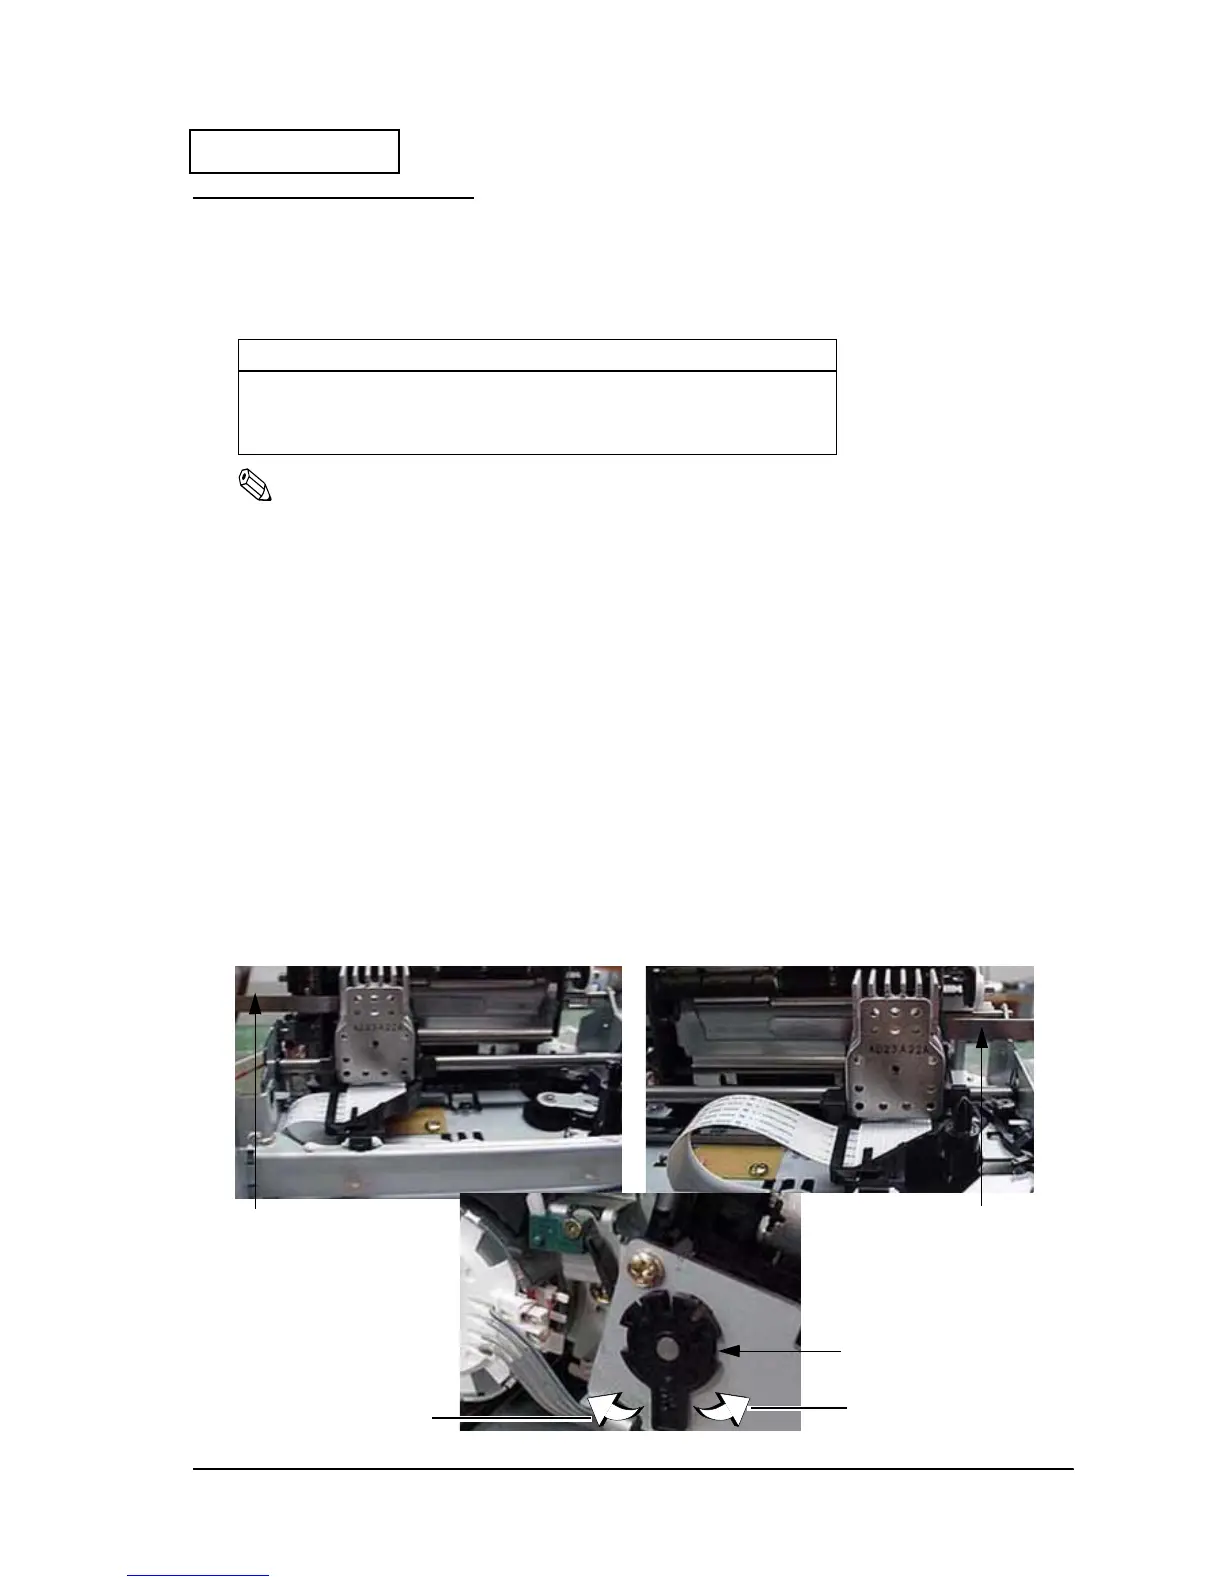
Platen Gap Adjustment
Adjust the platen gap on the reassembled TM-U220 printer unit. Use the following steps to
adjust the platen gap for the printer. Adjust the printer’s platen gap when you have performed
any one of the following:
Note:
Once removed, do not reuse an adjustment roller shaft holder. Also, the platen gap adjustment uses the
standard of “0.45 mm thickness gauge falls; 0.55 mm thickness gauge does not fall”
1. Open the platen rotation frame, and tighten the adjustment roller shaft holder firmly.
2. Hold up the platen rotation frame and make sure the adjustment roller shaft holder is
tightened firmly on the both sides.
3. Move the print head unit to the left; insert the gauge from the left side; and adjust the gap
while rotating the adjustment shaft holder.
4. Move the print head unit to the right; insert the gauge from the right side; and adjust the gap
while rotating the adjustment shaft holder.
5. Move the print head unit to the left; insert the gauge from the left side; and check the gap. If
it does not meet the standard, adjust the gap while rotating the adjustment shaft holder.
6. Move the print head unit to the right; insert the gauge from the right side; and check the gap.
If it does not meet the standard, adjust the gap while rotating the adjustment shaft holder.
Disassembly Items Requiring Platen Gap Adjustment of the Printer
❏ When you have replaced or removed the platen assembly.
❏ When you loosened the screws fastening the carriage unit.
❏ When you replaced or removed the print head.
Wider gap
Narrower gap
Adjustment roller shaft
holder
Gauge
Gauge
 Loading...


