2-12 Repair Guide Rev. B
Confidential
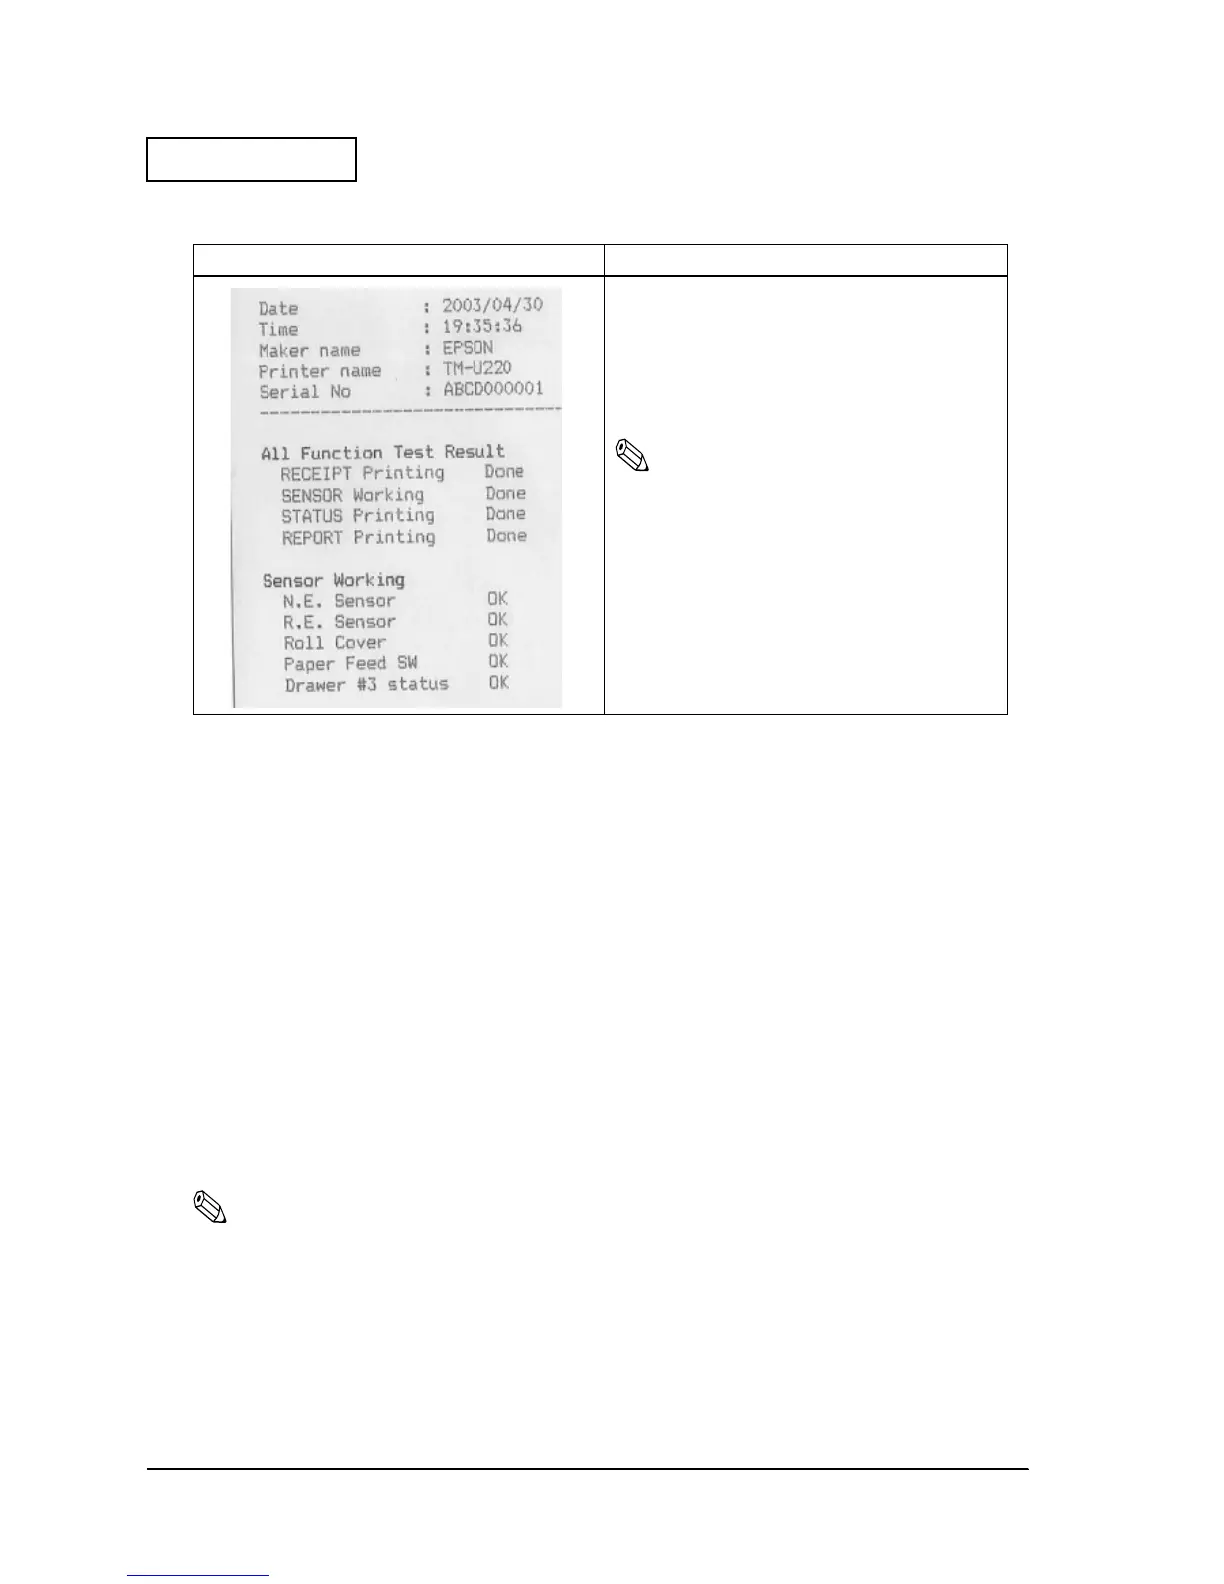
Report Print
Running a Self-test
The steps below describe how to run a self-test by operating the control panel.
1. Make sure the printer is turned off and the roll paper cover is closed properly.
2. While holding down the FEED button, turn on the printer using the switch on the front of the
printer. The self-test prints the printer settings and then prints the following, cuts the paper,
and pauses. (The PAPER OUT light flashes.)
If you want to continue SELF-TEST printing, Please press the FEED button.
3. Press the FEED button to continue printing. The printer prints a pattern using the built-in
character set.
4. The self test automatically ends and cuts the paper after printing the following:
*** completed ***
5. The printer is ready to receive data as soon as it completes the self test.
Note:
If you want to pause the self-test manually, press the FEED button. Press the FEED button again to
continue the self-test.
Normal print result Explanation
➀
➂
➄
➅
➁
➃
➆
➀ Prints execution date.
➁ Prints execution time.
➂ Prints “EPSON.”
➃ Prints “TM-U220.”
➄ Prints the serial number for the product.
➅ Prints the execution status of all function test.
➆ Prints test results of sensor operation. *1)
Note:
*1) When an operation such as cover open sensor
check is skipped using the button on the screen,
the report shows a problem for that item. (Refer
to “Cannot pass one of the tests for a sensor” on
page 3-18.)
 Loading...


