4.
Click OK.
A completion message is displayed.
Note:
Click Conrm to verify the certicate information.
Related Information
& “Application for Conguring Printer Operations (Web Cong)” on page 348
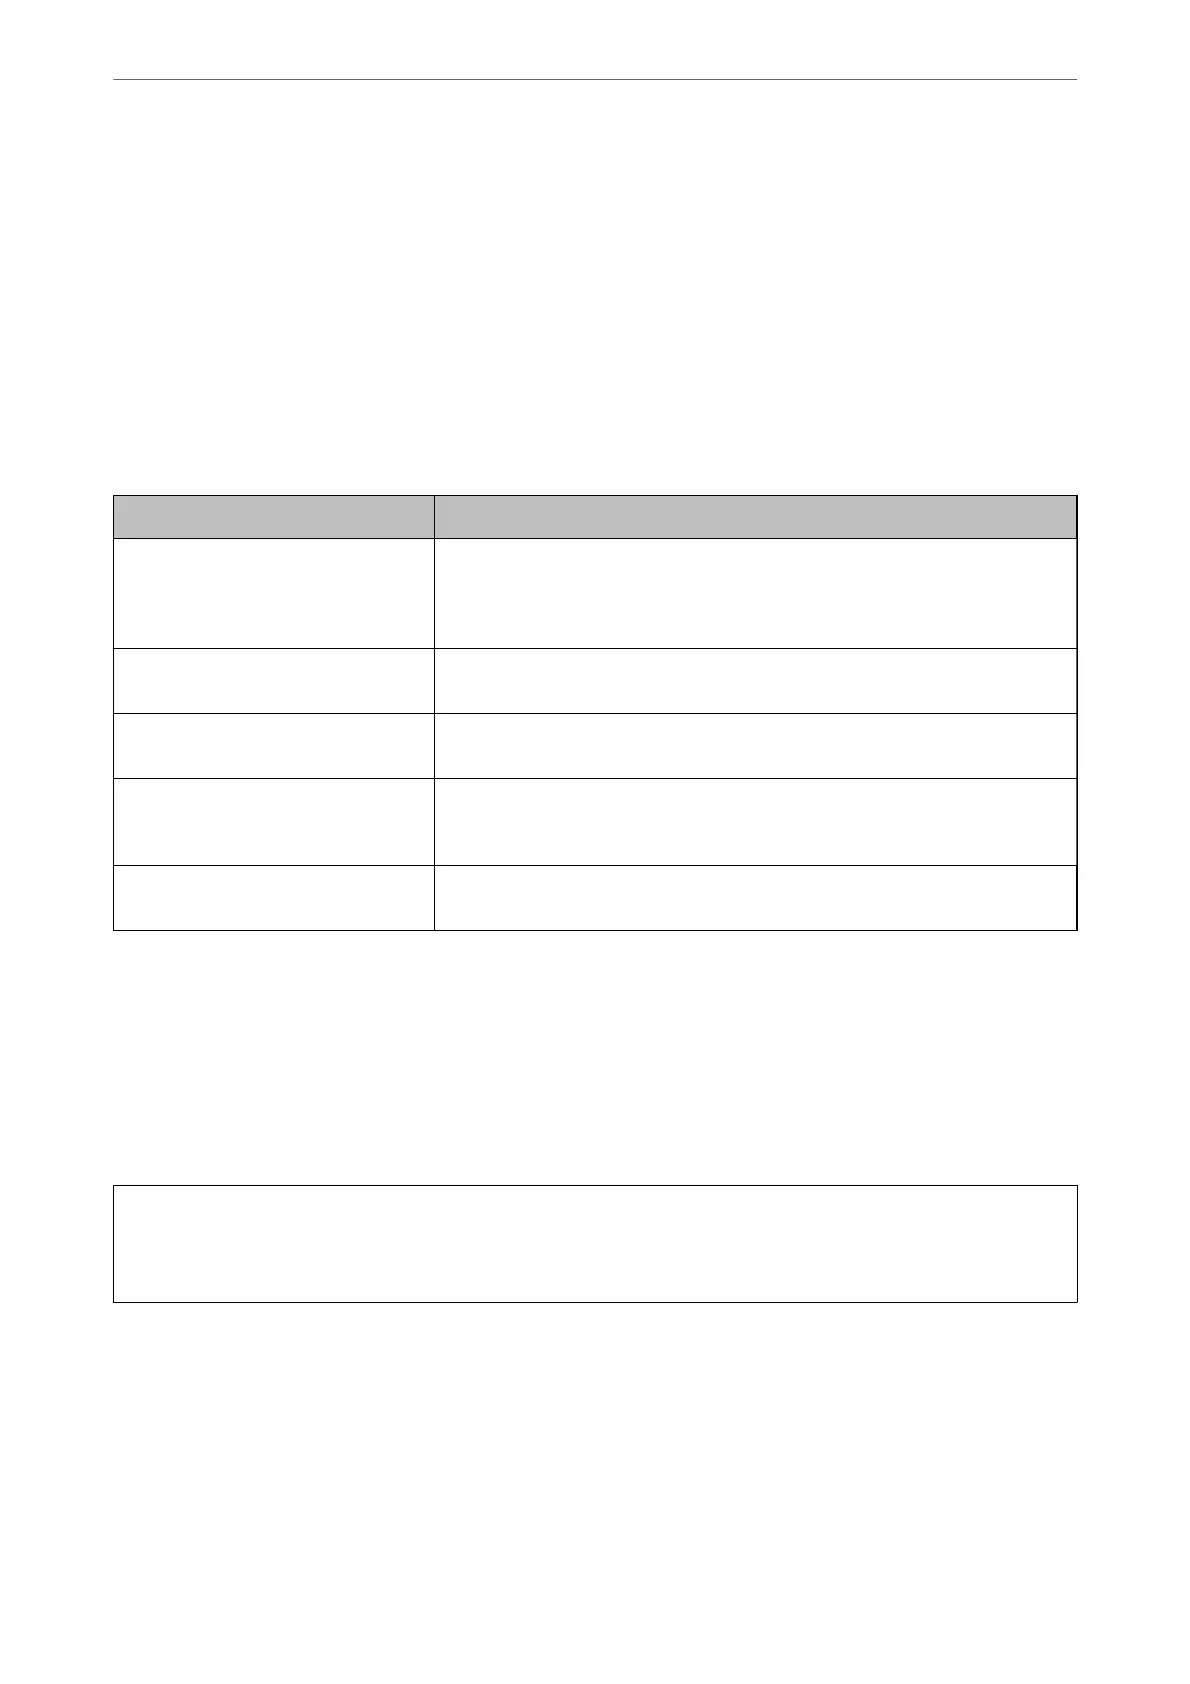
CA-signed Certicate Importing Setting Items
Items Settings and Explanation
Server Certicate or Client Certicate Select a certicate’s format.
For SSL/TLS connection, the Server Certicate is displayed.
For IPsec/IP Filtering or IEEE802.1x, the Client
Certicate
is displayed.
Private Key If you obtain a certicate of the PEM/DER format by using a CSR created from a
computer, specify a private key
le
that is match a
certicate.
Password
If the le format is Certicate with Private Key (PKCS#12), enter the password
for encrypting the private key that is set when you obtain the certicate.
CA Certicate 1
If your certicate’s format is Certicate (PEM/DER), import a certicate of a
certicate authority that issues a CA-signed Certicate used as server certicate.
Specify a le if you need.
CA Certicate 2
If your certicate’s format is Certicate (PEM/DER), import a certicate of a
certicate authority that issues CA Certicate 1. Specify a le if you need.
Related Information
& “Importing a CA-signed
Certicate
” on page 501
Deleting a CA-signed
Certicate
You can delete an imported certicate when the certicate has expired or when an encrypted connection is no
longer necessary.
c
Important:
If you obtain a certicate using a CSR created from Web Cong, you cannot import a deleted certicate again. In
this case, create a CSR and obtain a certicate again.
1.
Access Web
Cong,
and then select the Network Security tab. Next, select SSL/TLS >
Certicate
or IPsec/IP
Filtering > Client Certicate or IEEE802.1X > Client Certicate.
2.
Click Delete.
3.
Conrm that you want to delete the certicate in the message displayed.
Administrator Information
>
Advanced Security Settings
>
Using a Digital Certicate
502
 Loading...

