T-SM5f Page 11 of 29
MR & MRS OPERATION TABLES
Part 4
4. MAINTENANCE
gears on the idler plate (Fig. 6) still have clearance
and that securing screws are tight on driving and
idler gears in main gear train. Check grub screw
securing pivot bolt.
Hinge pin and nut
4.14 Pull table top as shown in Fig. 7 to check
for excessive play in the direction of the arrows.
If there is excessive play present refer to Fig. 7
and check to see if hinge nut (1) and bolt (2) are
loose. If so, * tighten hinge nut (1) against hinge
bolt (2) sufficiently to take up the slackness. To
do this, Eschmann recommend using two short
lengths of 3/16 in. diameter round bar (3) inserted
in the nut sockets, as illustrated in Fig. 7 and
applying an improvised tommy bar (4) to turn the
nut.
*Note: This could also indicate play in
Trendelenburg gear. If this is the case the complete
Trendelenburg screw assembly must be replaced.
For adjustment, see sections 4.16-4.18.
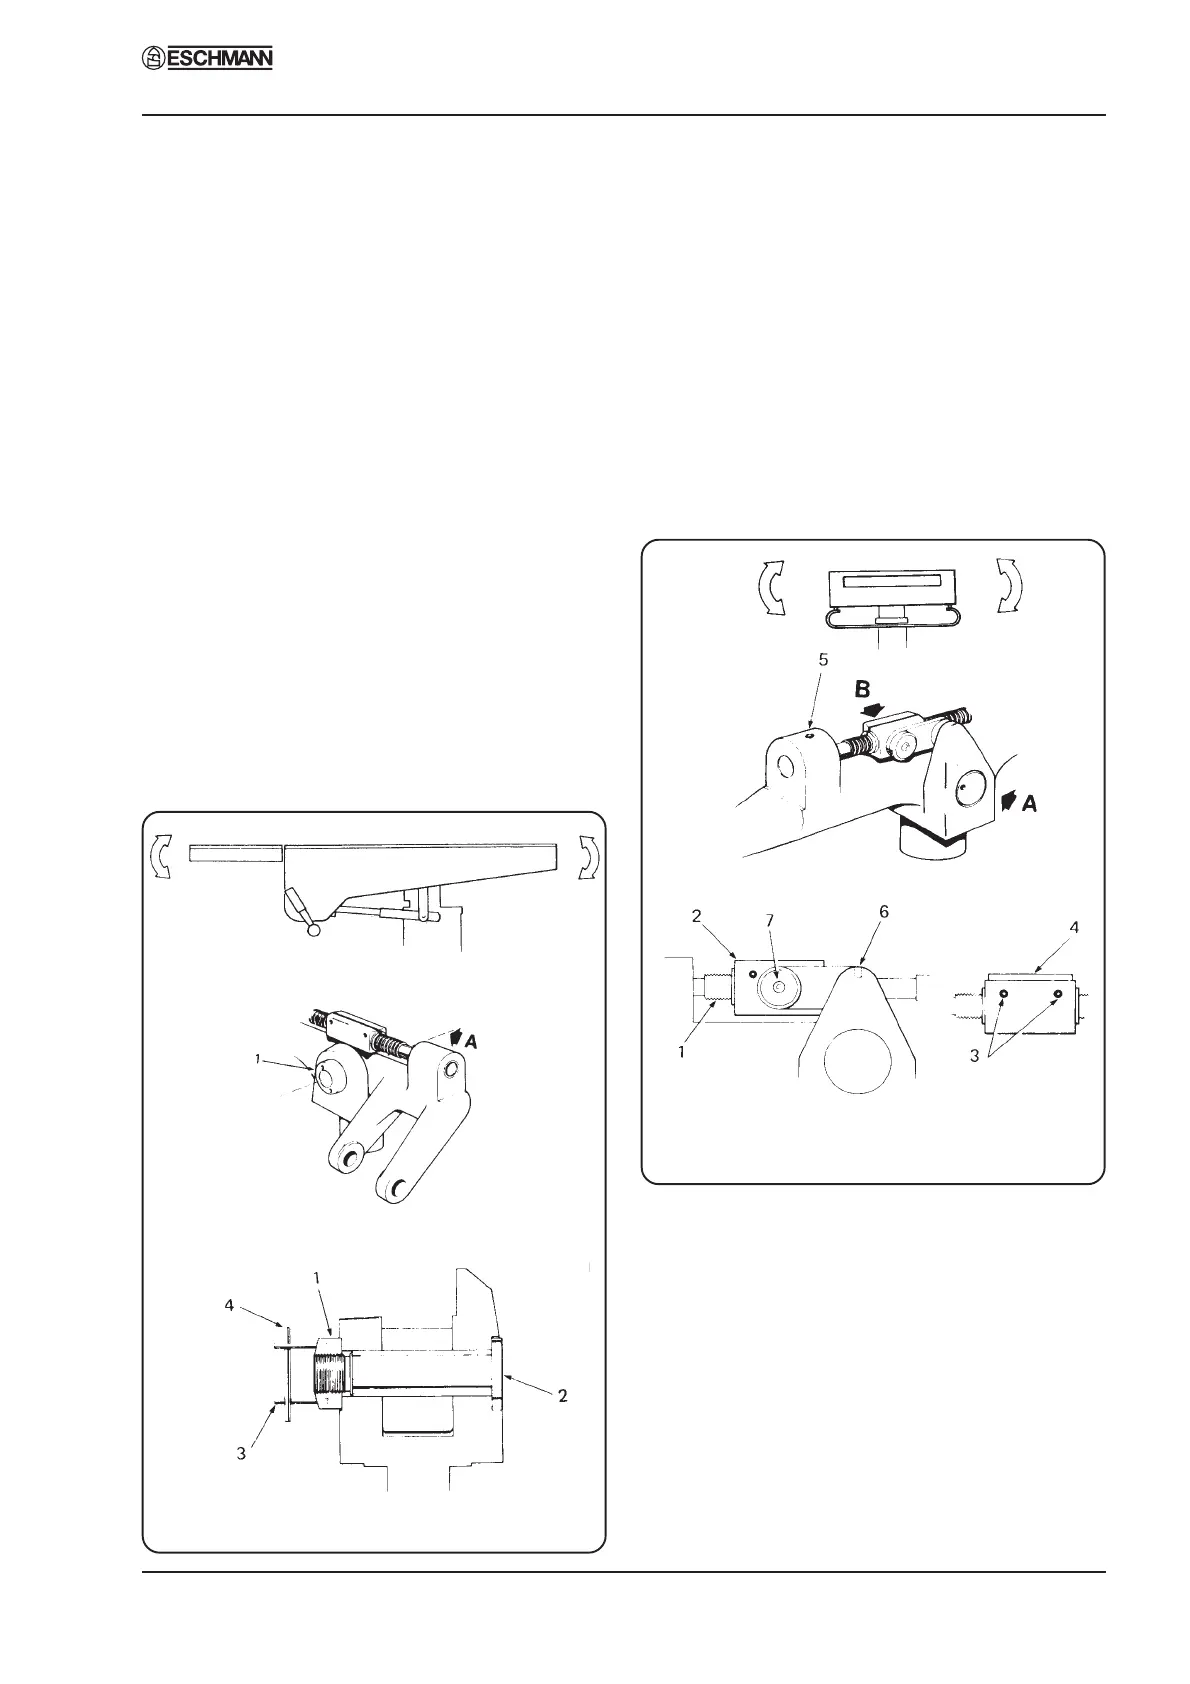
Sectional view in direction ‘A’
Fig. 7 Hinge pin and nut adjustment
Lateral screw and nut
4.15 Place table top in reverse Trendelenburg
position, then select Lateral Tilt and operate
control handle to test movement is satisfactory.
Pull as shown in Fig. 8. If undue play is suspected
refer to Fig.8 and proceed as follows:
i Check secureness of link pivot set screws
(6) and (7).
ii Check secureness of grub screw on yoke (5)
which locks lateral screw bearing.
CAUTION: Do not over-tighten.
Detail ‘A’ Detail ‘B’
Fig 8 Lateral screw and nut adjustment
iii Finger testing at the point where the lateral
screw (1) passes through the nut (2) will
establish the need for the nut adjustment.
First try tightening socket head screws (3)
on nut. If excessive play is still present,
shim removal will be necessary. Proceed as
follows:
(a) Unfasten socket head screws (3) on nut
and extract shim pack (4).
(b) Remove shims (0.002 in thickness per
shim, approx.) one at a time until play
is just taken up on re-tightening.