Overview 5
Overview
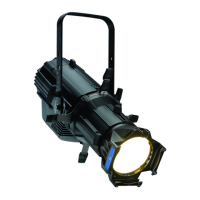
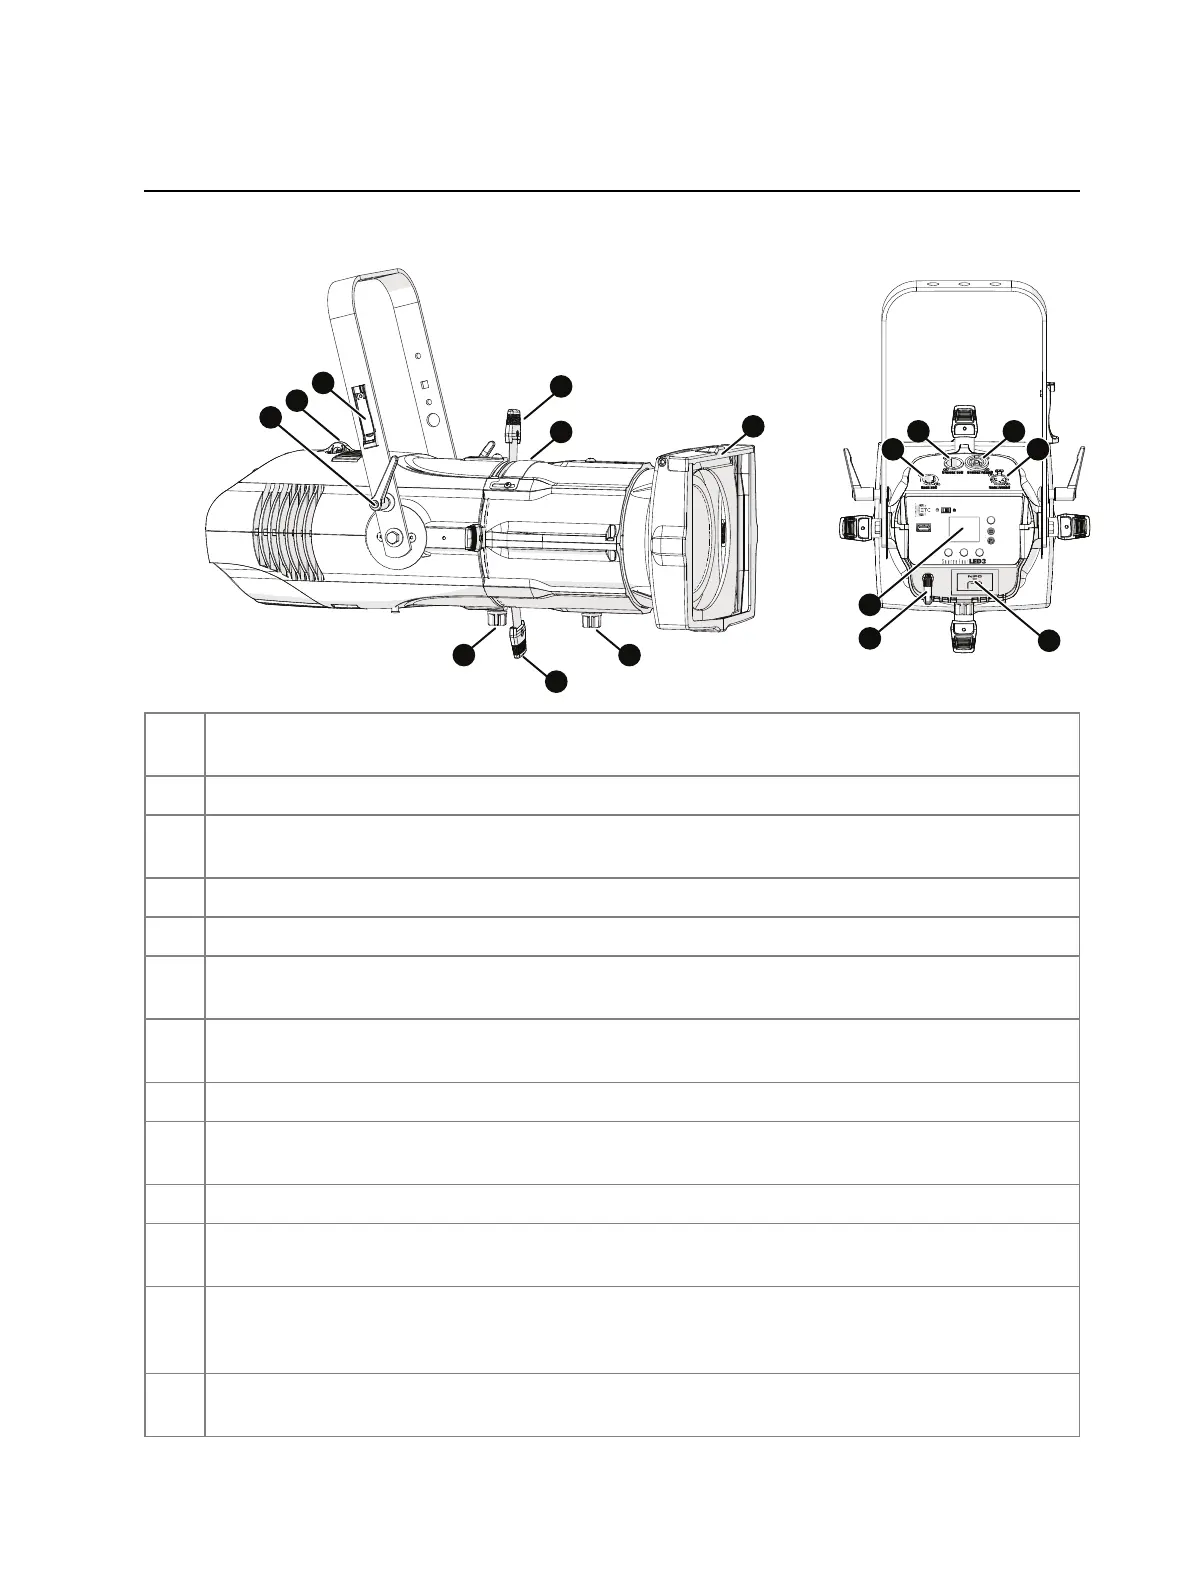
Fixture
L
II
K
M
B
E
G
H
F
D
E
A
J J
C
Source Four LED Series 3,
shown with 26° XDLT lens tube
A
Yoke tilt-lock: Tilt the fixture as needed, and then turn the tilt-lock clockwise to lock the
position. If necessary, pull the tilt-lock away from the stem to adjust the tilt-lock position.
B Safety cable attachment point: Attach safety cable to the fixture housing.
C
Antenna storage accessory:When transporting or storing the fixture, store the wireless
antenna on the yoke to protect it (
page28
).
D Barrel rotation knob: Loosen to rotate the barrel, and then tighten to secure it (
page11
).
E Shutters: Use four framing shutters to shape the beam.
F
Pattern holder slot and accessory slot: Insert an A-size, B-size, or glass pattern holder, and
insert an accessory, such as a drop-in iris or motorized pattern device (
page11
).
G
Beam focus knob: Loosen to adjust the lens tube position, and then tighten to secure it
(
page10
).
H Accessory holder: Insert a color frame or other accessory, and then lock the holder.
I
Power In and Power Thru connectors: powerCON
®
TRUE1 TOP connectors for power in and
power thru (
page9
).
J DMX In and DMX Thru connectors: Five-pin XLRconnectors for DMX/RDM in and thru.
K
User interface: View the fixture status, set the DMXaddress and mode, or set stand-alone
options.
L
Antenna: For use when controlling the fixture using wireless DMX (
page21
). The fixture ships
with the antenna stored in the antenna storage accessory (C). Install before using the fixture
(
page7
).
M
NFC(Near Field Communication) tag: Use the
Set Light
app to wirelessly configure the fixture,
with or without power applied to the fixture (
page21
).