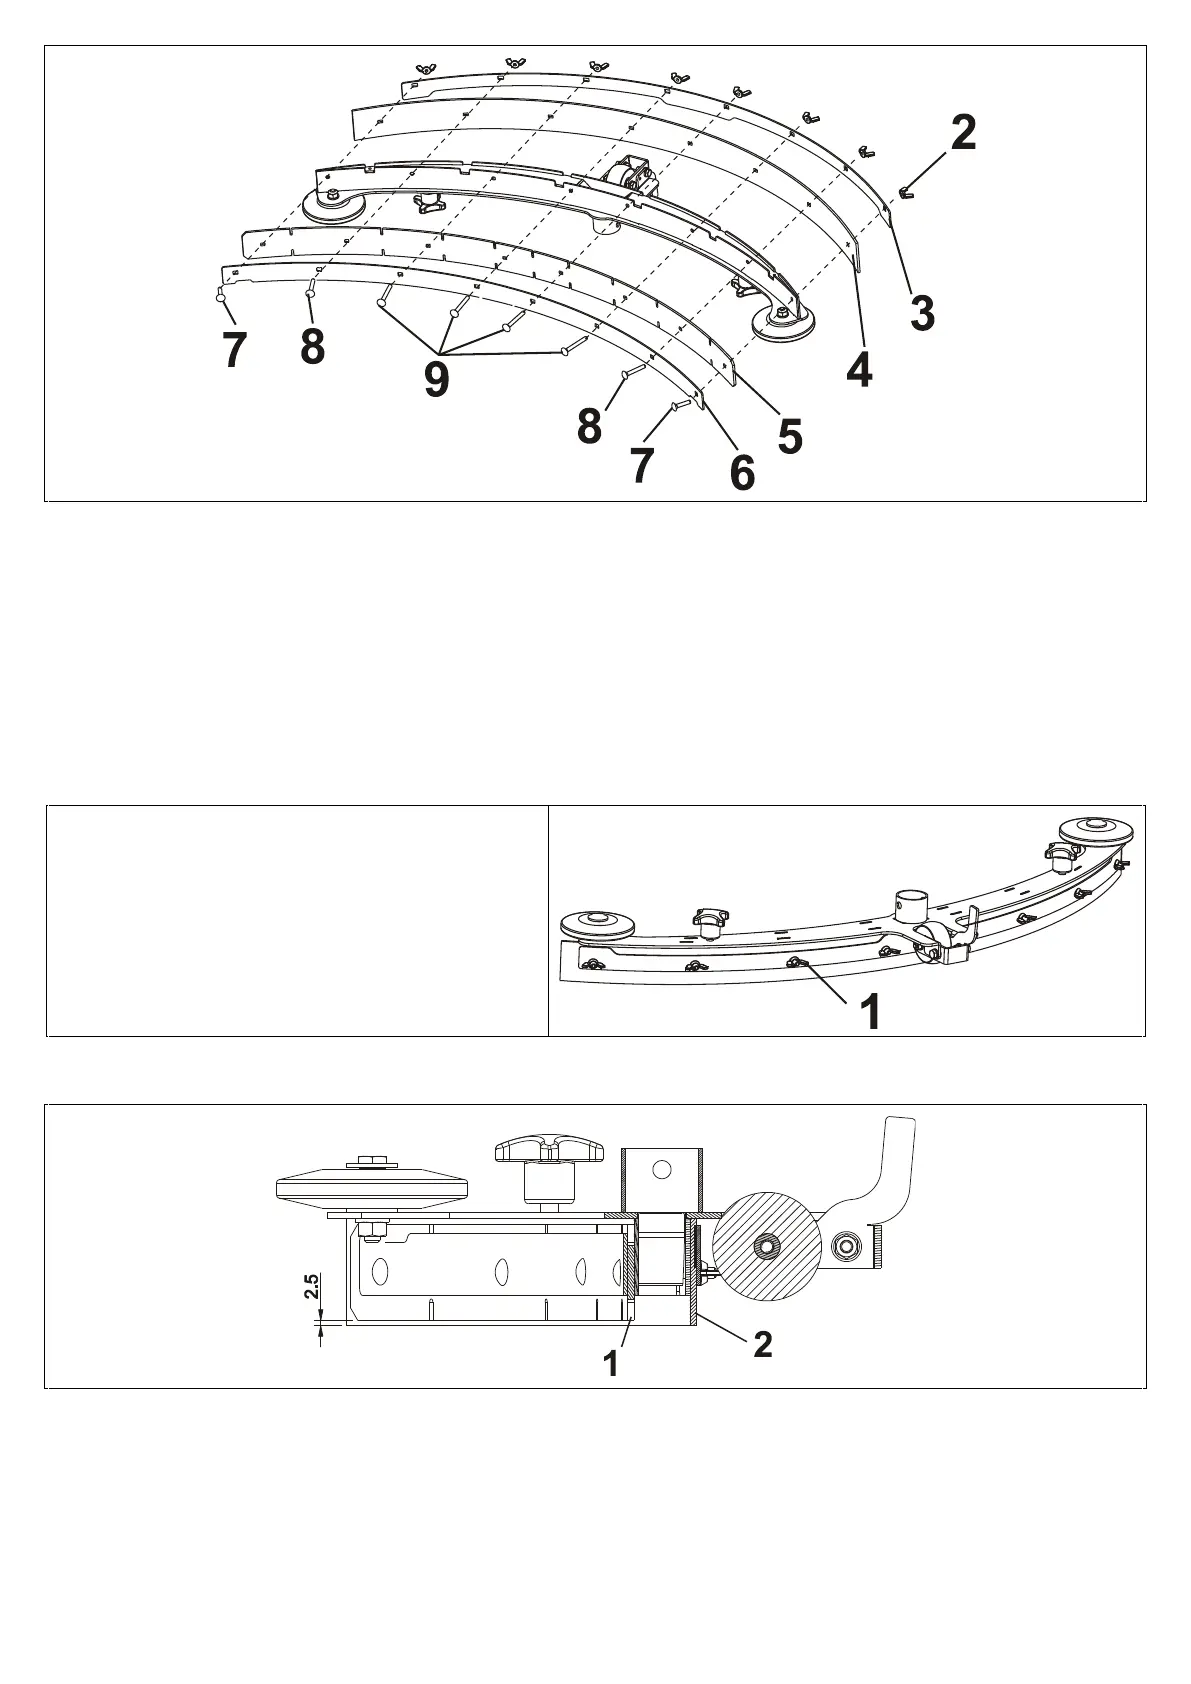
Remove the butterfly nut pos. 2;
Remove the rear blade blocking plate pos. 3;
Remove the rear blade pos. 4;
Remove the screws pos. 7-8-9 being careful not to mix them up as they have different lengths.
Pos. 7 length= 25mm - pos. 8 length = 35mm – pos. 9 length = 45mm;
Remove the front blade blocking plate pos. 6;
Remove the front blade pos. 5;
Rotate or replace the blades;
Fit everything back together again in the opposite sequence.
Mind that the front blade blocking plate pos. 6 and rear blade blocking plate pos. 3 are in the right position
(above/below).
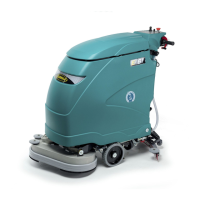
Fit the butterfly nuts pos. 1 back on being careful
not to tighten them too much, thus creating
deformations (swellings) on the rubber blade.
Once tightened up, position them all horizontally
to the floor as shown in the image.
CHECKING THE INSTALLATION OF THE SQUEEGEE BLADES
Once the squeegee blades are rotated or replaced, lay the squeegee onto a flat surface and check the following:
Make sure the rear blade (see position 2) is fitted correctly and levelled throughout its entire length. If the blade is not
fitted evenly, release the blade locking plate and re-position the blade so that it is levelled correctly against the floor;
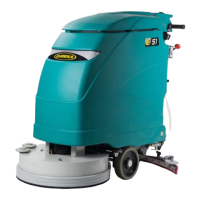
Make sure the front blade (see position 1) is fitted evenly and check for any deformations due to tightening the screws
excessively. Also make sure the blade is raised 2,5 mm above the ground throughout its entire length.