After completing the washing operation, clean the squeegee and make sure the blades are in good condition, and then
proceed as follows:
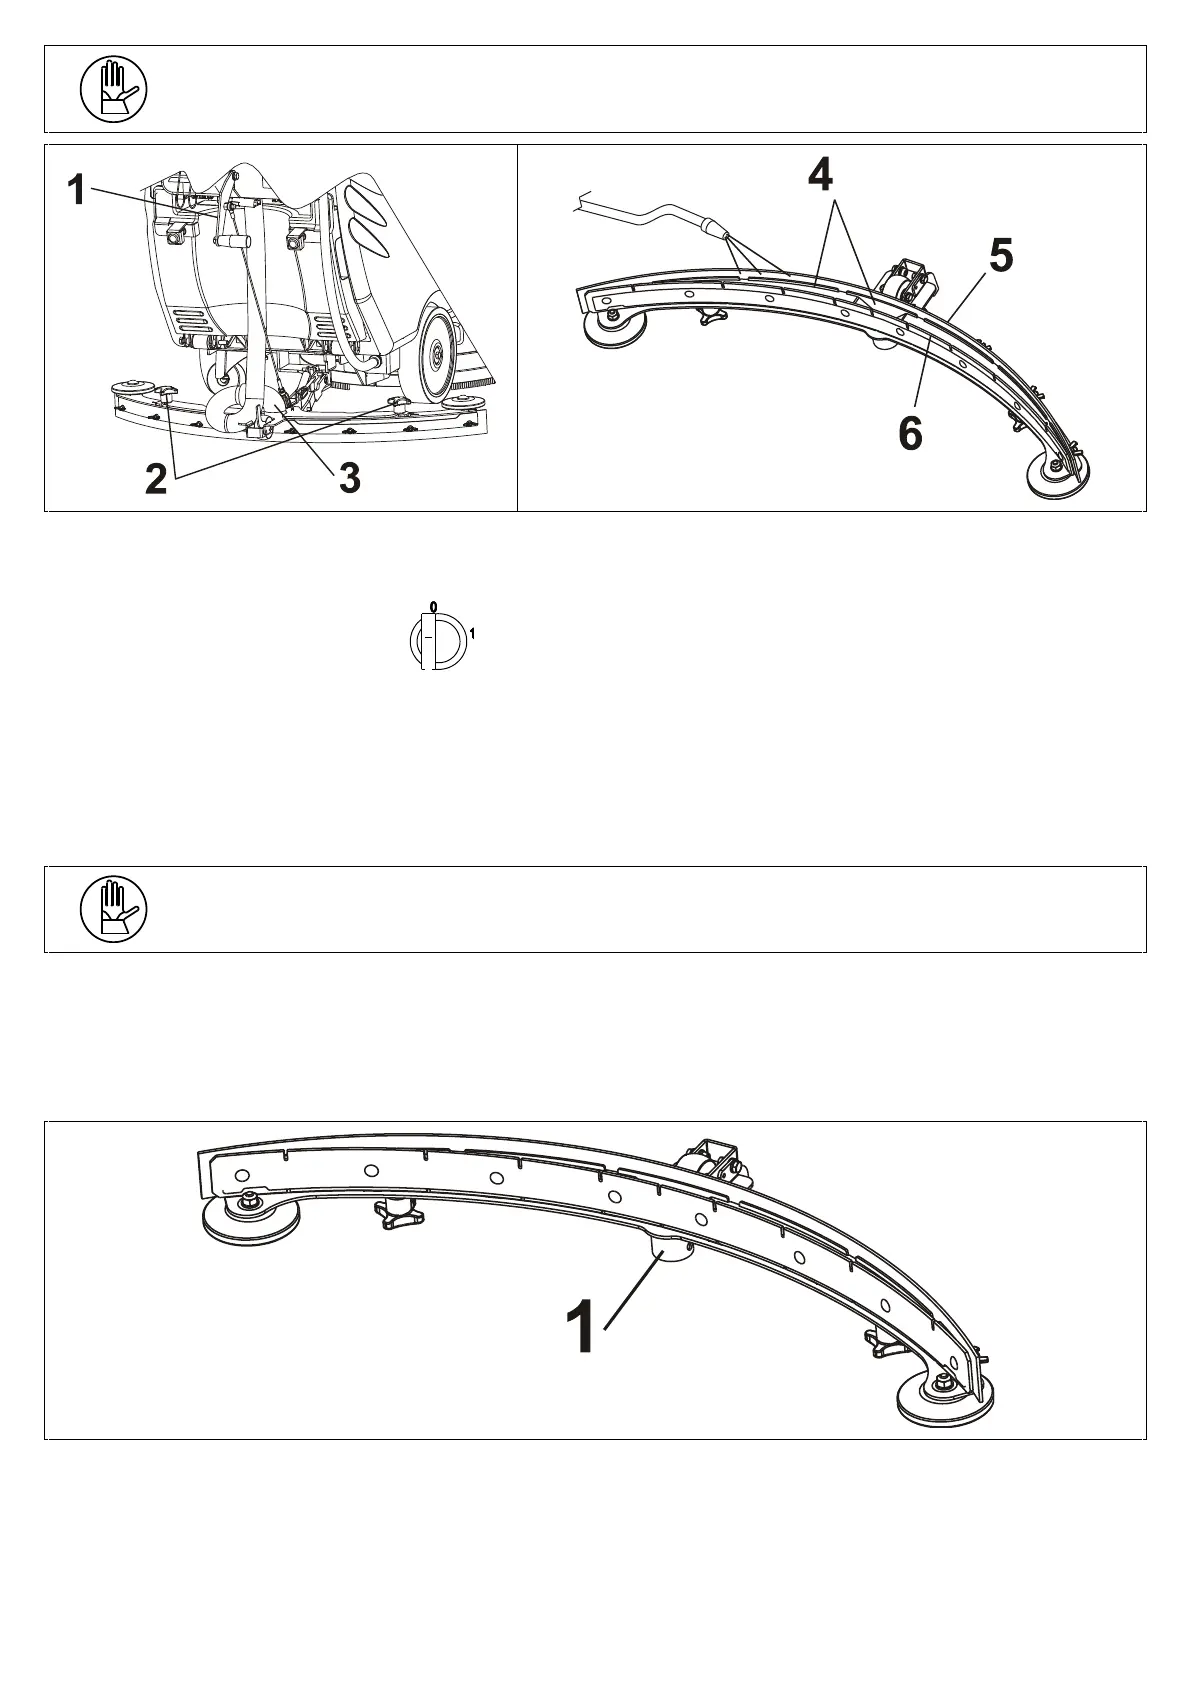
Bring the machine into a stop position in a flat surface area;
Lift the squeegee using the lever (see position 1);
Unscrew both screw knobs (see position 2) and remove the squeegee vacuum pipe (see position 3);
Remove the squeegee, lay it on the ground facing up (as shown in the figure), wash it using water and remove any
pieces or incrustations from the lower part and from the mouth of the squeegee (see position 4);
Use a piece of cloth to wipe off the rear drying blade (see position 5) and the front drying blade (see position 6);
Make sure the blades are in good condition and rotate them if necessary in order to have a new edge in contact with
the floor.
REPLACING SQUEEGEE BLADES
The squeegee is fitted with two drying blades, a rear and a front blade, as specified in the previous paragraph.
Each blade has 4 edges that can be used and rotated 4 times before being replaced, unless one of the edges is torn.
For better drying performance, make sure the edge of the rear blade is not worn out. If the blade is worn out, rotate it or
replace it.
REPLACING THE REAR BLADE
Follow the instructions below to rotate or replace the blade:
Remove the squeegee from the machine;
Block the squeegee in upturned position as shown in the picture, using the pipe pos. 1 and avoiding any crushing of
the pipe;