Mechanical Installation
44
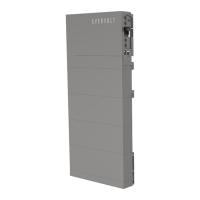
h) Place expansion bolts into the two holes
32 in
/8
1
2
.
8 m
m
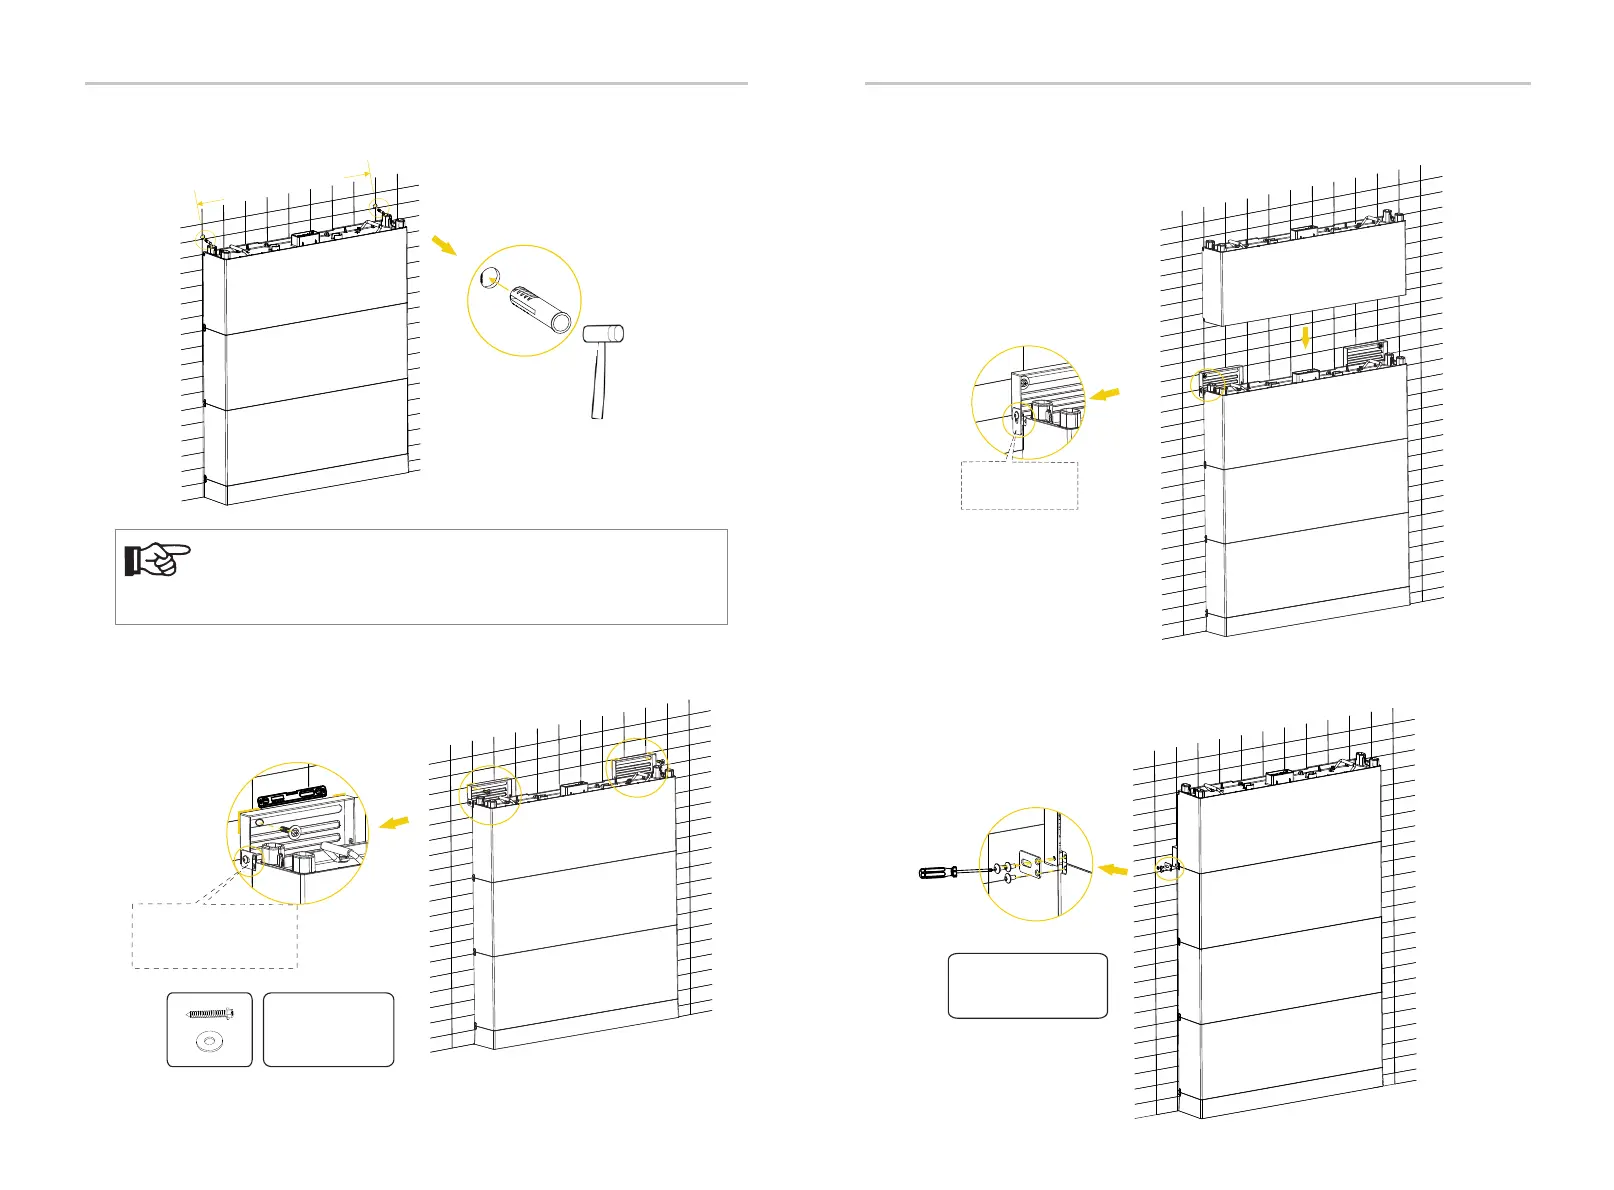
j) Let the fixing plate down and place the fourth battery module;
k) Fix the fixing plate (3 holes) on both sides of battery module using M5 *
10 cross screw,and then tighten M5*10 screws;
Mechanical Installation
45
Let the Platen
down
Platen (3 holes) × 2
M5*10 Screw × 6
2.2-2.5 N·m
I) Place the Wall Bracket on the wall where the mark is drawn previously, and
then secure the Wall Brackets on the wall using M6 Tapping Screws (x2) and
Washers (Torque: 5 N·m).
Tapping Screw × 2
Washer × 2
Wall Bracket × 2
5 N·m
Mark
Attach screw but not
tighten, and align the hole
location of battery
NOTE!
In the case of the solid wood wall, the Expansion Bolt is not
required to be installed.