Mechanical Installation
50
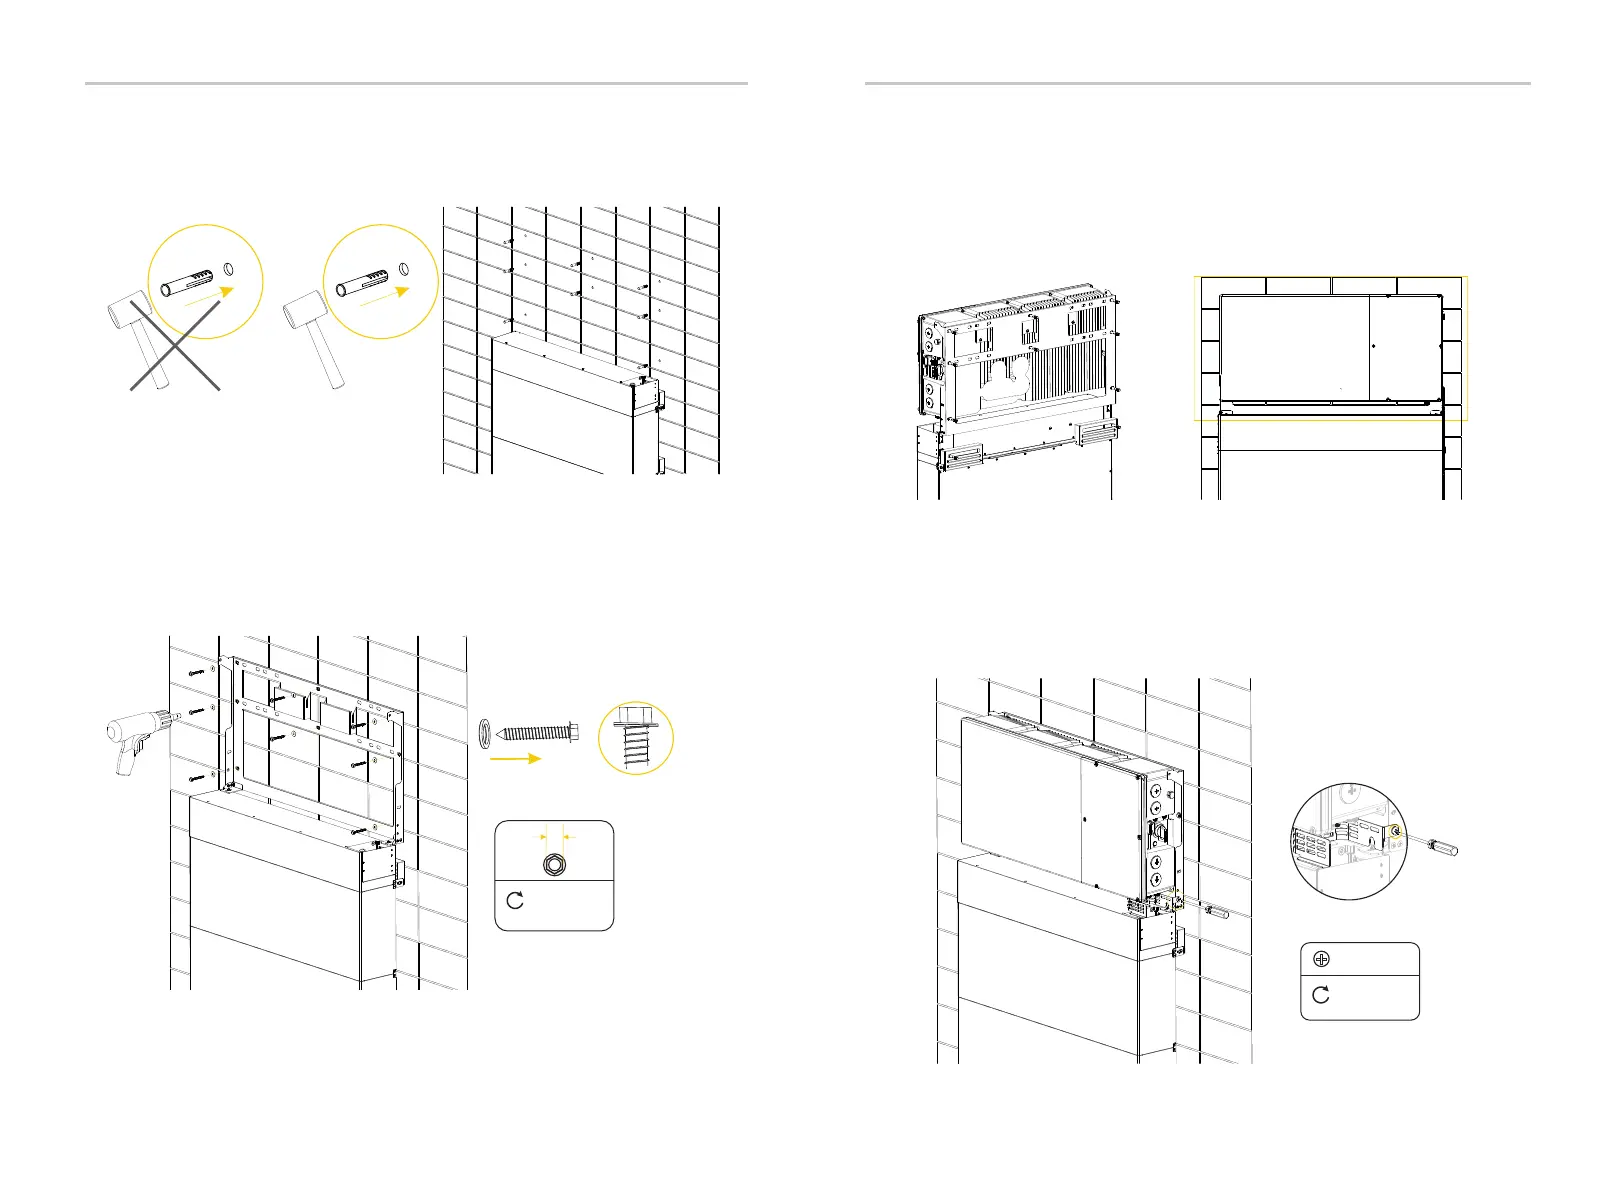
d) Insert the expansion tube into the hole and use rubber hammer to knock
the expansion tube into the wall; (It can be ignored in case of wooden wall.)
e) Align the bracket over the holes and re-fix the bracket on the BMS with
screws. And set the tapping screw through the washer and secure the bracket with
tapping screws. Please hold the bracket firmly to the wall surface before fixing it.
g) Place the protective guard on the correct position of battery’s BMS
prior to the wiring connection between inverter and battery and fix it with the
inverter bracket with M5 screws;
f) Place the inverter to be seated on the corresponding position of the
bracket. As EV-HB series inverters are heavy, weigh 75 lbs / 34 Kg. They
should be lifted up by two persons and placed carefully onto the bracket. Then
adjust the inverter to be centered on the whole system;
Back view
Front view
M5
8.8 lbf.in /
1.0 N·m
26.5 lbf.in /
3.0 N·m
1
0
mm
Mechanical Installation
51
For wooden wall,
this step is not required
For solid concrete wall,
this step is required