Raptor User Manual
2017 EverySight Ltd. Proprietary Page 22 of 46 Rev 1.0
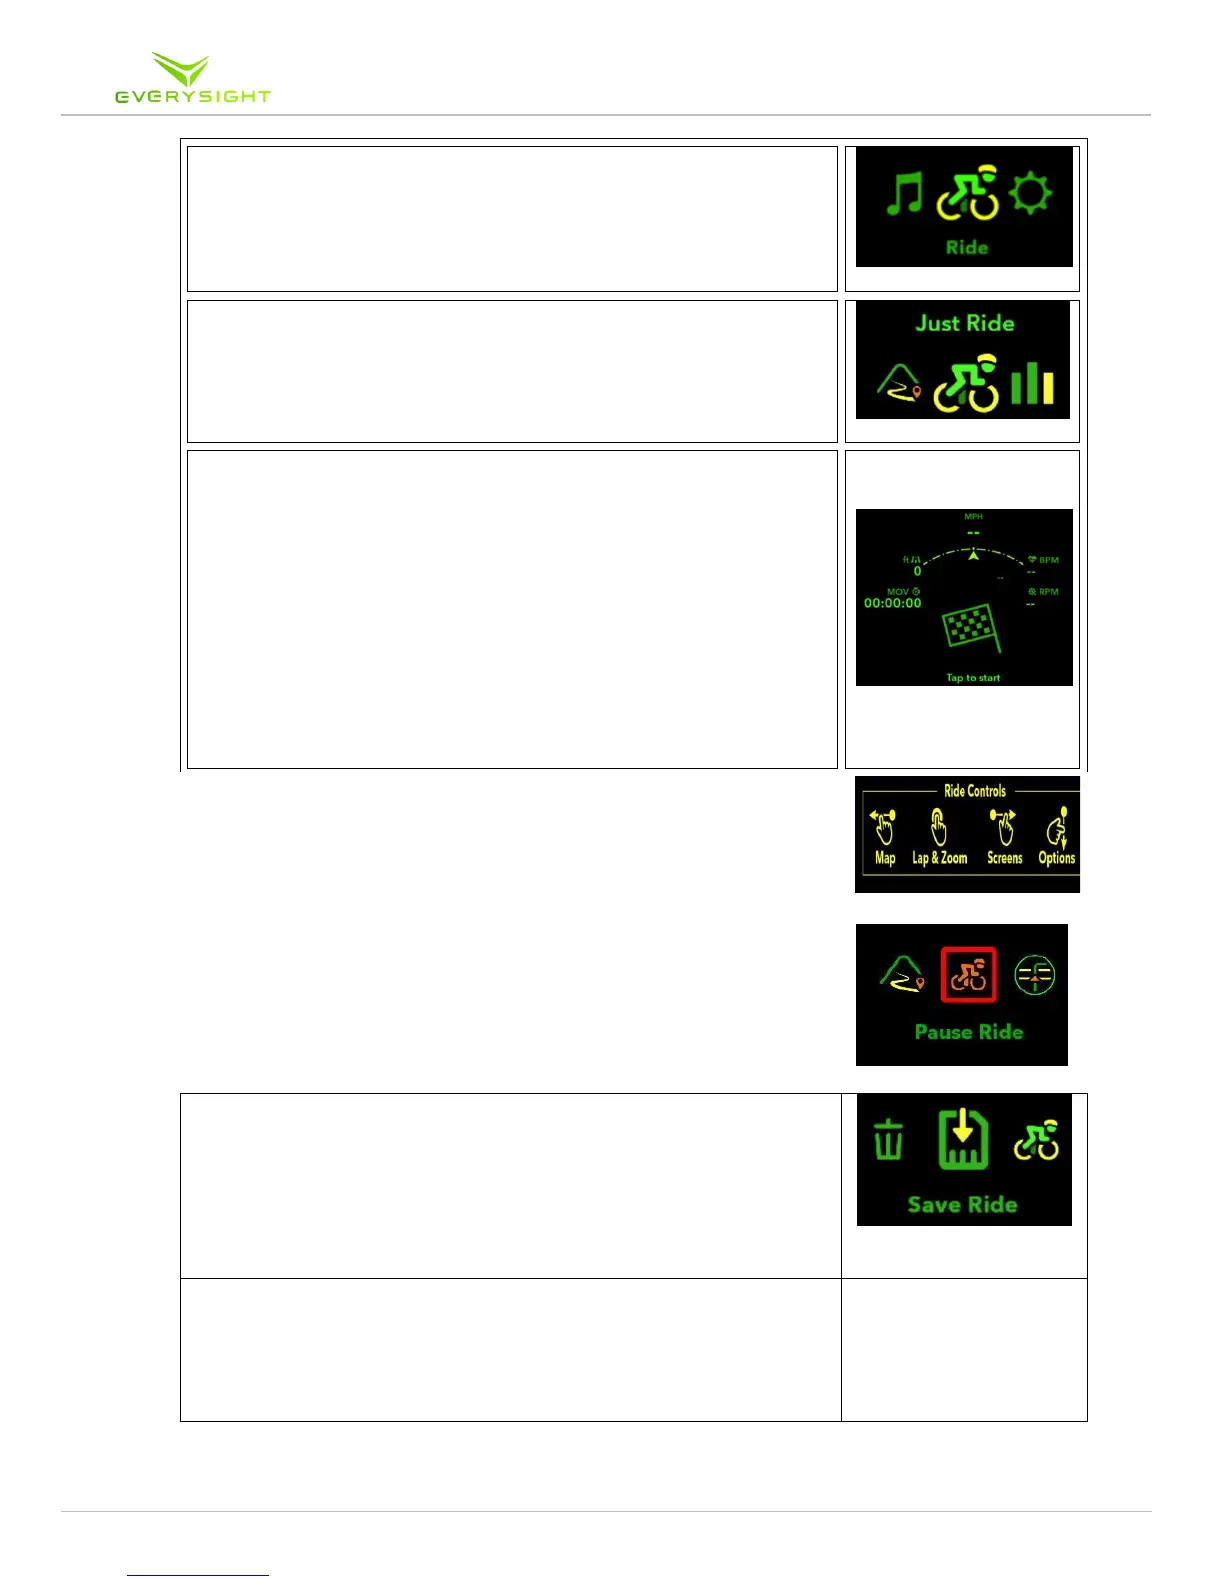
1. Turn on Raptor and put your Raptor glasses on. On the main
menu, swipe to the Ride icon and Tap to select.
2. The ride menu allows you to choose your ride type (Just ride,
Navigation or workout). Swipe to the Just Ride icon and tap to
select.
3. Tap the Touchpad to start your ride. As you ride, your Raptor
will display your planned screens' information for you, as well
as record that information so you can later save it.
4. Swipe forward to change your ride screens (up to 6 screens as
you defined them).
5. Swipe back to change your map mode – 2D map or No Map.
6. When 2D map is displayed, you can choose to show maps
while stationary only by swiping down to open the ride menu.
Swipe to the streets feature, and tap to turn it on or off.
7. Tap to open the Lap and Zoom Menus – another tap will start a
new lap, a swipe forward will zoom in on a 2D map, a swipe
back will zoom out (only when map is shown).
8. To pause or end a ride:
8.1. Swipe down to open Ride Menu.
8.2. Swipe to the pause ride icon.
8.3. Tap to select.
1. Swipe left or right to choose whether you want to discard the
ride (lose all ride data), save the ride, or resume your ride. Tap
to select the option you want to use.
2. Once you saved a ride a popup message will appear on your
smartphone, click it to open the ride page and upload it to your
profile.
3. Next a feedback page will appear. We appreciate it if you can
take a few seconds to give us a feedback about your Everysight
experience during this ride.