Raptor User Manual
2017 EverySight Ltd. Proprietary Page 25 of 46 Rev 1.0
Create a Route for Your Ride (Optional)
Navigation with Raptor is easy and accurate. You can see a map of your route and provides
real time navigation directions as you ride. You can also display the elevation profile of your
route, allowing you to see how much of the climb is still ahead. Riding with a route, even on
a well-known road, will improve your experience with your Smartglasses.
To navigate using a pre-loaded route, you will need to first load it to your account on
go.everysight.com and then, upload it to Raptor smartglasses.
You can import an existing route, convert a previous ride to a route, choose a route from
thousands of exiting routes created by the Everysight community or create a new route on
your preferred route editor.
The steps below show you how to create a new route in Strava, export it, and import it into
your Everysight account. If you don’t already have a Strava account, or you prefer not to
create a Strava account, there are alternative ways to create routes or find routes online.
The key to importing routes into your Everysight account is that the route file must be in
GPS Exchange Format (GPX).
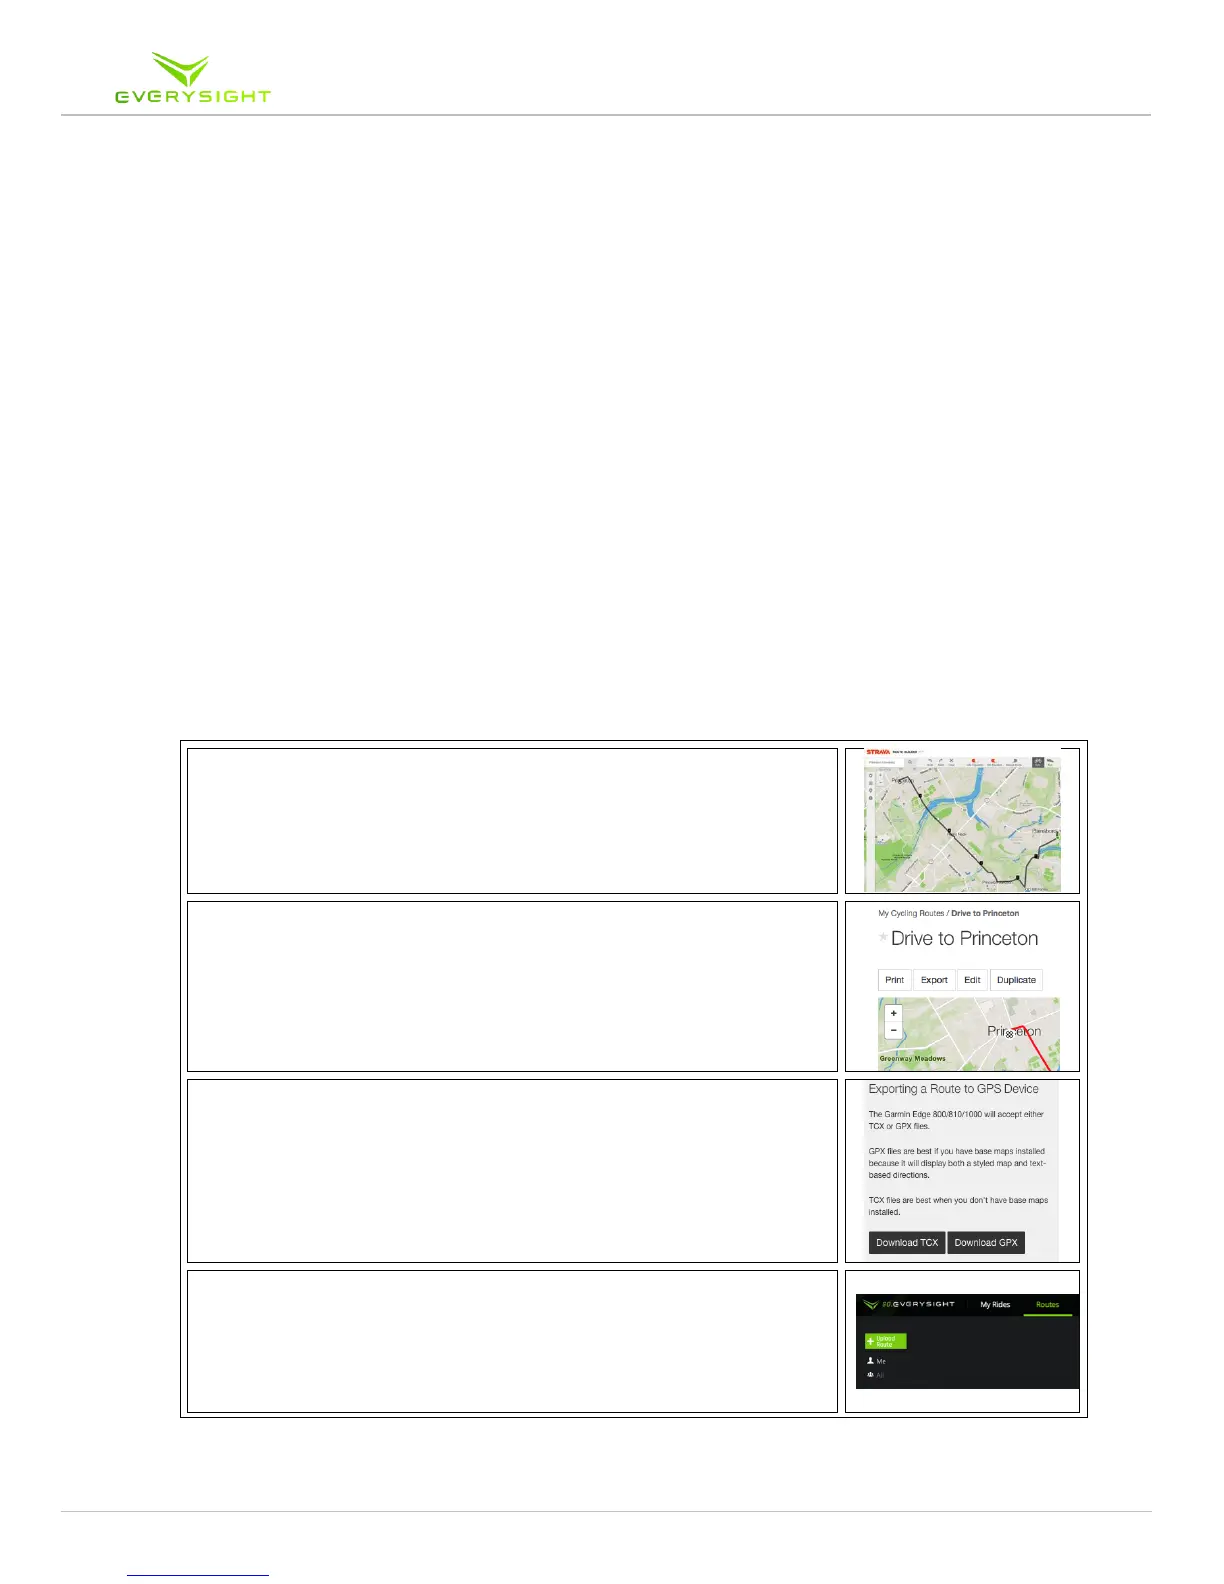
1. Login to your Strava account. Click Dashboards, My
Routes. Click Create New Route. Create your route, and
click Save to save the route.
4. Use the web browser on your computer to sign in to
Go.everysight.com. On the main menu click Routes and
then click the "Upload Route" button.