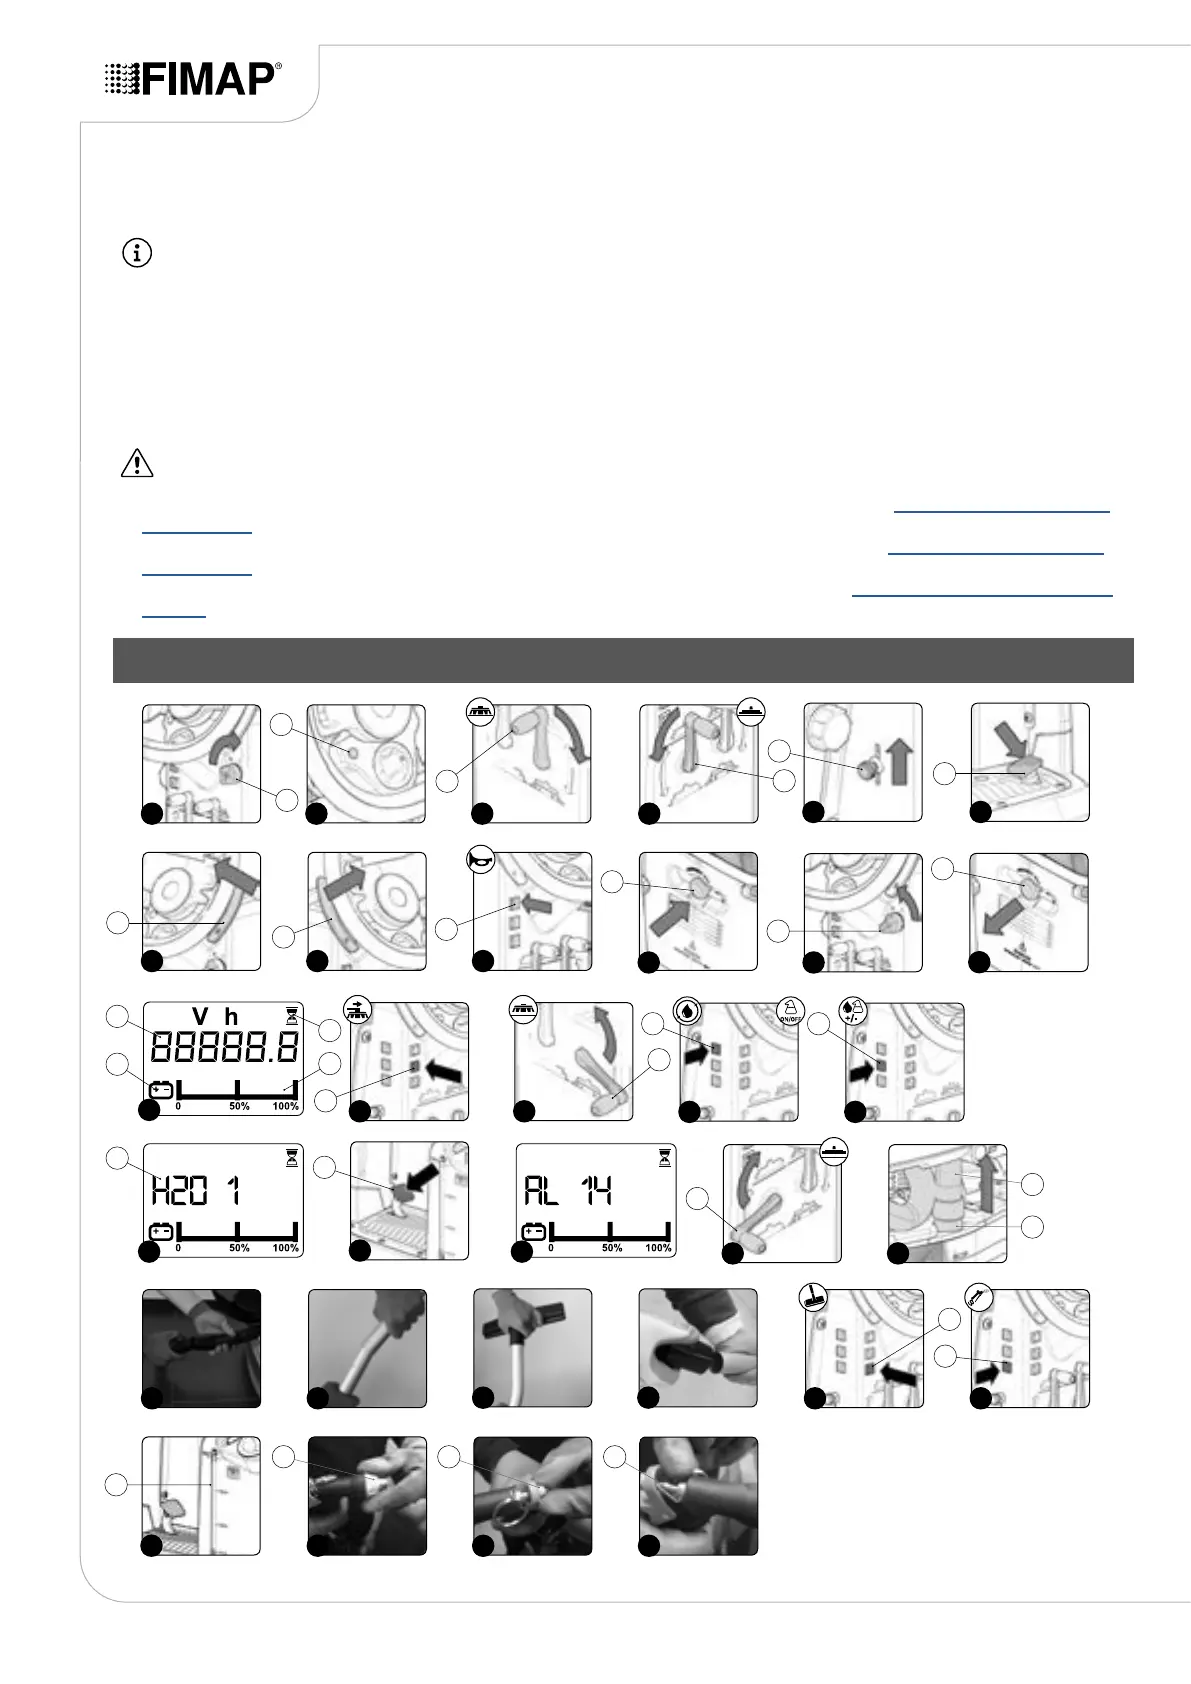
11. Move to the left side of the machine and open the left side casing (5) (Fig. 5).
12. Make sure the electronic brake is engaged. If it isn't, turn the lever (6) in the direction of the arrow (Fig. 6). The traction gear motor is located
on the rear right-hand side of the machine.
13. Make sure the water system lter cap (7) is closed. If it isn't, close it (Fig. 7).
N.B.: for the sweeping versions, the water system lter is located on the right of the machine.
14. Close the left side casing of the machine.
15. Check that the water tap is fully open, move the water adjustment knob (8) in the direction shown by the arrow (Fig. 8).
16. Stand at the back of the machine.
17. Check that the solution tank drainage cap (9) is closed. If this is not the case, close it (Fig. 9).
18. Make sure the cap of the recovery tank drainage tube (10) is closed. If it isn't, close it (Fig. 10).
19. Make sure the vacuum tube (11) is correctly connected to the sleeve in the squeegee body. If it isn't, connect it (Fig. 11).
20. Grip the handle (12) and raise the recovery tank's lid to its maintenance position (Fig. 12).
ATTENTION: to prevent the cover from rotating, insert the pin (13) into the support (14) (Fig. 13).
21. Make sure the suction motor lter (15) is correctly connected and is clean (Fig. 14). If it isn't, clean it (see “CLEANING THE RECOVERY
TANK FILTERS”).
22. Make sure the vacuum duct lter (16) is correctly connected and is clean (Fig. 15). If it isn't, clean it (see “CLEANING THE RECOVERY
TANK FILTERS”).
23. Make sure the lter-strainer (17) is correctly connected and is clean (Fig. 16). If it isn't, clean it (see “CLEANING THE RECOVERY TANK
FILTERS”).
WORK
20
30
24
31
25
32 33
26 27
24 28 29
22
23
23
20
21
27
21
26
4
25
19
19
16 17
16 17
1514
15
3
12
11
18
14
13
10
12
10
10
11
1
9
9
8
8
7
13
18 20
7
4
4
65
5
6
2 31
1
2
3