EXTRAORDINARY MAINTENANCE
Before carrying out any extraordinary maintenance operations, proceed as follows:
1. Take the machine to the maintenance area.
N.B.: the place given over to this operation must comply with current environmental protection regulations.
2. Make sure the machine is in a safe condition (see chapter “MACHINE SAFETY MEASURES”).
CAUTION: it is recommended to wear the appropriate PPE (Personal Protective Equipment), suitable for the work to be carried out.
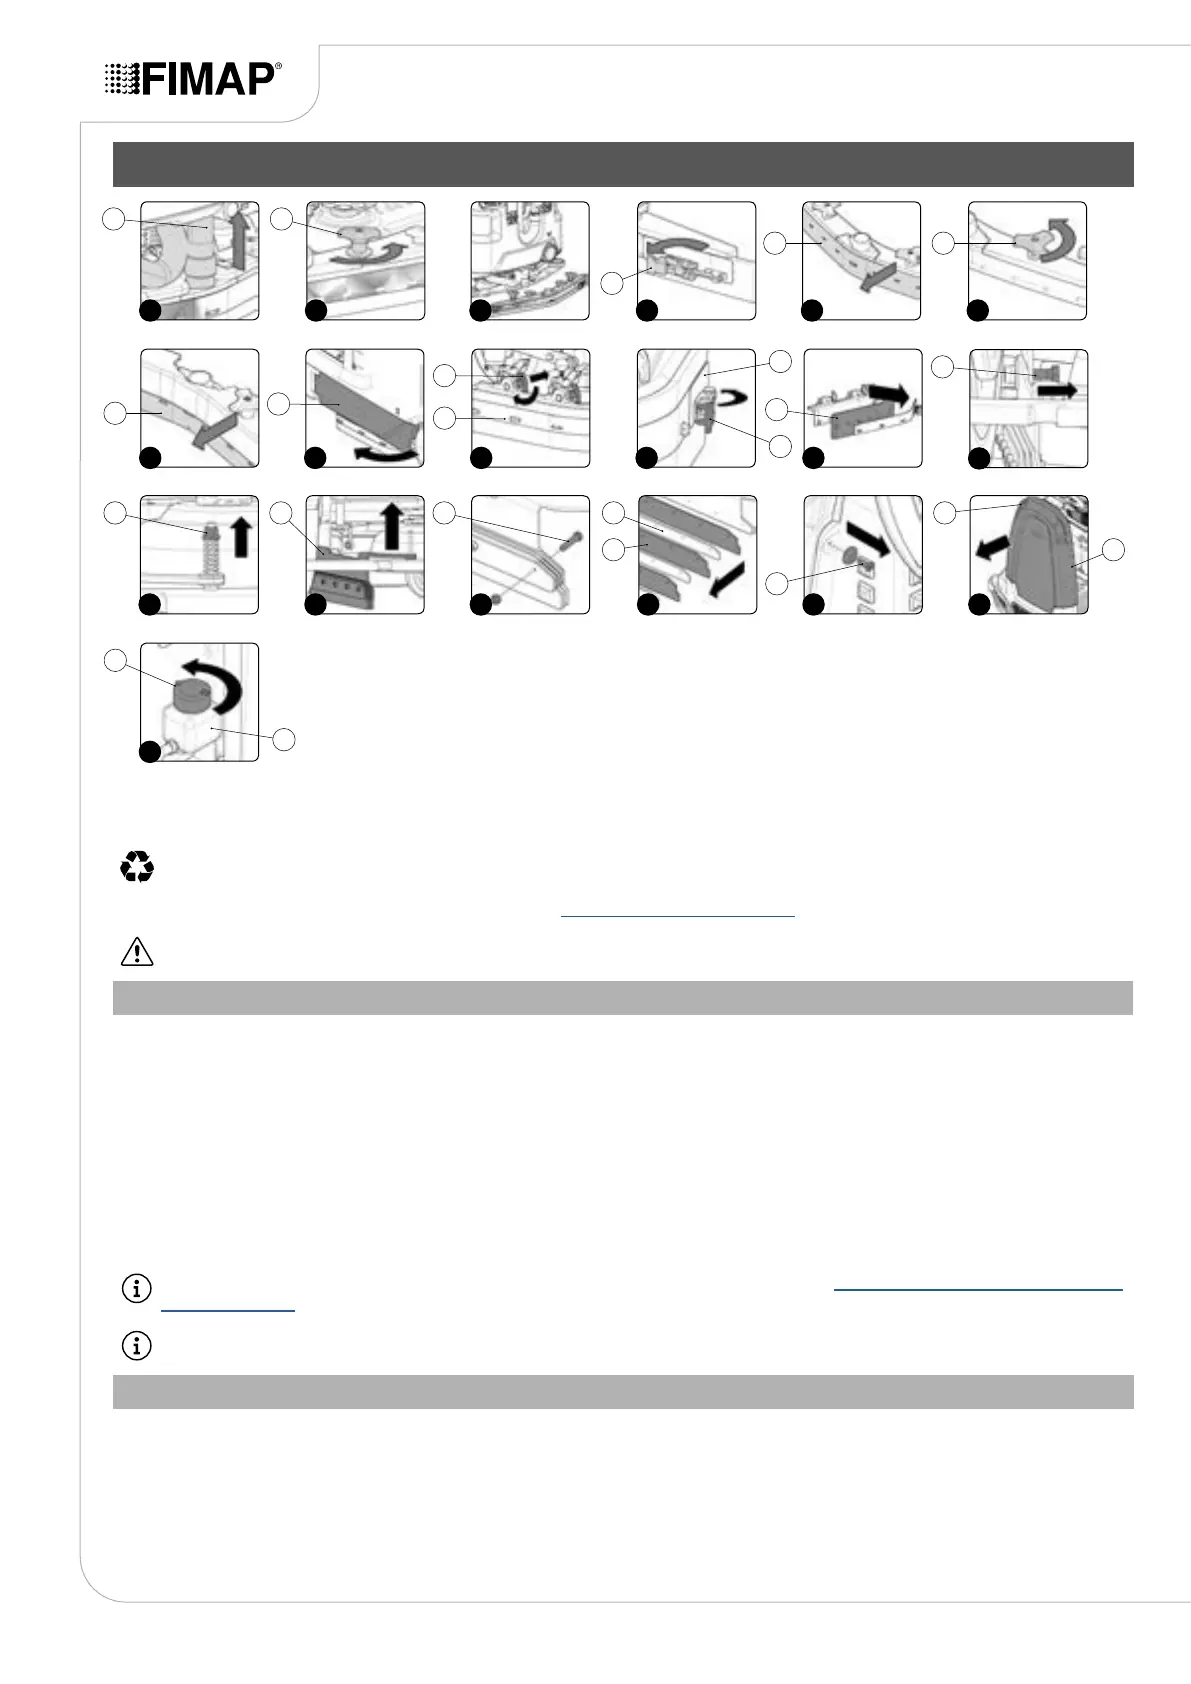
REPLACING THE BRUSH HEAD SPLASH GUARD
If the splash guard rubber blades of the brush head side casing are damaged they cannot work properly, namely they cannot convey the dirty
detergent solution towards the squeegee, therefore the splash guard rubber blades need to be checked. To replace the brush head splash
guards, proceed as follows:
1. Open the machine's left side casing (7) (Fig. 8).
2. Remove the left splash guard body (8) and move the xing anchors (9) on the brush head body into the maintenance position (Fig. 9).
3. Remove the rear rubber blade compression plate (10), and release the stopper (11) on rubber blade compression plate (Fig. 10).
REPLACING THE SQUEEGEE BODY RUBBER BLADES
Ensuring the integrity of the squeegee body's rubber blades guarantees better oor cleaning and drying results, as well as a longer service life
for the suction motor. In order to replace the squeegee body's rubber blades, do the following:
1. Extract the vacuum hose (1) from the vacuum nozzle on the squeegee body (Fig. 1).
2. Completely unscrew the knobs (2) in the squeegee body's pre-assembly (Fig. 2).
3. Remove the squeegee body from the slits in the squeegee connector (Fig. 3).
4. Remove the rear rubber blade compression plate, and release the stopper (3) at the rear of the squeegee (Fig. 4).
5. Remove the rear rubber blade (4) from the squeegee body (Fig. 5).
6. Completely unscrew the knobs (5) in the squeegee body's pre-assembly (Fig. 6).
7. Remove the front rubber blade (6) from the squeegee's internal body (Fig. 7).
8. Repeat the operations in reverse order to reassemble all the parts.
N.B.: before using the machine, remember to adjust the squeegee body: see the section titled “ADJUSTING THE SQUEEGEE BODY'S
RUBBER BLADES”.
N.B.: it is recommended to replace both squeegee body blades in order to ensure good results when drying the oor.
32
18
19
17
19
20
21
22
23
1615
16 18
17
13 14
12
13
14 15
11
12
108 9
7
8
11
10
9
7
6
4
3
65
4 5
2 31
1 2