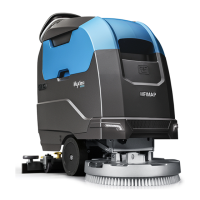
CLEANING THE LATERAL BRUSH (SCRUBBING VERSION)
Careful cleaning of the brush guarantees better cleaning of the oor as well as a longer brush head gearmotor lifespan. To clean the brush,
proceed as follows:
1. Open the machine's right later carter (13) (Fig. 18).
2. Move the brush release lever downwards (14) (Fig. 19).
3. Remove the brush from the side brush head (Fig. 20).
4. Clean the brush under a stream of running water to remove any impurities from its bristles. Check the bristles. If they are excessively
worn, replace the brushes (the bristles should protrude by at least 10 mm). See “FITTING THE SIDE BRUSH (SCRUBBING VERSION)”
when replacing the brush.
5. After checking to make sure that the brush is clean, reassemble it.
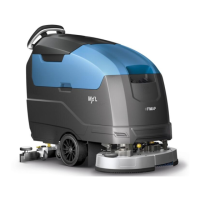
CLEANING THE LATERAL BRUSH (SWEEPING VERSION)
Careful cleaning of the brush guarantees better cleaning of the oor as well as a longer brush head gearmotor lifespan. To clean the brush,
proceed as follows:
1. Stand on the right side of the machine.
2. Remove the wing nut (15) xing the side brush to the gear motor, turning the wing nut anti-clockwise (Fig. 21).
3. Remove the washer (16) holding the side brush in place (Fig. 22).
4. Take out the side brush from the pin in the gear motor.
5. Clean the brush under a stream of running water to remove any impurities from its bristles. Check the bristles. If they are excessively worn,
replace the brushes (the bristles should protrude by at least 10mm). See “FITTING THE SIDE BRUSH (SWEEPING VERSION)” when
replacing the brush.
6. After checking to make sure that the brush is clean, reassemble it and move on to the one on the left hand side.
CLEANING THE RECOVERY TANK FILTERS
In order to clean the lters present inside the recovery tank, do the following:
1. Grip the moulded handles (17) on the recovery tank cover (Fig. 23).
2. Turn the recovery tank cover until the support (18) xed to the recovery tank is coupled with the pin (19) xed to the recovery tank cover (Fig. 24).
3. Remove the dirty water basket/lter from the support (20) (Fig. 25).
4. Remove the basket cover (21) from the basket/lter (20) (Fig. 26).
5. Clean the basket/lter and the basket cover under a jet of water.
N.B.: use a spatula or brush to eliminate any dirt that is particularly dicult to remove.
6. Use a cloth to dry the basket/lter and basket cover, and place them back inside the recovery tank.
7. Remove the suction motor lter (22) and the basin (23) (Fig. 27).
8. Clean the basin under a jet of water.
9. Extract the dirt present inside the suction motor lter.
N.B.: use a jet of water to eliminate any remaining dirt, and use a spatula or a brush with soft bristles to eliminate any dirt that is
particularly hard to remove.
10. Wait for the suction motor's lter to dry, if necessary, and then place it back on its support.
ATTENTION: wait for the lter to dry completely before using it again, or else use a spare.
11. Remove the suction motor duct lter from its support (24) (Fig. 28).
12. Clean the suction motor duct lter under a jet of water.
N.B.: use a spatula to eliminate any dirt that is particularly dicult to remove.
13. Dry the suction motor duct lter with a dry cloth and place it back on its support.
14. Clean the lower part of the vacuum cover with a damp cloth, and carefully clean the lter gaskets (Fig. 29).
15. Grip the handle and turn the recovery tank cover to its working position.
CLEANING THE RECYCLE FILTER (FLR VERSIONS)
Proceed as follows to empty the recovery tank:
1. With the tank empty, grip the handles (17) moulded on the recovery tank cover (Fig. 23).
2. Turn the recovery tank cover until the support (18) xed to the recovery tank is coupled with the pin (19) xed to the recovery tank cover (Fig. 24).
N.B.: you are advised to invert the right and left-hand brushes every day.
ATTENTION: if the brushes are not new, and have deformed bristles, it is better to reassemble them in the same position in order
to prevent the dierent inclination of the bristles from overloading the brush motor, as well as to prevent excessive vibrations.
30