Maintenance
Service Information
5
5-11
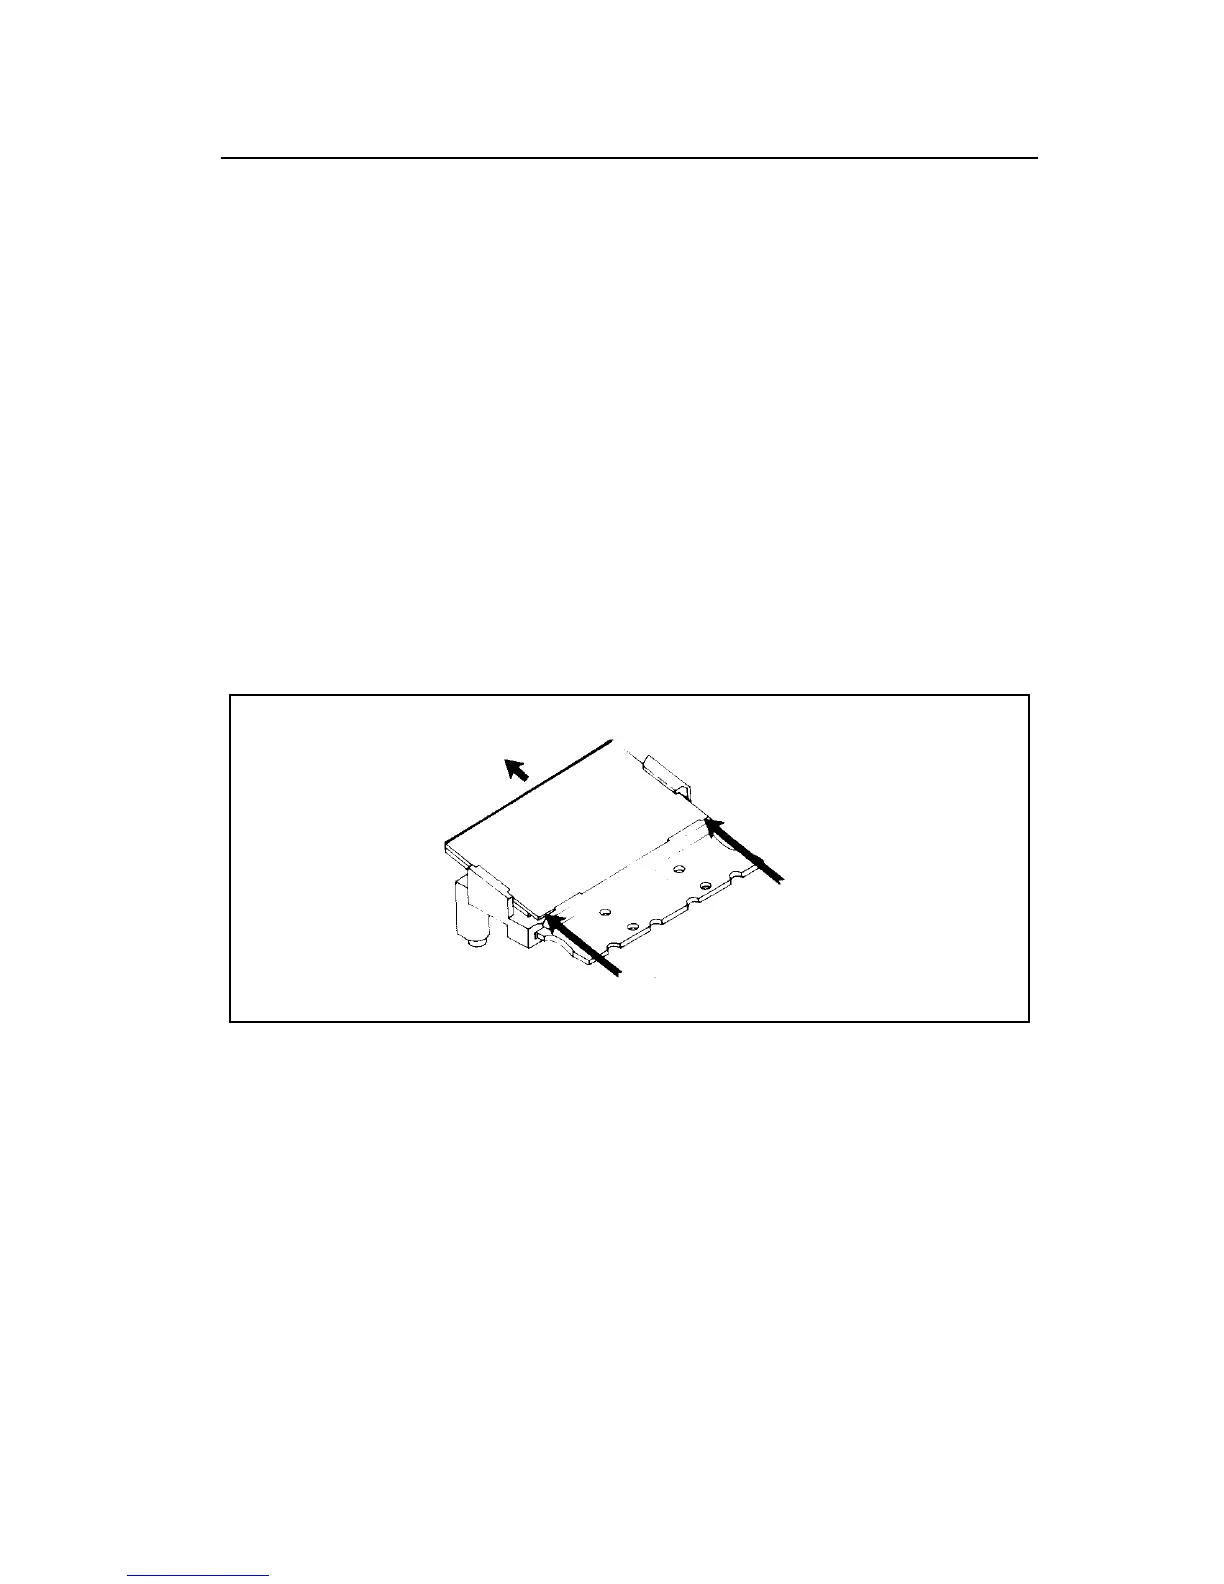
To disassemble the LCD, use your thumbnails and push on the corners of the
LCD display, gasket and display lens so that all three components slide out
together as shown in Figure 5-3.
Note
It is not necessary to remove the main pcb from the button case to
disassemble or reassemble the LCD.
To assemble the LCD, use the following procedure:
1. Align the LCD display (item 8) as indicated in Figure 5-2 and slide it
into place. The bottom edge of the LCD display should compress the
LCD interconnect (item 7) and slide underneath the two plastic notches
on the LCD bracket (item 1).
2. Refer to Figure 5-2 and follow steps 9 and 10 to complete assembly.
Push corners with thumbnails.
Slide Out
sx34c.eps
Figure 5-3. Disassembling the LCD
To disassemble the microcomputer pcb, use the following procedure:
1. Turn the main pcb face down and remove the two small screws at the
top of the pcb to free the microcomputer pcb.
2. Refer to Figure 5-2. Beginning with item 7, remove items 7 through 3
(leave item 2 attached to item 1). Be sure to observe the handling
precautions for items 7, 5, and 4.
To assemble the microcomputer LCD, refer to Figure 5-2. Beginning with
item 3, assemble items 3 through 7 (in ascending numerical order). Be sure
to follow the handling precautions for items 4, 5, and 7.