14
last step is setting the volume level. Use the volume buttons to dial-in
the desired volume level you wish to assign to this preset and then push
“Play/Select” to lock it in. Your preset is now setup.
You can assign the P1, P2, P3, and P4 buttons in the following manner:
Highlight the sound that you wish to have established in one of the four
positions. From the main sounds or category screen, press and hold the
P1, P2, P3, or P4 button for approximately 3-4 seconds. Set the volume
level and then push the “Play/Select” button to lock in that preset.
To initiate playback of presets 1-4, make sure that both the X24 and X24
remote are turned on, and then push the corresponding preset button
(P1 – P4) on the top sides of the remote. The X24 will then instantly
switch to that sound and volume level.
To initiate playback of any preset, simply select the “Favorites/Presets”
menu on the main screen, browse through the available presets, and
then use the “Play/Select” button, just as if you were picking a sound
for normal playback.
4. X24 Detailed Overview
This chapter provides a more detail-oriented overview of the X24.
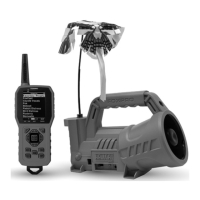
4-1 Using a Tripod
The X24 features a universal tripod mount (tripod not included) located
on the bottom of the longer leg. This mount will work with most tripods
using the universal-type tripod connector. Using a tripod can be helpful
in two ways. First, elevating the caller off the ground can help sound
propagation by lessening the dampening of the emitted sound to the
ground. Second, elevation can be helpful in maximizing the remote
range.