F3D3 Series Service Manual Parts Replacement / Section 2.3
Questions? Call Franke Technical Support Group For Your Area. Copyright 2012 Franke, Inc. All rights reserved.
2.3 Automation Assembly Replacement
Continued…
[See Section 1.5 for Part Number]
19) With dispense doors in CLOSED position, adjust height
of Door Lift Assembly so that rubber hopper just “kisses”
the freezer bottom, to form a seal. [NOTE: Care should
be taken to keep rubber hopper level and centered in
rectangular opening.]
20) Tighten all M6 [10 mm] bolts securely and recheck
rubber hopper-to-bottom “kiss” seal for uniform fit.
21) Reattach power service wires to both motors [Red =
positive, black = negative] and sensor leads to Main
Wiring Harness.
22) Plug in unit power cord to power supply.
Test Automation Assembly operation by:
23) Turn on main power switch and press LANE-POWER
touch pad on control overlay.
24) If word: Ready is in display and ready lights are on in
basket graphic, position empty fry basket under hopper
and press against basket bumper switch to activate a fry
loading cycle.
25) If Lane dispenses fries, it is working properly.
26) Re-hang service access panel, replace screws and
return Disperser to normal operating location.
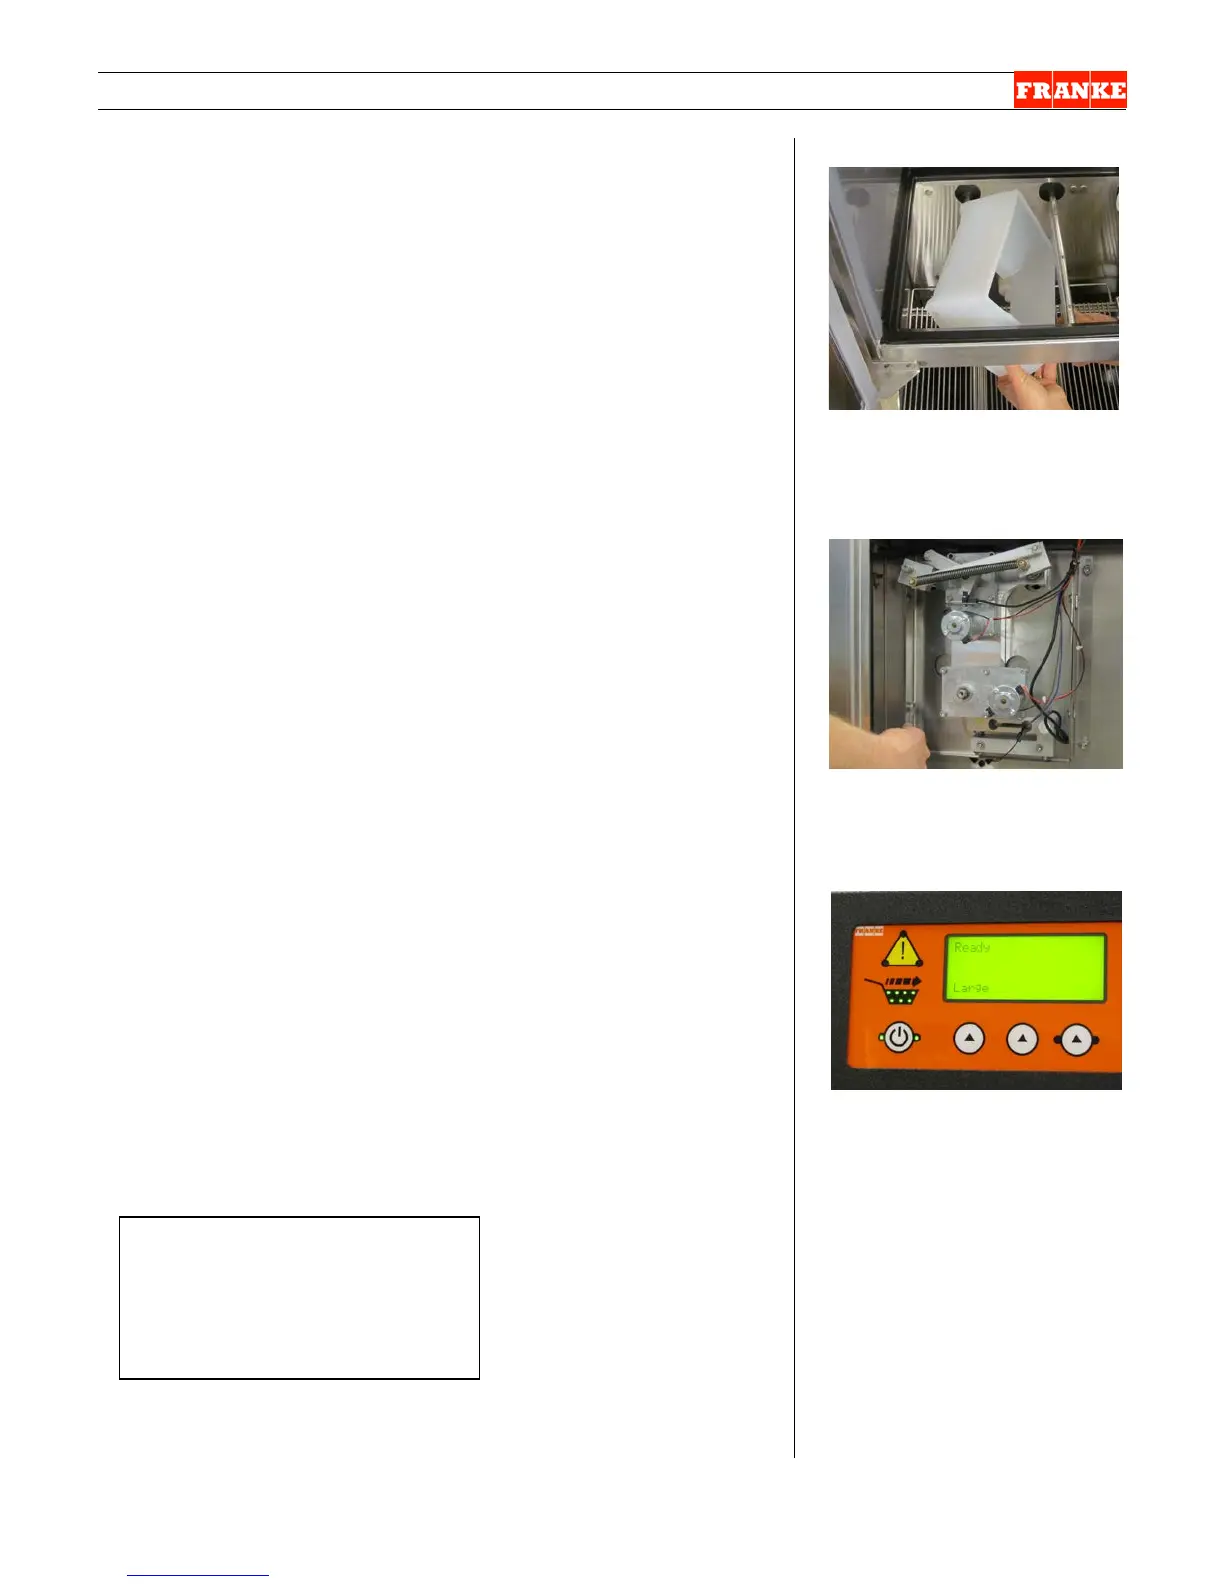
[Photo 5] From front
To remove, distort rubber hopper
to clear freezer front bottom
channel and pull off door shaft.
[Photo 6] From rear
Remove the four Automation
Assembly mounting bolts.
[Photo 7] To Test
If Ready appears on display and
green basket lights are on, place
basket in loading lane and push
against bumper switch.
Rev. 1 6/2012
Medium Phillips screwdriver
3 mm [1/8”] Allen wrench
10 mm box or socket wrench
Needle-nose pliers