1.
If the vehicle was originally equipped with wheel
covers, ensure all wheel covers are present. In-
spect wheel covers for damage or wear. Remove
wheel covers from rear drive wheels, if equipped,
prior to inspecting the tires and wheel compo-
nents.
NOTE: During wheel cover installation, ensure
the V-notch in the liner inner retaining ring is
centered on the valve stem. The inner and outer
retaining rings should be uniformly aligned to
each other and to the wheel rim. The outer re-
taining ring of the liner is equipped with two
canvas flaps. When installing the face cover,
make sure the cover retaining ring is inserted
between the two canvas flaps on the liner outer
retaining ring so that the Velcro strips line up
between the face cover and the liner. Make cer-
tain the detachable view cover is centered on
the face cover, and the Velcro strips are
pressed firmly in place.
2.
Inspect each tire for the following:
•
valve stem caps on every tire, screwed on
finger-tight
•
bulges, cracks, cuts, and penetrations
•
oil contamination (petroleum derivatives will
soften the rubber and destroy the tire)
•
tread depth—if tread is less than 4/32 inch
(3 mm) on any front tire, or less than 2/32
inch (1.5 mm) on any rear tire, replace the
tire
•
debris lodged between duel tire sets
IMPORTANT: Low-rolling resistance (LRR) tires
minimize wasted energy as a tire rolls, thereby
decreasing rolling effort and improving fuel effi-
ciency. If tire replacement is necessary, replace-
ment tires must meet or exceed the rolling resis-
tance of the originally installed tires in order to
maintain compliance with greenhouse gas and
full efficiency regulations (GHG14).
Contact your tire manufacturer/supplier to deter-
mine the rolling resistance of the originally in-
stalled tires. Visit
www.epa.gov/smartway for
additional information and resources.
3.
Check tire inflation.
For inflation pressures and maximum loads, see
the tire manufacturer’s guidelines. Inflate the tires
to the applicable pressures if needed.
If a tire has been run flat or under-inflated, check
the wheel and tire for damage before adding air.
Keep compressed air reservoirs and lines dry
during tire inflation. Use well-maintained inline
moisture traps and service them regularly.
WARNING
Do not operate the vehicle with underinflated or
overinflated tires. Incorrect inflation can stress
the tires and make the tires and rims more sus-
ceptible to damage, possibly leading to rim or
01/31/2011 f422530
1
2
3
4
5
6
7
8
9
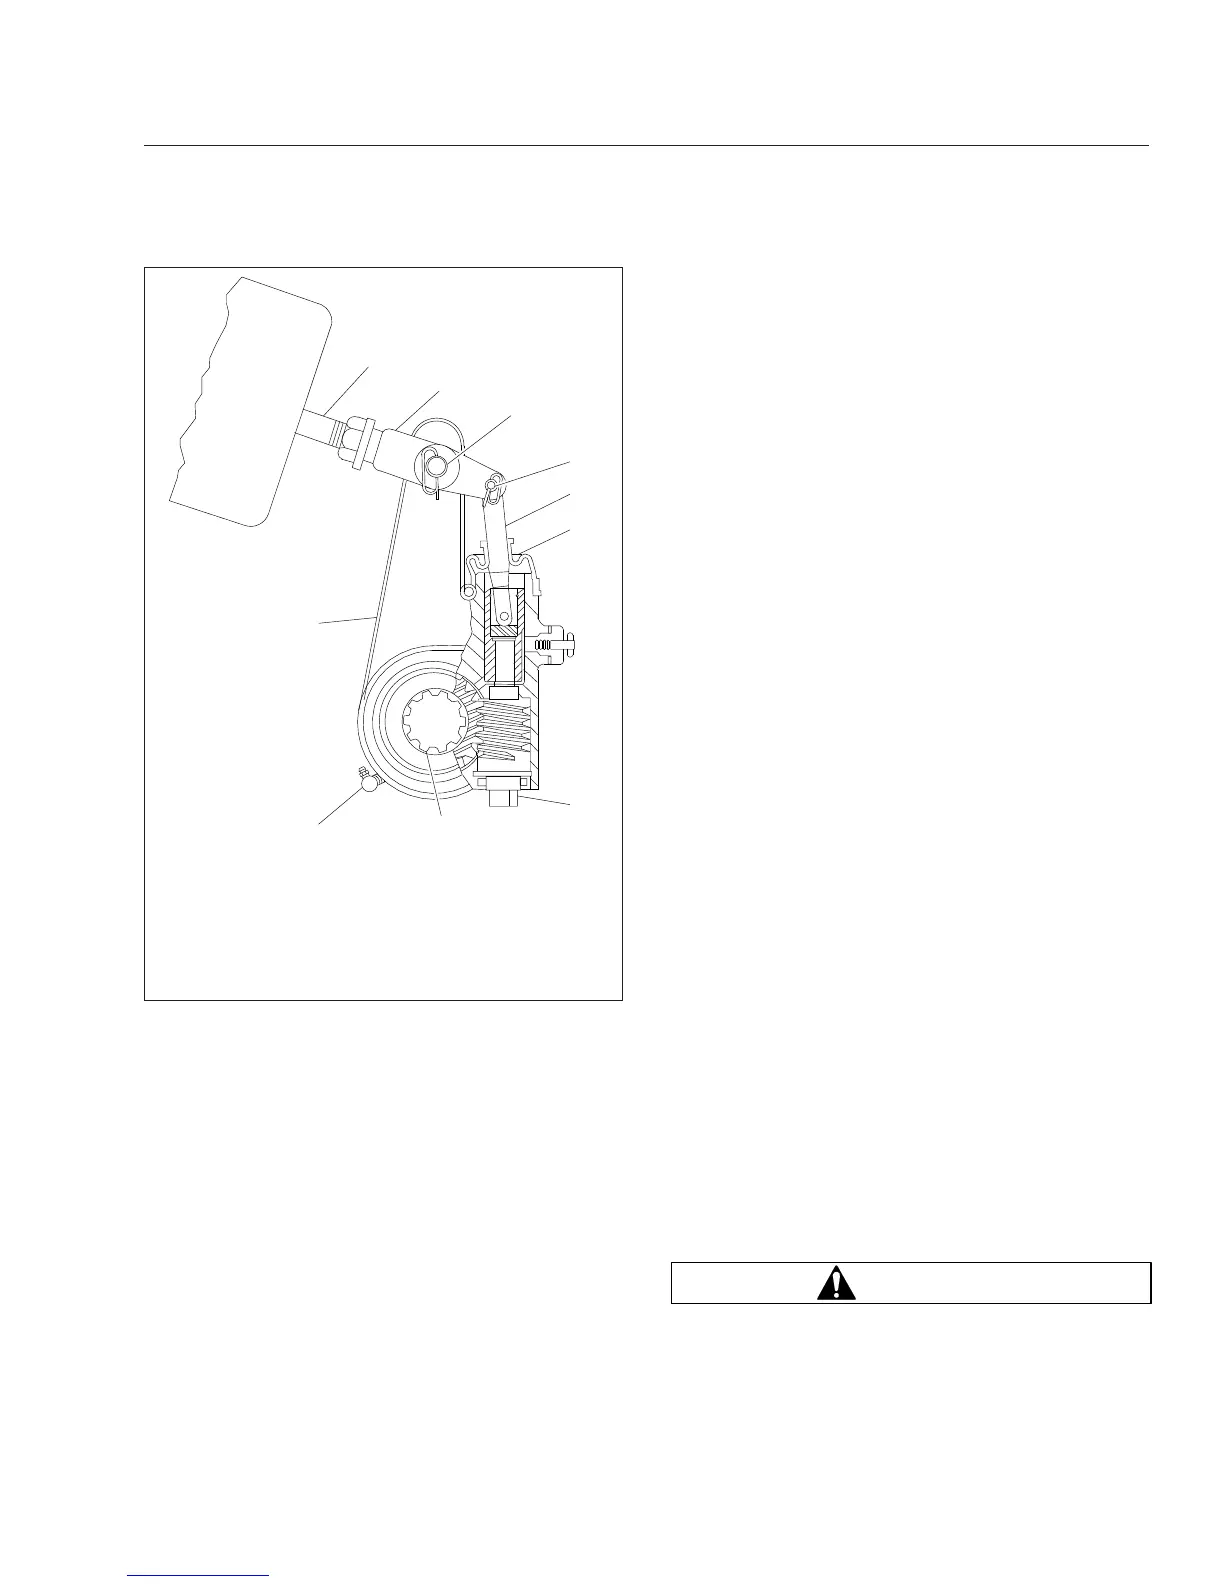
10
1. Grease Fitting (if
equipped)
2. Slack Adjuster
Housing
3. Brake Chamber
Pushrod
4. Clevis
5. Clevis Pin (large)
6. Clevis Pin (small)
7. Actuator Rod
8. Boot
9. Manual Adjusting Nut
10. Camshaft Splines
Fig. 20.2, Meritor Automatic Slack Adjuster
Pre- and Post-Trip Inspections and Maintenance
20.2