6
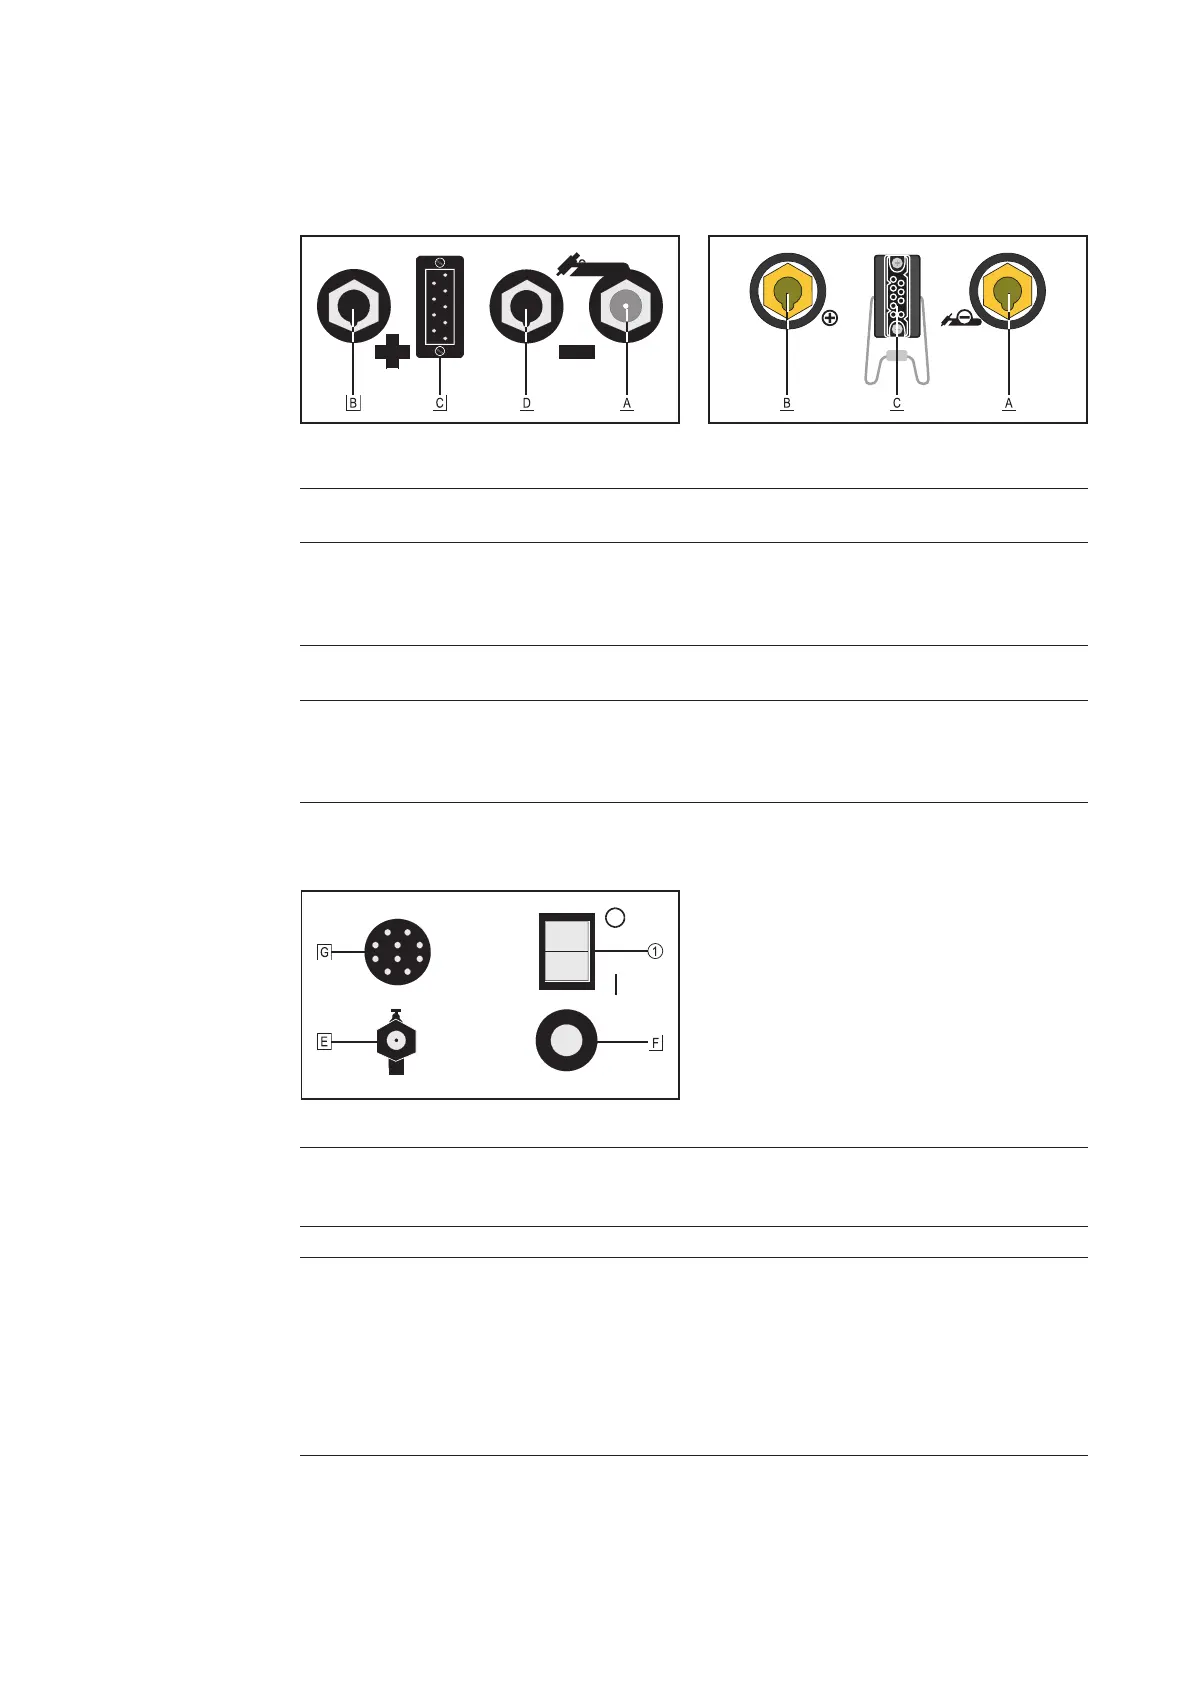
Connection
points on front of
machine
Connections, switches and system add-ons
Fig. 3 Design with central welding torch connec-
tion GWZ
Fig. 4 Design with central welding torch connec-
tion F
[A] TIG TORCH CONNECTION
- for connecting the GAS + CURRENT supply for the welding torch
[B] (+) SOCKET with bayonet coupling
- as the earth cable connection point with TIG welding;
- as the connection either for the manual electrode cable or the earth cable
with manual electrode welding, depending on the type of electrode used.
[C] TORCH CONTROL SOCKET
- Steuerstecker des Schweißbrenners einstecken und verriegeln
[D] (-) SOCKET with bayonet coupling
- only for welding torch central connection GWZ
- as the connection either for the manual electrode cable or the earth cable with
manual electrode welding, depending on the type of electrode used.
[E] GAS CONNECTION
- Screw the terminal nut of the gas hose onto the connection-fitting and tighten
it
[F] MAINS CABLE WITH STRAIN-RELIEF GRIP
[G] CONNECTING SOCKET for remote control unit
- Plug the remote control cable plug into the socket, the right way round, and
tighten the swivel nut
- The desired welding current is set on the remote control unit.
- The machine automatically recognizes the fact that the remote control unit
has been plugged in
- The short-circuit-proof supply voltage to the remote control units protects the
electronics in the event of any damage to the remote control cable.
Fig. 5 Rear side of the machine
Connections and
switches on the
rear of the machi-
ne
 Loading...


