13
ENGLISH
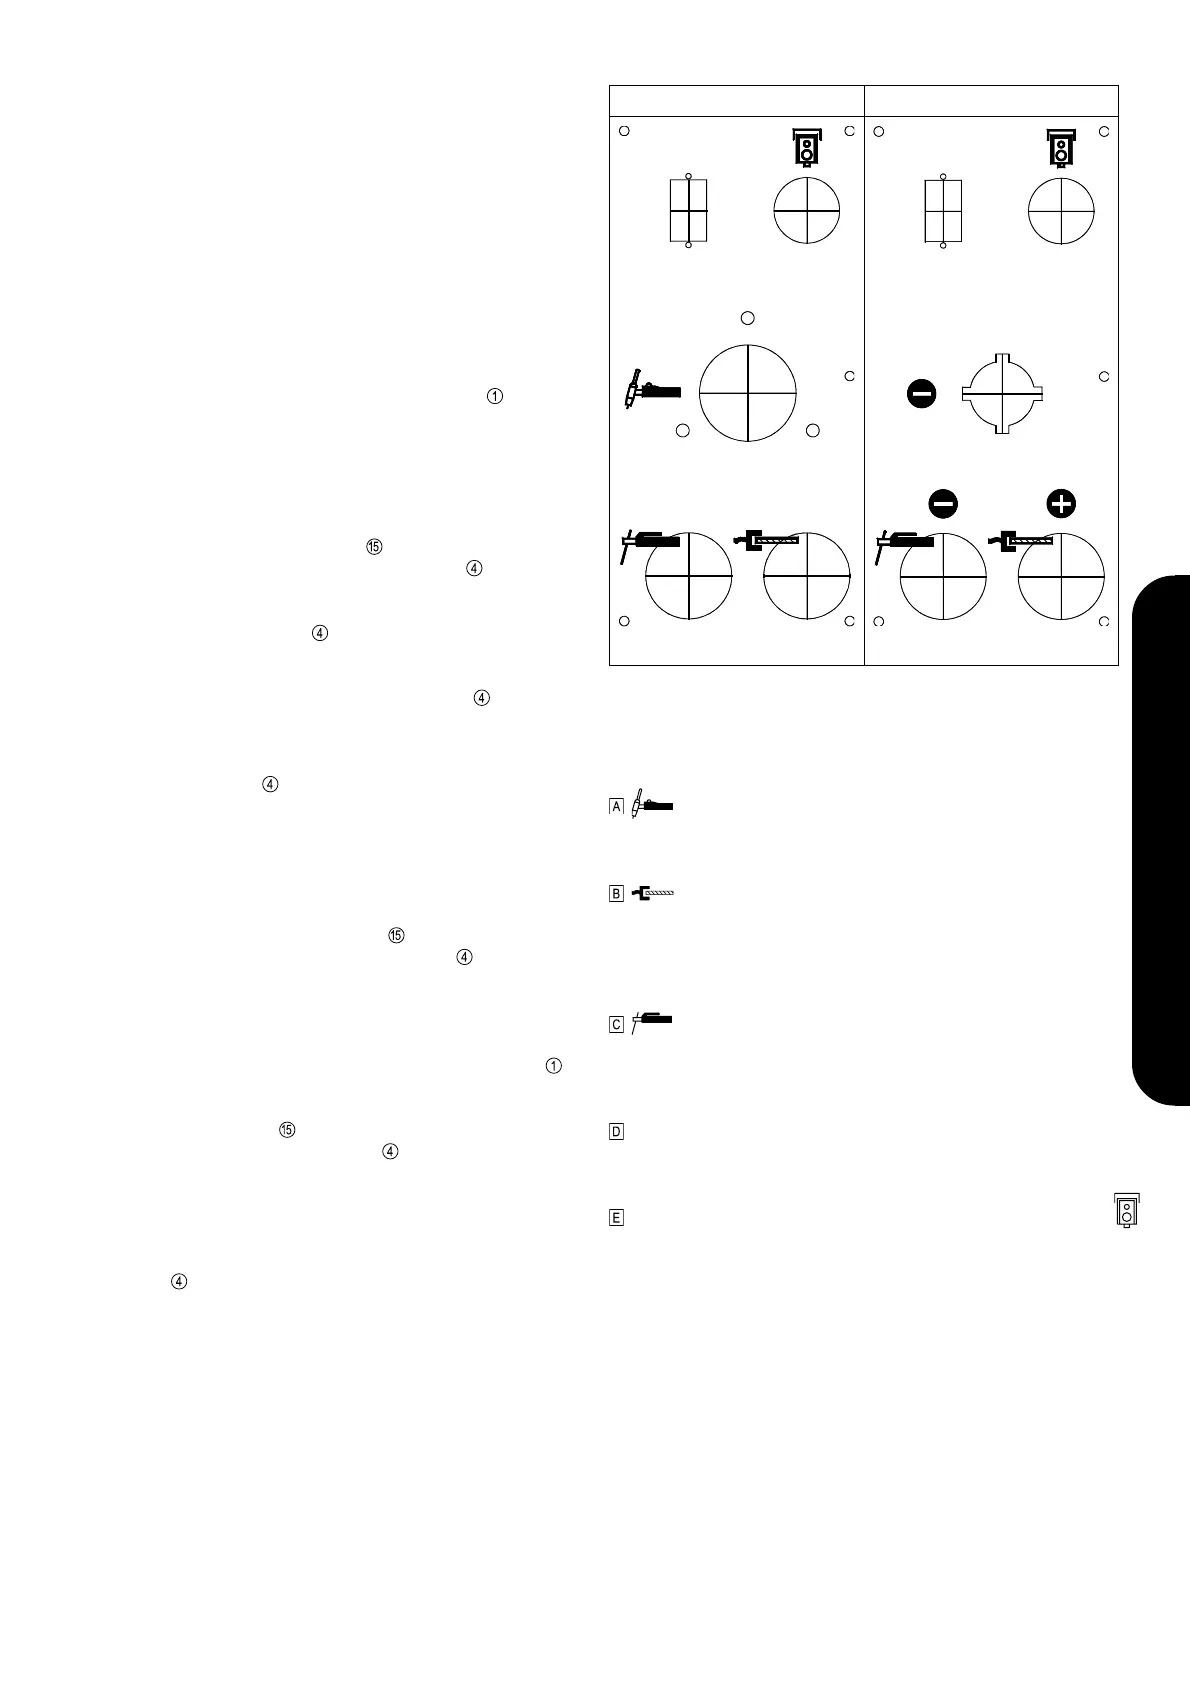
TIG torch connection (gas cooled)
- for connecting the central GAS + CURRENT supply for the
welding torch
SOCKET with bayonet coupling, serves:
a) as the earth cable connection point with TIG welding;
b) as the connection either for the manual electrode cable or
the earth cable with manual electrode welding, depending
on the type of electrode used.
SOCKET with bayonet coupling, serves:
- as the connection either for the manual electrode cable or
the earth cable with manual electrode welding, depending
on the type of electrode used.
TORCH CONTROL SOCKET
- Plug in the control plug for the welding torch, and latch in
place.
CONNECTING SOCKET (10-pole) for remote control unit
- Plug the remote control cable plug into the socket, the right
way round, and tighten the swivel nut
- The machine automatically recognizes the fact that the
remote control unit has been plugged in - there is thus no
need for any internal/external switchover.
- The short-circuit-proof supply voltage to the remote control
units protects the electronics in the event of any damage to
the remote control cable.
- The desired welding current is set on the remote control unit.
2.3 Level 1:
- Service menu with various test programs.
2.4 Level 2:
Codelock: The MW 2000 Fuzzy and Transtig 2000 machi-
nes come with an electronic codelock.
General:
a) The codelock is not activated when the machines leave
the factory.
b) Whenever you change the numerical combination, keep
a written note of it!
c) If the wrong combination is entered 3 times in a row, the
machine switches off automatically and can only be re-
started by turning the mains master switch
OFF and
then ON.
Altering the codelock and switching it on/off:
- Access program level 2, as described in Pt. 1 above
- Enter the existing 3-digit code number:
(on new machines, this is set to “321”).
Use the main current (I
H
) dial to enter the digits from 0-
9. Confirm each digit with selector switch until your 3-
digit combination is complete.
- To change the code number
Use selector switch to move to each digit of the
combination in turn, entering a new digit from 0-9 by
pushing the torch trigger forward. After you have entered
the new combination, use selector switch to move to
the “Cod ON/OFF” point. The codelock can now be
switched on or off with the torch trigger. Either ON or OFF
will appear on the display. Move on to “PRO” by pressing
selector switch .
- PRO (program): For programming the code parame-
ters
(numerical combination plus code ON or OFF).
Push the torch trigger forwards. The machine then asks
you to enter the altered code again. Now enter the new
combination - this code will now be stored in the memory.
Using the main current (I
H
) dial , enter digits from 0-9.
Confirm each digit with selector switch . If the wrong
combination is entered 3 times in a row, the machine
switches off automatically, as described in c) above.
Machine start-up when codelock is activated:
- Switch on the machine at the mains master switch .
The display immediately shows “Cod”, requesting you to
enter the code-number.
- Using the I
H
dial , enter the combination, confirming
each digit with selector switch .
- Once you have entered the 3-digit combination in this
way, the machine is ready for use.
2.5 Level 3 (only on AC machines!):
All parameters can be selected with the function selector
switch
, and altered with the torch trigger.
- ACF AC frequency 40 - 100 Hz
(in “Electrode” and TIG modes)
- POS Positive half-wave (tri, SIN, rEC) only in TIG mode
- nEG Negative half-wave (tri, SIN, rEC) only in TIG mode
- PRO (Program): For storing the parameters that have
been set, by pushing the torch trigger forward.
[tri (=triangle), SIN (=sinus), rEC (=square-wave)]
Fig. 11 Torch / welding-cable connection points on front of machine
MAGIC WAVE 2000 Fuzzy TRANSTIG 2000