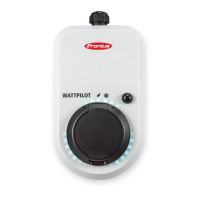
Pressing for more than 2.0 s
Pressing the pushbutton repeatedly changes the preset charging current (in
amperes). The level of the set charging current is indicated by the LED status in-
dicator (see LED status indicator on page 17).
The level of the preset charging current can be adjusted in the app (see Current
level on page 49).
Standard settings
-
Fronius Wattpilot Go 11 J 2.0 / Home 11 J 2.0: 6 A, 10 A, 12 A, 14 A, 16 A
-
Fronius Wattpilot Go 22 J 2.0 / Go 22 J 2.0 AUS: 10 A, 16 A, 20 A, 24 A, 32 A
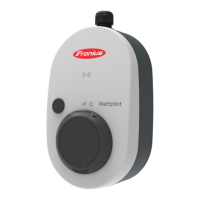
ID chip The ID chip can be used to personalise access to the Fronius Wattpilot. The ID
chip is used for authentication and for recording user-specific charging amounts.
In the app settings, authentication for charging can be activated under "Access
management" and "Authentication required" (see Access management on page
52). Charging with authentication activated can be carried out after scanning
the supplied ID chip or by providing confirmation in the app. To scan, hold the ID
chip directly in front of the card reader of the Wattpilot.
Each ID chip can be assigned a name in the app under "ID chips". The stored
charging amount per ID chip can be viewed in this menu (see ID chips on page
53).
No authentication is required in order to assign the charging amount to the ID
chips.
Reset card The reset card resets all settings (e.g. access management, WLAN and LED set-
tings) to the factory settings. The taught-in ID chips and the corresponding char-
ging amounts continue to be stored.
The following information is printed on the reset card.
-
"Serial number" - serial number of the Wattpilot
-
"Hot spot SSID" - WLAN network name of the Wattpilot
-
"Hot spot key" - WLAN password of the Wattpilot
-
"QR code" - key to connect the app to the Wattpilot hot spot
Resetting the Wattpilot
1
Hold the reset card in front of the card reader.
2
All LEDs briefly light up red.
NOTE!
Keep the reset card safe!
The reset card contains all access
data.
▶
TIP: Keep the reset card in the car.
16
 Loading...