How to Perform a Scan (for Mac OS users)
263
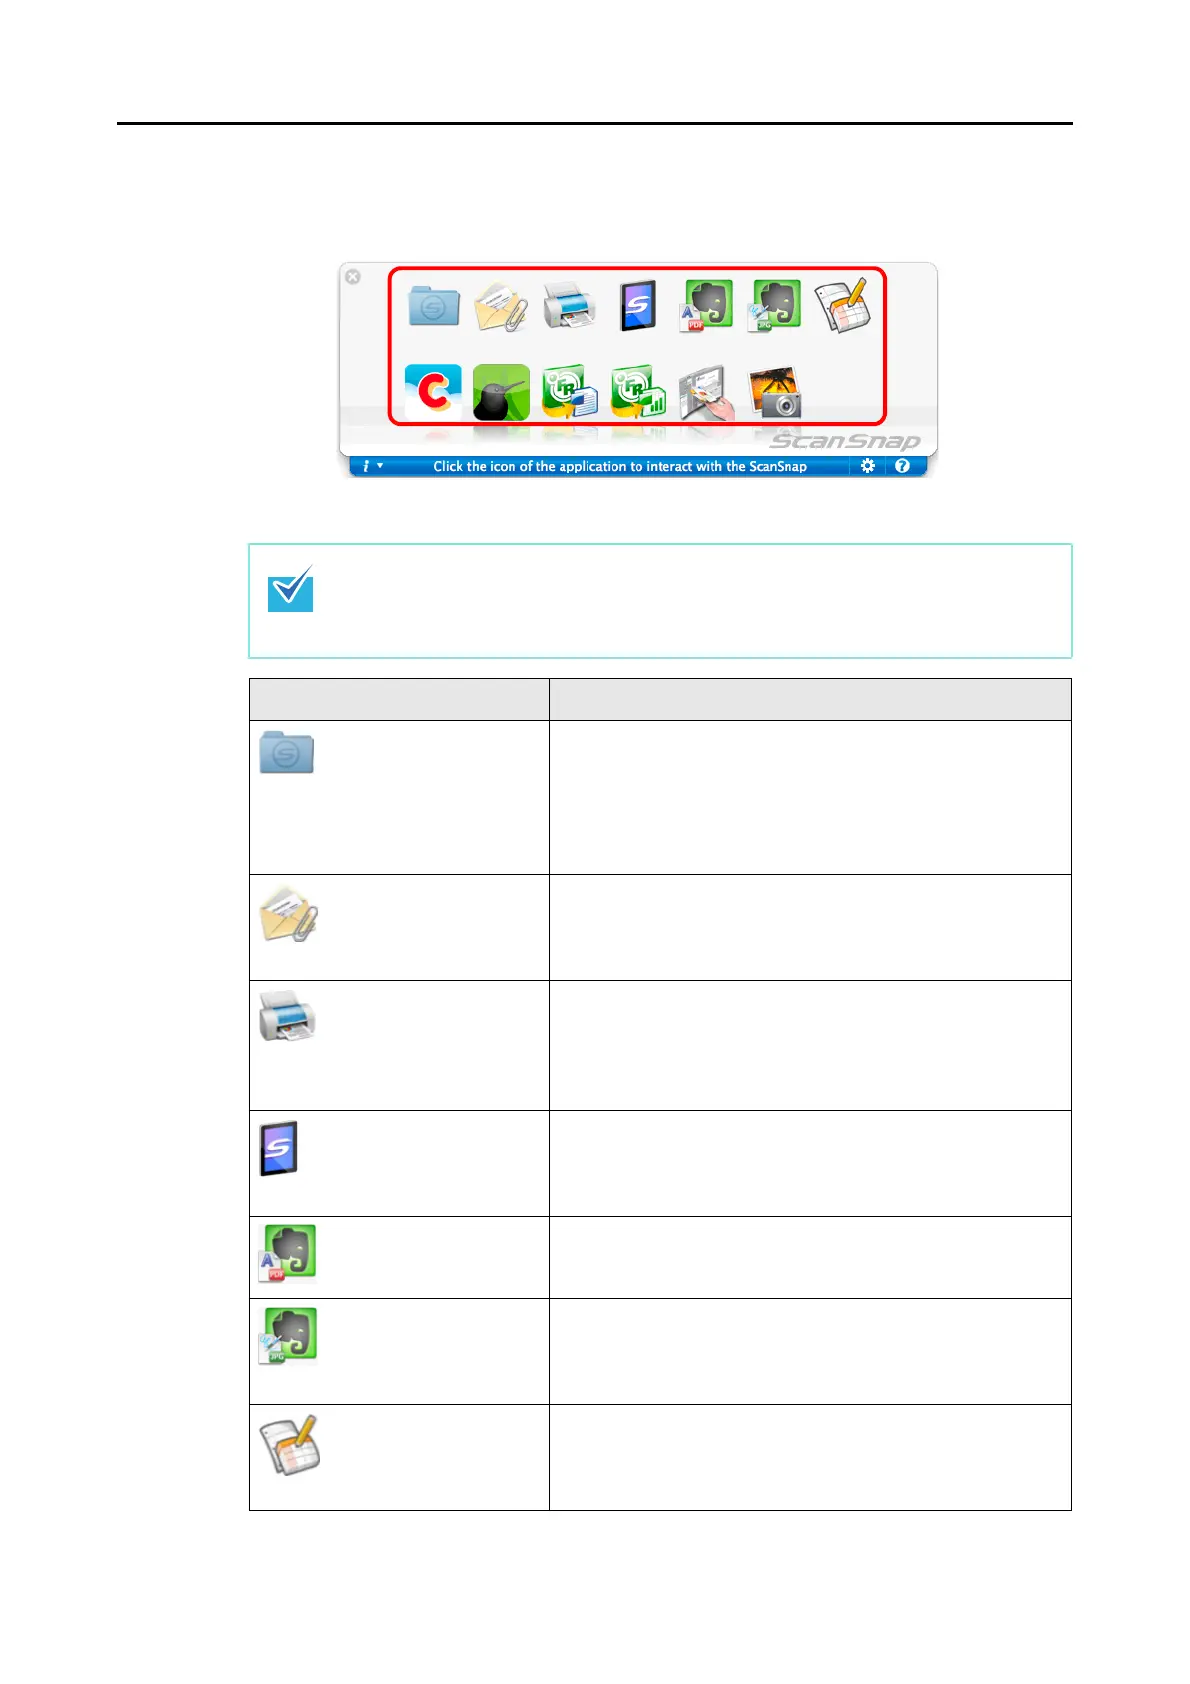
9. In the Quick Menu, click the icon of the application to link with ScanSnap
Manager.
D The selected application is started.
z To specify which applications to display/hide in the Quick Menu, or change the display
order of the applications, refer to "Quick Menu Settings" (page 270).
z To select an application to link with ScanSnap Manager before scanning, refer to
"Without Using the Quick Menu" (page 265).
Application Description
Scan to Folder Displays the [Scan to Folder] window.
You can specify the destination folder to save the scanned
images.
For details about how to continue the process after you select
this item, refer to "Saving Data in a Specified Folder" (page
290).
Scan to E-mail Displays the [Scan to E-mail] window.
Scanned image is attached to an e-mail message.
For details about how to continue the process after you select
this item, refer to "Attaching Files to E-Mail" (page 297).
Scan to Print Displays the [Print] window.
Scanned image can be printed.
For details about how to continue the process after you select
this item, refer to "Using the ScanSnap as a Copy Machine"
(page 307).
Scan to Mobile Displays the [Scan to Mobile] window.
Scanned image is saved to a mobile device.
For details about how to continue the process after you select
this item, refer to "Saving Data to a Mobile Device" (page 373).
Scan to Evernote
(Document)
(*1) (*2)
Scanned image is saved as a PDF file in Evernote.
For details about how to continue the process after you select
this item, refer to "Saving Documents to Evernote" (page 335).
Scan to Evernote (Note)
(*1) (*2)
Scanned image is saved as a JPEG file in Evernote.
For details about how to continue the process after you select
this item, refer to "Saving Handwritten Notes to Evernote" (page
342).
Scan to Google Docs(TM)
(*1)
Scanned image is saved as a PDF file in Google Docs.
For details about how to continue the process after you select
this item, refer to "Saving Documents to Google Docs" (page
347).