Turning the ScanSnap On
1. Turn on the computer.
a The computer starts up and the ScanSnap Manager icon appears in the Dock.
HINT
l If the ScanSnap Manager icon is not displayed in the Dock, click [Applications] from the
sidebar in Finder, click [ScanSnap], and then double-click [ScanSnap Manager].
l If ScanSnap Manager does not automatically start when you log in to the computer, display
the [System Preferences] window and select [Users & Groups] → [Current User] → [Login
Items] → [ ] → [ScanSnap] → [ScanSnap Manager].
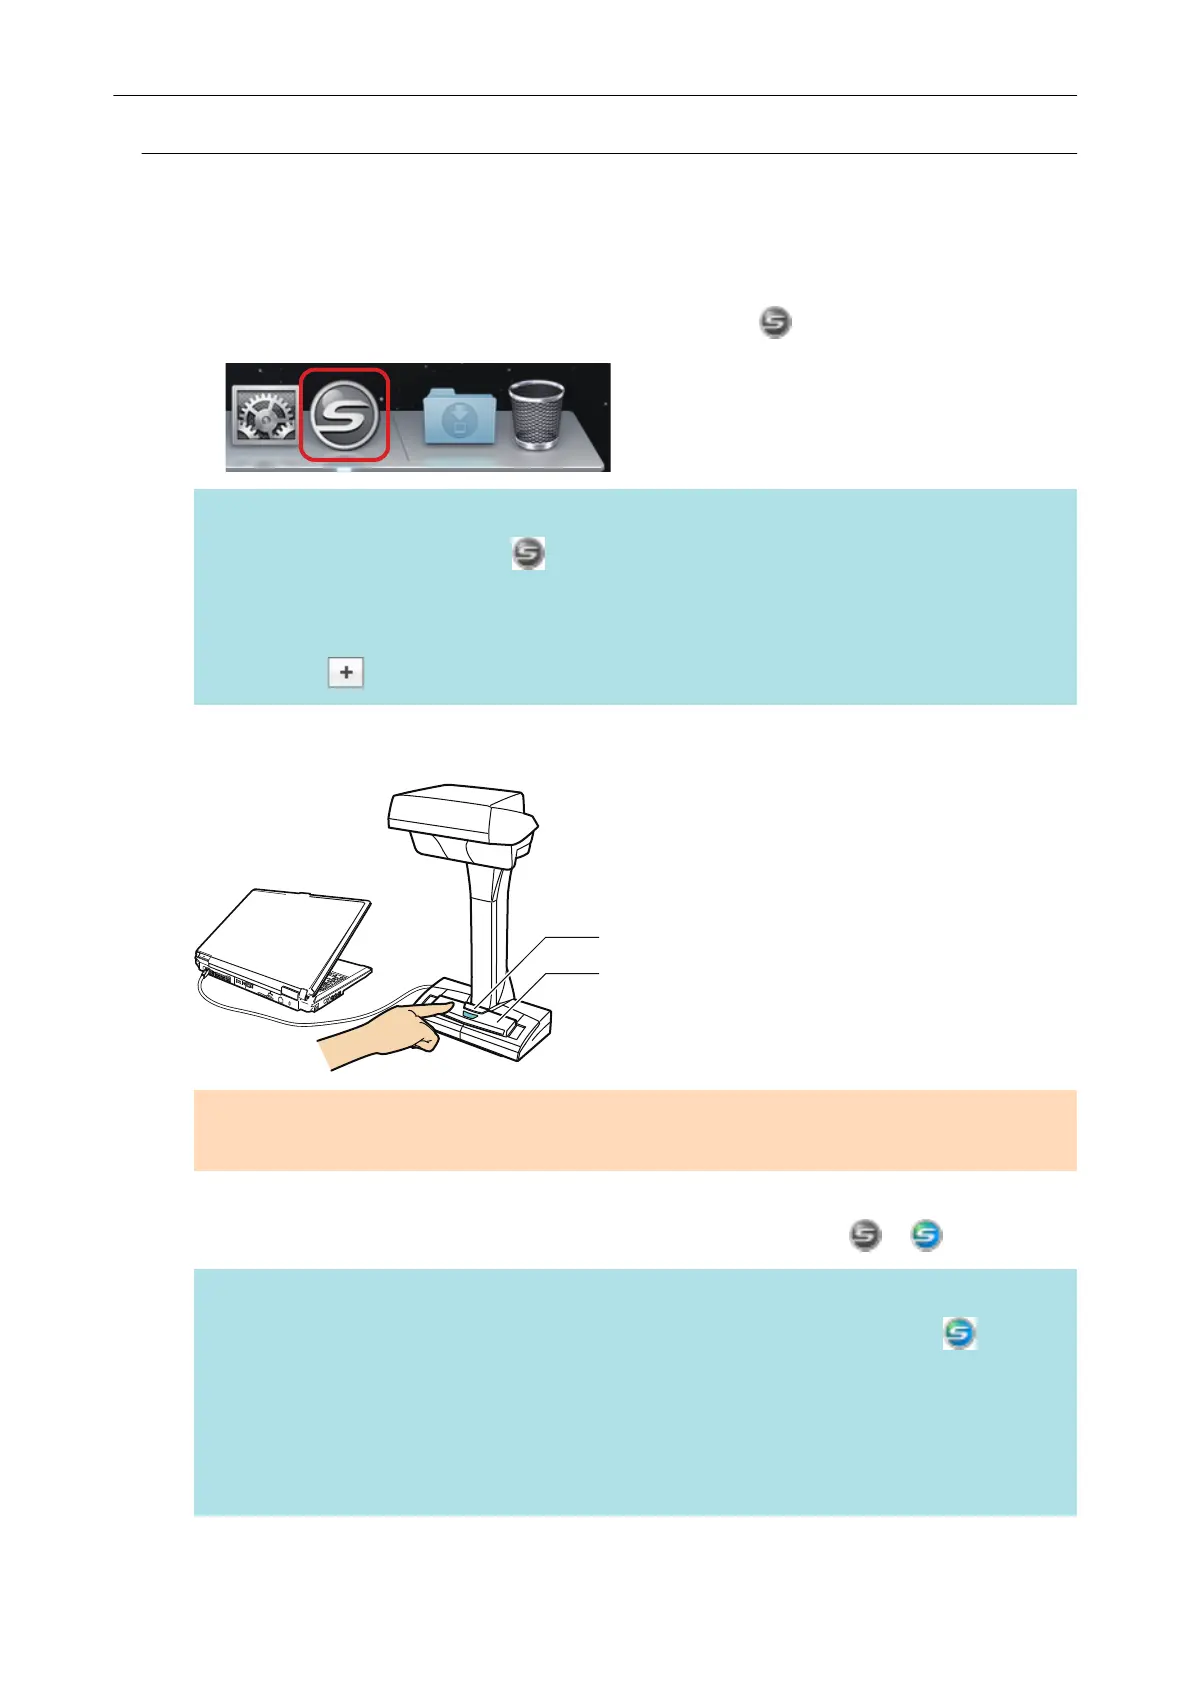
2. Press the [Scan] or [Stop] button on the ScanSnap to turn the power on.
[Scan] Button
[Stop] Button
ATTENTION
When turning the power on, do not cover the white sheet with a hand.
a The [Scan] button lights up in blue.
In addition, the ScanSnap Manager icon in the Dock changes from to .
HINT
l It may take more time for the ScanSnap Manager icon in the Dock to change to
depending on computer performance, operating environment, or loading, for example, when
many software programs are running at the same time.
l When the ScanSnap is turned on, a notification window notifies you of the ScanSnap's
communication status.
To disable notifications of the ScanSnap's communication status, change the setting in the
following procedure:
Turning the ScanSnap On or Off
47
 Loading...