1. OPERATION
1-33
1
10. Do one of the following according to the item selected at step 9.
Fish Type
1) Select [ACCU-FISH], [Fish School], or [Bottom Fish(Only BL)], then press the
KNOB.
For [ACCU-FISH] go to step 2). For other choices go to step 6).
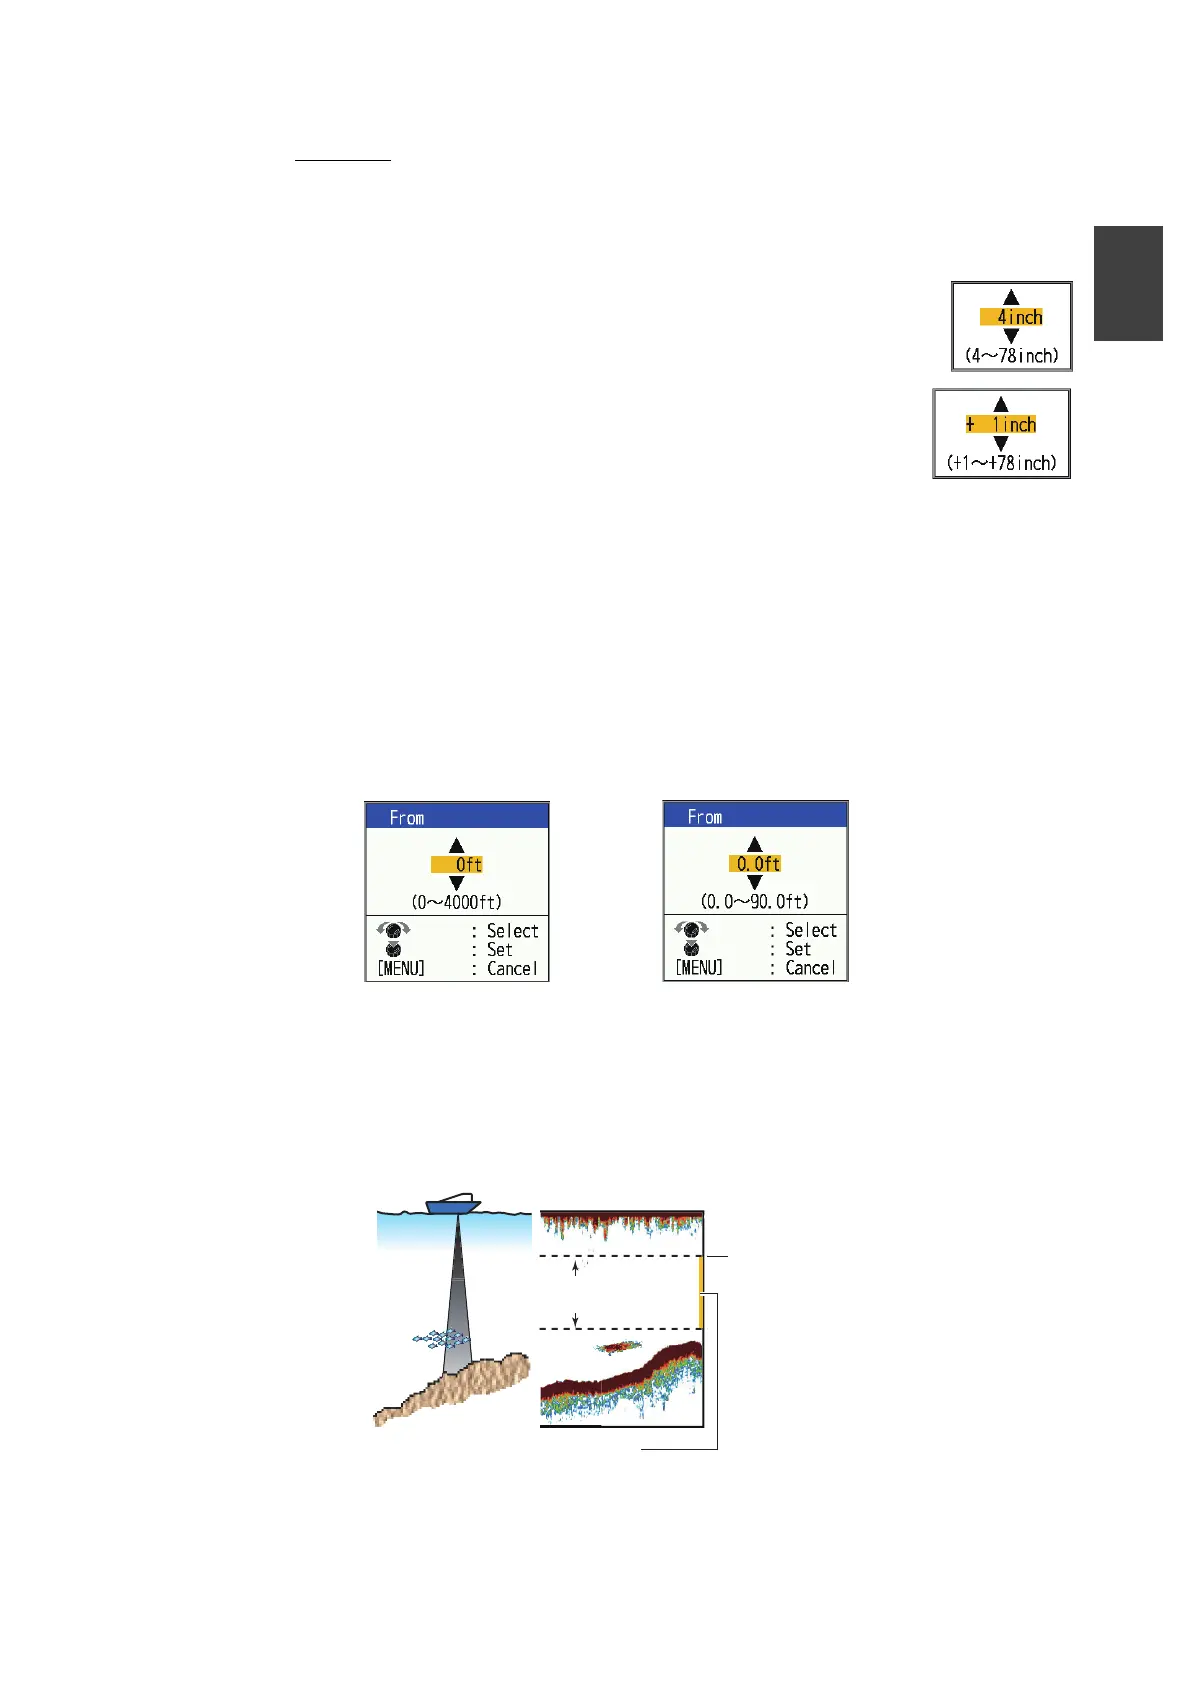
2) Select [From] (under [Fish Type]), then press the KNOB.
3) Set the minimum fish length, then press the KNOB.
4) Select [Span] (under [Fish Type]), then press the KNOB.
5) Set the width of the alarm, then press the KNOB. Go to step
8.
Note: The maximum measureable fish length is 78 inch.
6) Select [Fish Level], then press the KNOB.
7) Select the echo strength that triggers the alarm, referring to the description be-
low.
[Weak]: Echoes stronger than light- blue* trigger the alarm.
[Medium]: Echoes stronger than yellow* trigger the alarm.
[Strong]: Echoes stronger than red* trigger the alarm.
*: When [Color Scheme] is set to [White] on the [Display] menu.
8) Select the [From] that is below [Depth], then press the KNOB.
9) Enter the width of the alarm, then press the KNOB.
The alarm marker (indicated as a yellow bar at the right-hand edge of the
screen) appears at the starting point for the alarm. The marker appears only
when the corresponding alarm is active. The starting depth for the ACCU-
FISH
TM
and [Fish School] alarms is the transducer position. For the [Bottom
Lock] alarm the starting depth is the distance from the bottom.
10) Select [Span], then press the KNOB.
[ACCU-FISH],[Fish School] alarms [Bottom Fish (Only BL)] alarm
Starting
depth
Alarm range
(width from starting depth)
Alarm marker
- ACCU-FISH, Fish School, Bottom: Left side
- Bottom lock: Center