1. OPERATION
1-44
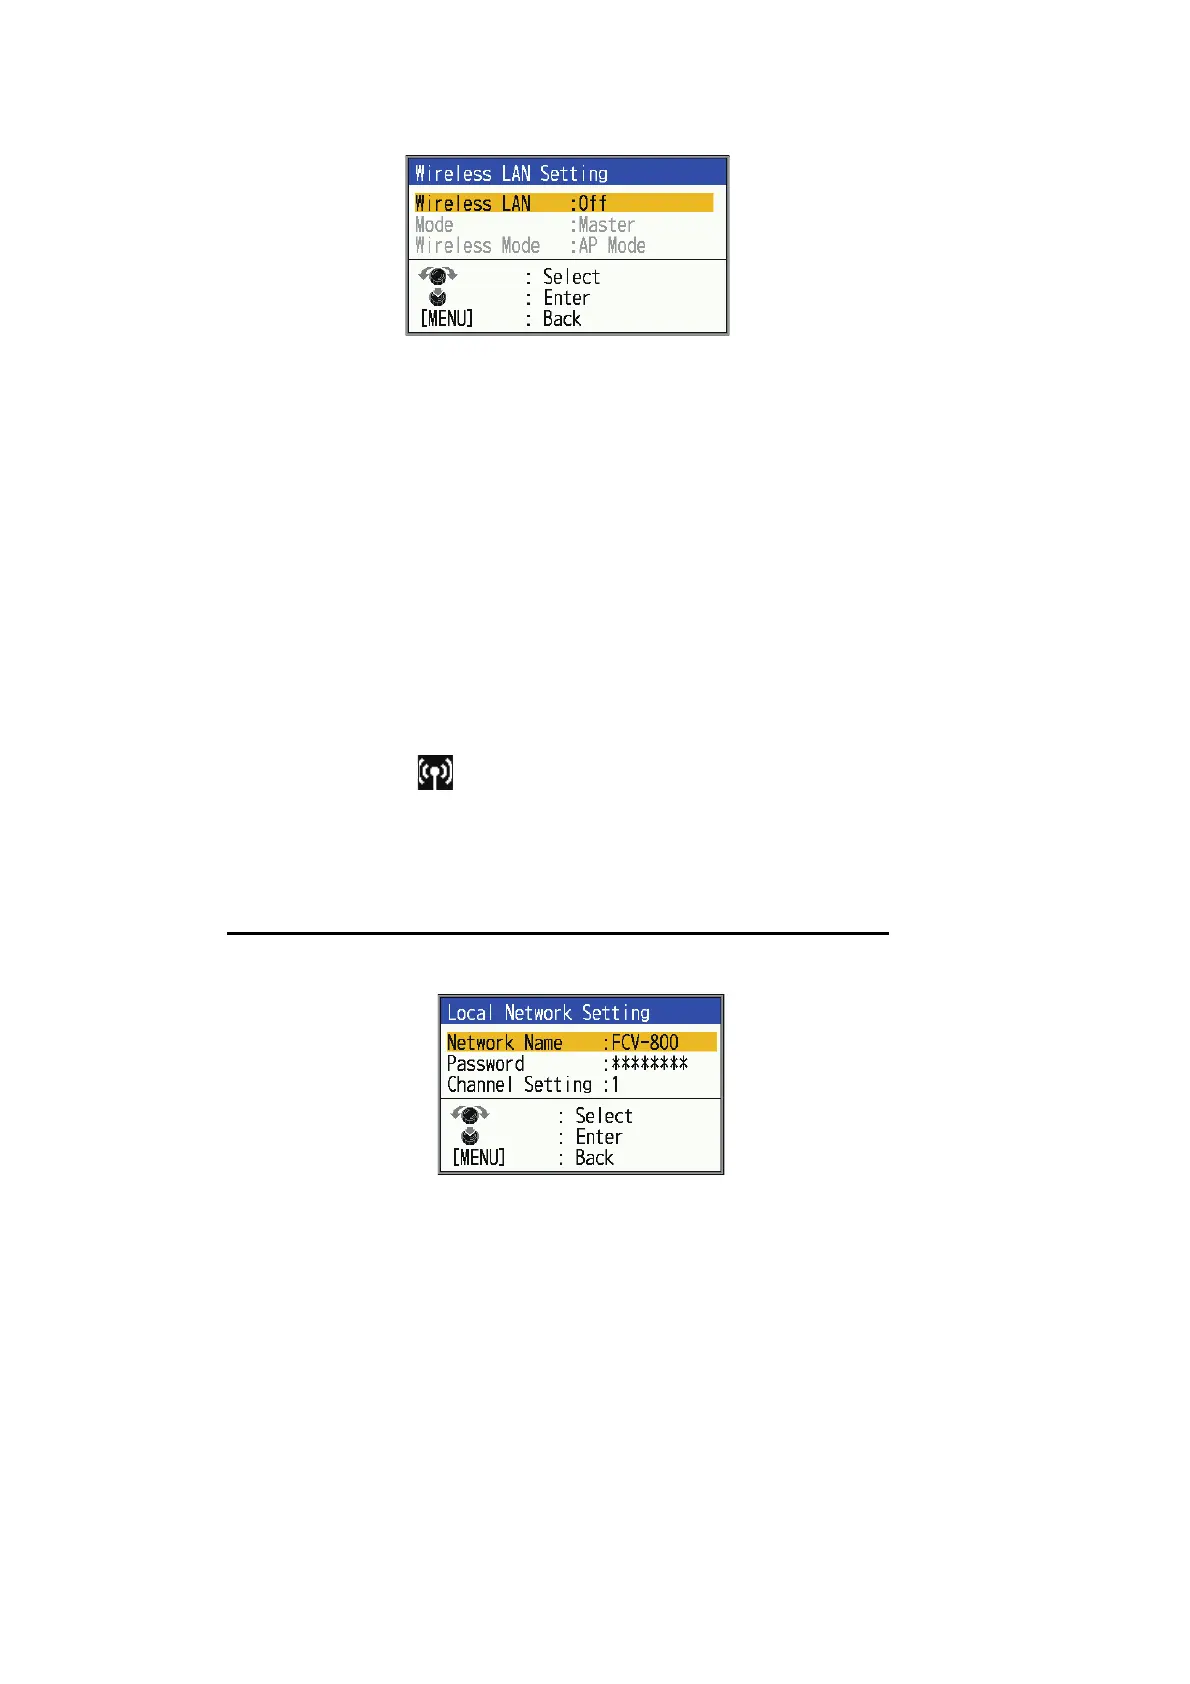
4. Select [Wireless LAN Setting] and press the KNOB.
5. Select [Wireless LAN] and press the KNOB.
6. Select [On] and press the KNOB.
7. Select [Mode] and press the KNOB.
8. Select [Master] and press the KNOB.
9. Select [Wireless Mode] and press the KNOB.
10. Select one of the following settings and press the KNOB.
• [AP Mode]: Use the FCV main unit (main monitor) as an access point.
• [Client Mode]: Use existing access point.
11. Press the MENU/ESC key.
‘‘Restart to apply changes?‘‘ message appears.
12. Select [Yes] and press the KNOB.
The system restarts. After restarting, if you selected "AP Mode" in step 10, a wire-
less LAN icon ( ) will appear in the upper right corner of the screen. This icon
indicates that the FCV is used as an access point.
13. Repeat step 1 to 3 to show the [Wireless LAN] setting window.
14. Depending on the item selected in step 10, do one of the following procedures.
For [Client Mode] (Connecting to existing FCV-600/800 units)
1) Select [Connect Network Setting] and press the KNOB.
Note: In the example above, [Network Name] shows a default setting (the
connected unit's name). Your network may show either FCV-600 or FCV-800,
depending on your installed unit.
2) If you do not need to change the network, go to step 4. To change the network,
select [Network Name], then press the KNOB. The [Network Name] window
appears.
3) Set the desired network name (max. 32 characers). See page 1-16 for details.
4) Select [Password] and press the KNOB.
[Password] setting window will be shown.
 Loading...