EasyManuals Logo

GE ApexPro Service Manual

GE ApexPro
198 pages
To Next Page IconTo Next Page
To Previous Page IconTo Previous Page
Page #152 background imageLoading...
Page #152 background image
7-34 ApexPro™ Telemetry 2001989-203C
Parts lists, drawings and replacement
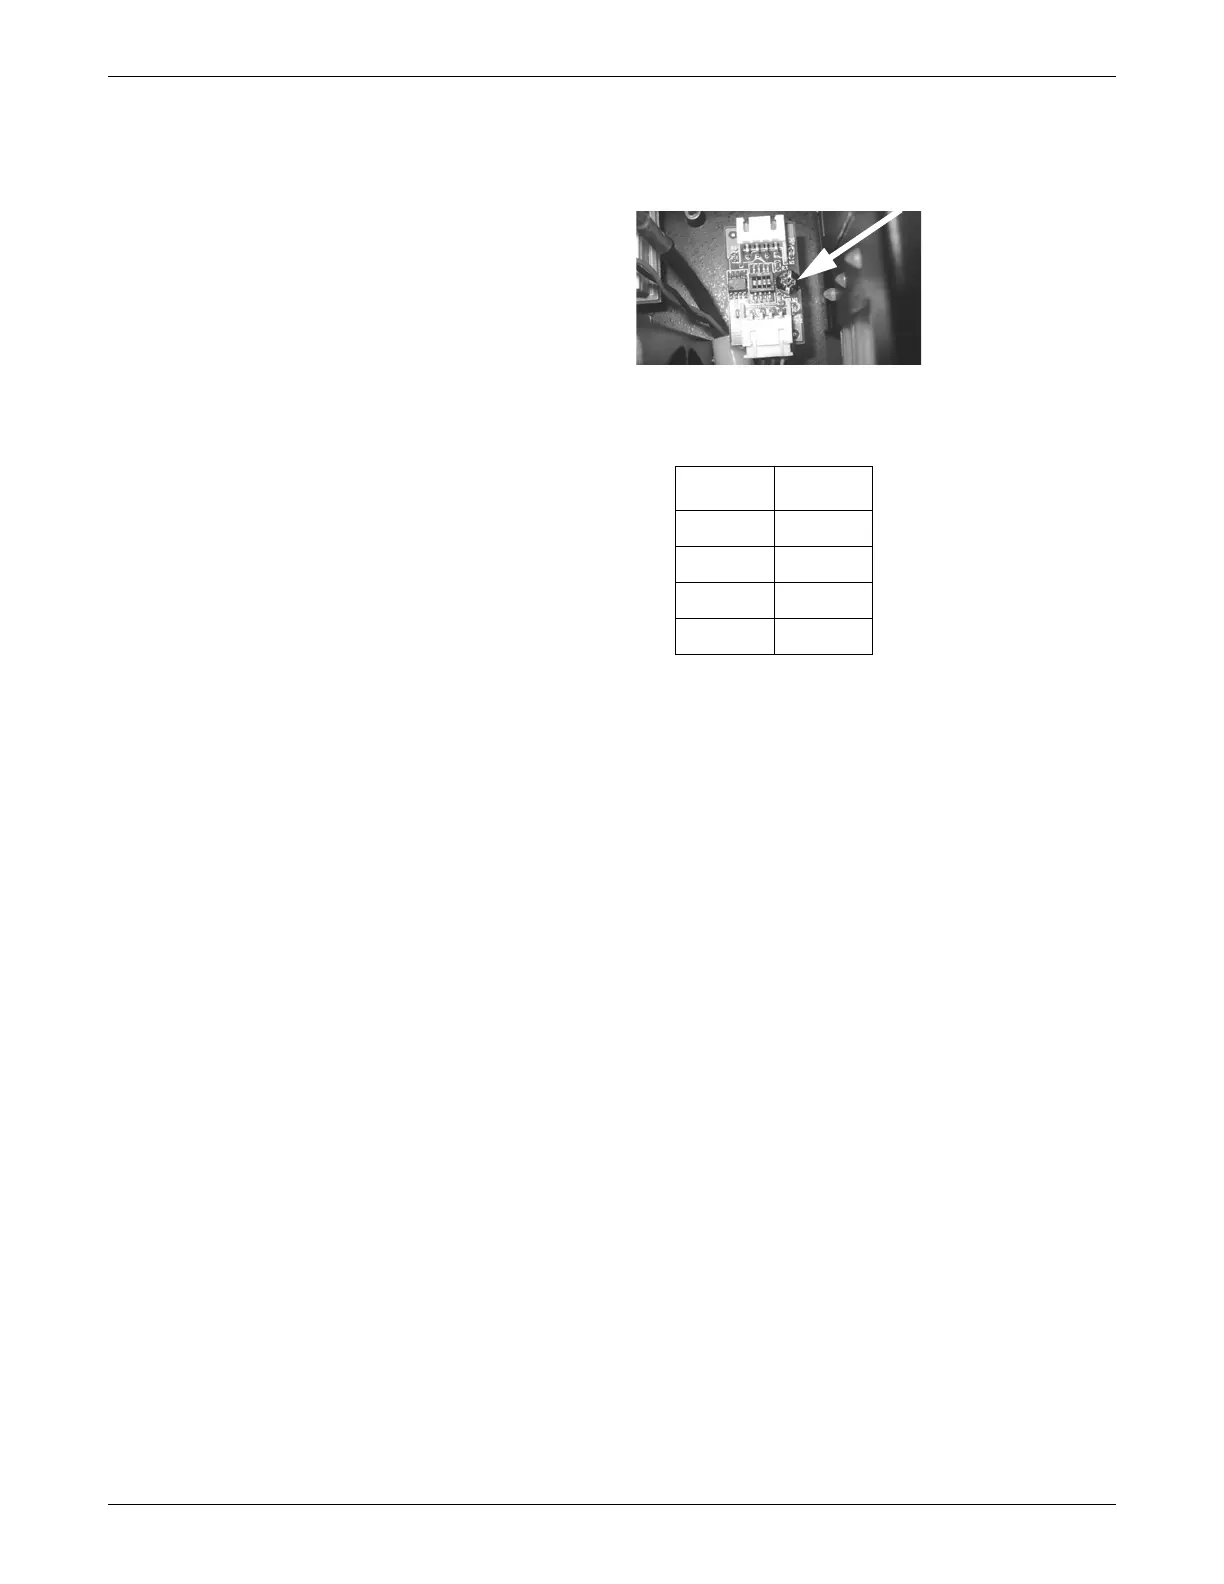
9. Using a phillips screwdriver, remove the screw securing the temperature sensor
at the front left corner of the chassis floor, behind the left edge of the chassis fan.
077A
NOTE
Note the position of the temperature sensor DIP switches for re-assembly.
10. Remove the temperature sensors and the associated temperature sensor wire
harnesses, cutting/removing any ties as required.
11. Reverse the steps in this procedure to install the temperature sensors.
Number Position
1OFF
2ON
3OFF
4ON

Table of Contents

Other manuals for GE ApexPro

Questions and Answers:

Question and Answer IconNeed help?

Do you have a question about the GE ApexPro and is the answer not in the manual?

GE ApexPro Specifications

General IconGeneral
BrandGE
ModelApexPro
CategoryMedical Equipment
LanguageEnglish

Related product manuals