7-16 ApexPro™ Telemetry 2001989-203C
Parts lists, drawings and replacement
185A
9. Perform steps 2-5 in reverse order to reseat the SNMP Extension board.
CAUTION
EQUIPMENT DAMAGE— Use extra care to make sure the pins
are properly aligned before seating the SNMP extension board.
Bent/broken pins may result if the pins are misaligned.
Drive bay
1. Complete the preparation procedures. See Field replacement preparation on page
7-3.
2. Remove the chassis cover. See Chassis cover on page 7-6.
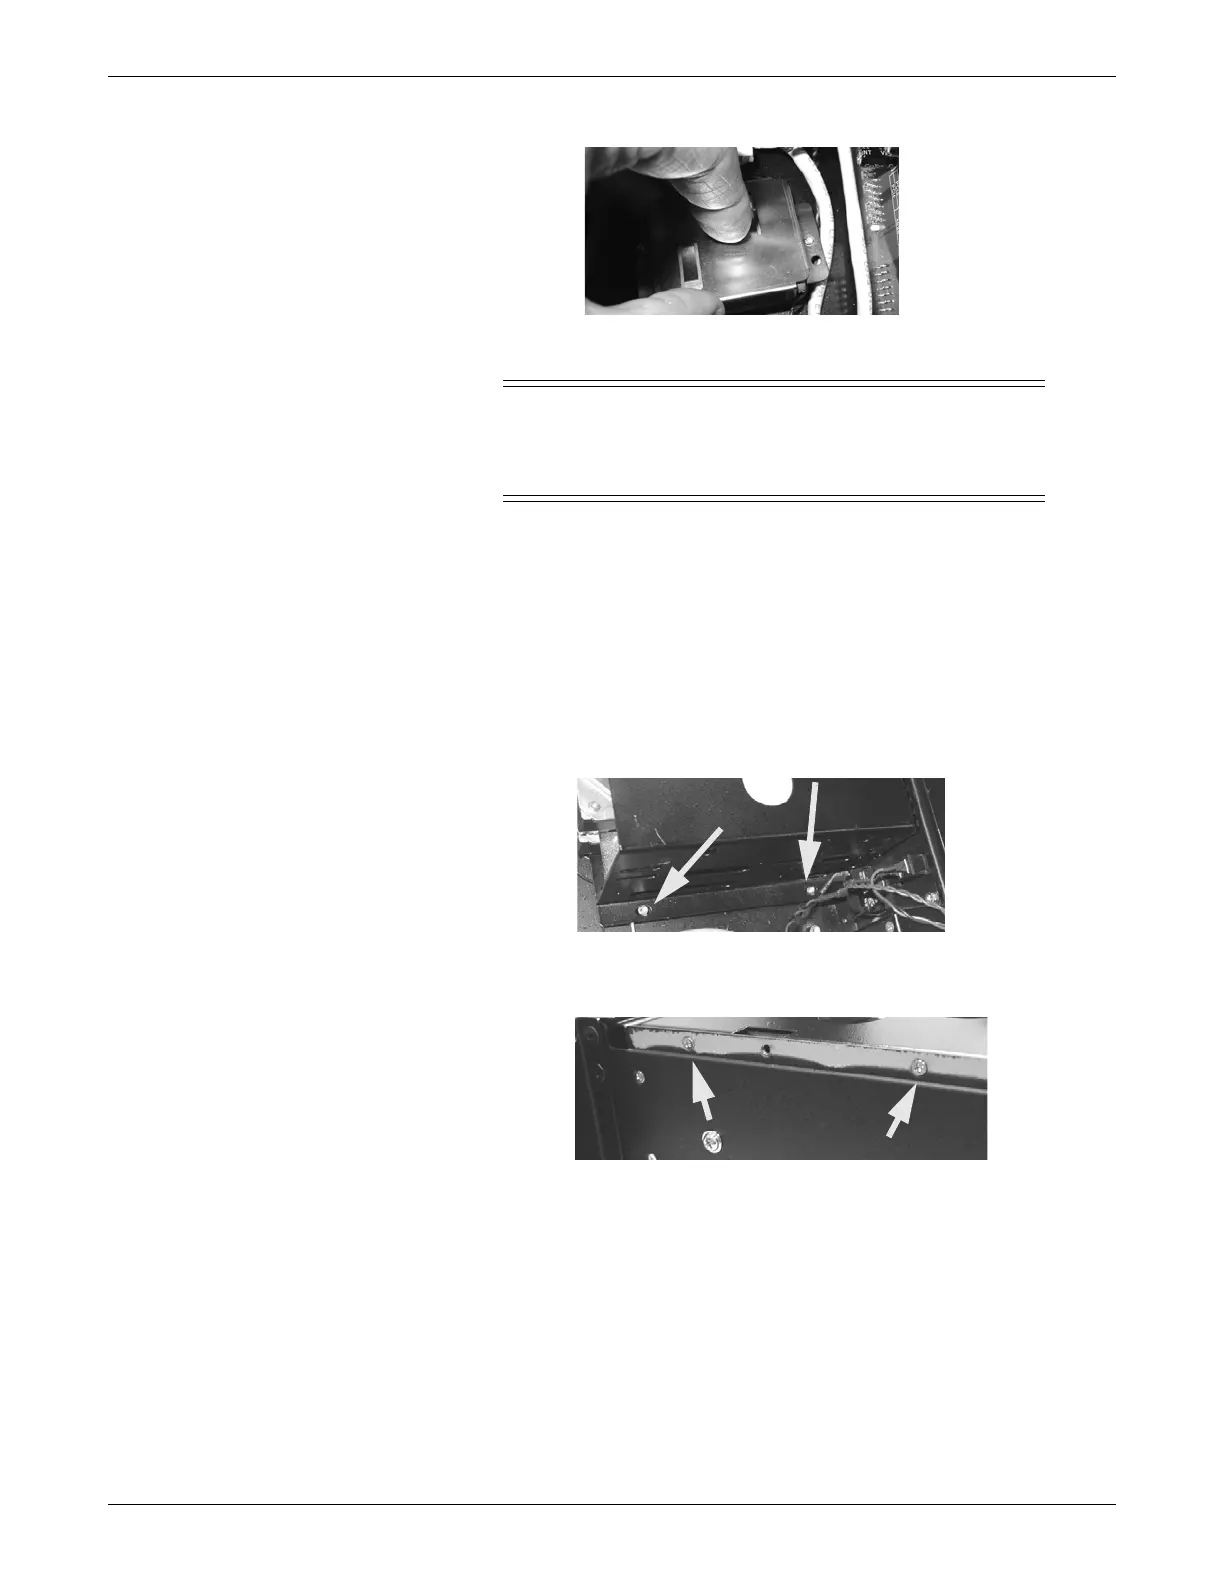
3. Using a phillips screwdriver, remove the 2 screws securing the inside edge of the
drive bay to the bottom of the chassis.
016A
4. Using a phillips screwdriver, remove the 2 screws securing the outside edge of
the drive bay to the right side of the chassis.
017A
5. Disconnect the connector from the back of the temperature sensor located along
the left edge of the CD/top hard drive carrier.