CHAPTER 2: INSTALLING THE D20MX
D20MX HARDWARE USER’S MANUAL GE INFORMATION 33
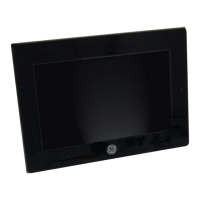
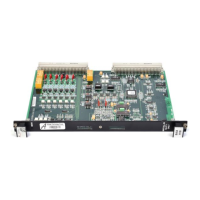
Figure 8: D20 chassis front panel - D20MX with rear fiber optic connectors
Installation steps
The D20MX can be installed in a non-VME (GE part number 500-0305) or VME (GE part
number 500-0280) D20 chassis. If you are retrofitting an existing D20 device, See section:
“Retrofitting the D20MX in an existing D20” on page 35.
To install the D20MX in a D20 chassis
1. Ensure that you are sufficiently grounded to prevent ESD damage to the D20MX or
other components. See section: “Grounding the D20MX” on page 38.
2. Remove the D20MX from its static-protective packaging. Set the packaging aside and
save it for future reuse. See section: “Unpacking the D20MX” on page 38.
The D20MX must be placed on an anti-static surface while not installed in the chassis.
3. Remove all horizontal blank faceplates.
4. Gently install the D20MX in the first (bottom-most) slot. Align the edge of the D20MX
with the guide rails in the D20 chassis.
The D20MX is a double-height board that occupies two slots in the chassis.
Handle the D20MX with care, since SMT components are located on the bottom side.
5. Push the front panel of the D20MX until it is seated properly and firmly connected to
the backplane of the chassis.
6. Tighten the front panel retaining screws to 3.5 in-lbs to secure the D20MX to the
chassis.
7. For the 526-3005LF version:
7.1. Remove the position 1 and position 2 vertical blank plates from the D20
chassis.
7.2. Remove the D20MX Fiber Card from the static-protective packaging.
D20 chassis
D20 power supply
D20MX processor
D20MX cover
plate
D20MX cover plate filler
D20MX Fiber Optic card
Protective earth
terminal