– 21 –
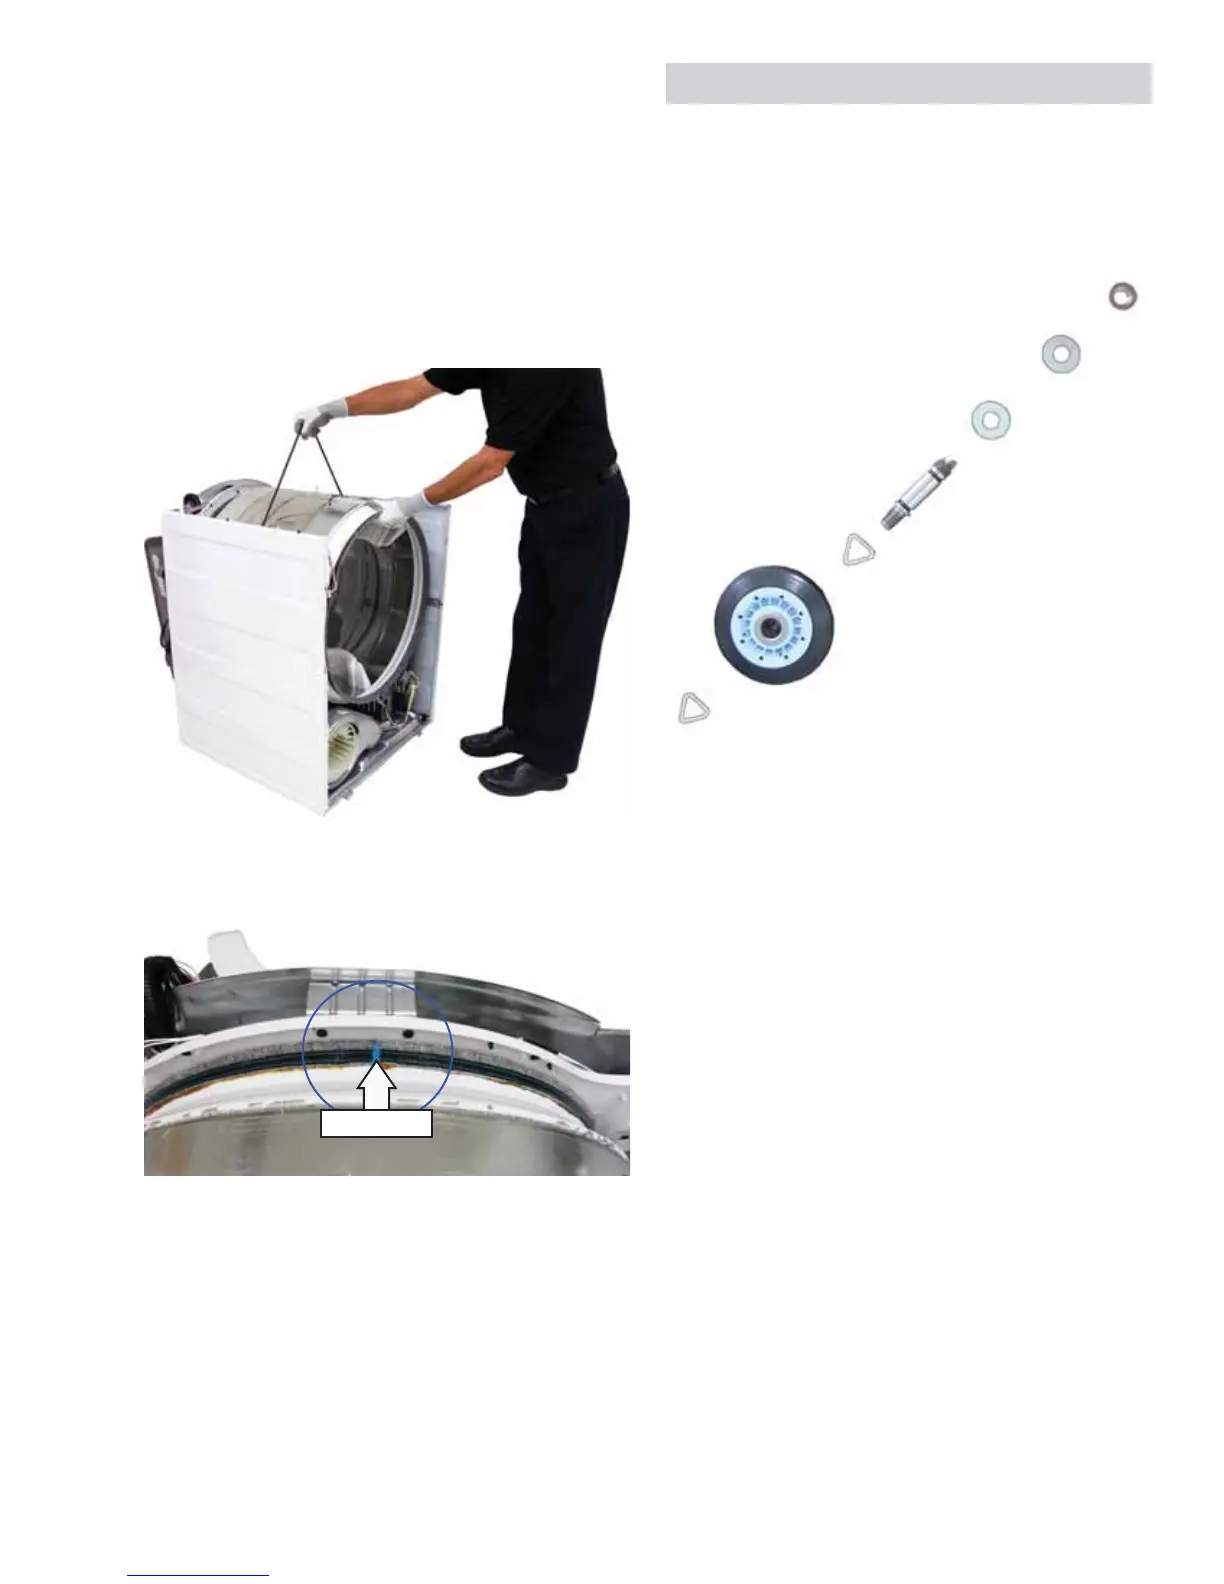
To remove the drum:
1. Remove the belt from the motor pulley and idler
pulley. (See To remove the drive belt, follow
steps 1 through 3.)
2. Using the belt as a handle, pull the drum
forward and guide it out of the dryer cabinet.
Note: Before installing the front panel, slowly rotate
drum in both directions to ensure belt is aligned and
not twisted.
Caution: To prevent damage to the dryer, the drum
must be installed with the blue threaded felt seal
toward the back of the dryer.
Blue Thread
Drum Rollers
The stainless steel drum rotates on 4 drum rollers (2
on the front drum support and 2 on the rear drum
support).
Each drum roller comes as a complete assembly.
To remove the drum rollers:
1. Remove the front bulkhead to access the front
drum rollers. Remove the drum (See Drive Belt
and Drum), to access the rear drum rollers.
2. Each drum roller is held in place by a plastic
triangular clip. Remove the triangular clip with a
small fl at-bladed screwdriver and slide the drum
roller off the roller shaft.
To remove the left side drum roller shaft from the
front bulkhead:
1. Remove the front bulkhead. (See Front Bulkhead.)
2. Remove the 9/16-in. hex nut that attaches the
shaft to the front bulkhead.
To remove the right side drum roller shaft from
the front bulkhead:
1. Remove the front bulkhead. (See
Front Bulkhead.)
2. Remove the lint fi lter.
3. Disconnect the sensor wires.
Note: The sensor rods are part of the lint fi lter
housing. To replace the sensor rods, the lint fi lter
housing must be replaced.
(Continued Next Page)