– 37 –
Troubleshooting
(Continued Next Page)
The following tables shows the diagnostic tests and the button sequence that is required to perform them:
The dryer control has a service test mode that can be utilized by the service technician in order to test
critical components and to access error codes. This test mode will help the service technician to quickly
identify certain failed or improperly operating dryer components.
To enter the service test mode and navigate:
From idle state, simultaneously press and hold the START button and rotate cycle select knob 180 degrees (8
clicks) and release the START button.
Upon entering the service mode, the control will be in service test selection mode and display the fi rst test
number (t1). Rotating the knob clockwise (CW) shall increment the test numbers in the display. Rotating the
knob counterclockwise (CCW) shall decrement the test number in the display.
Once the test number is selected, pressing START will begin the selected test. To exit that test, rotate the
cycle selection knob either CW or CCW.
To exit the service test mode:
Pressing the Power button will exit the machine from the service test mode.
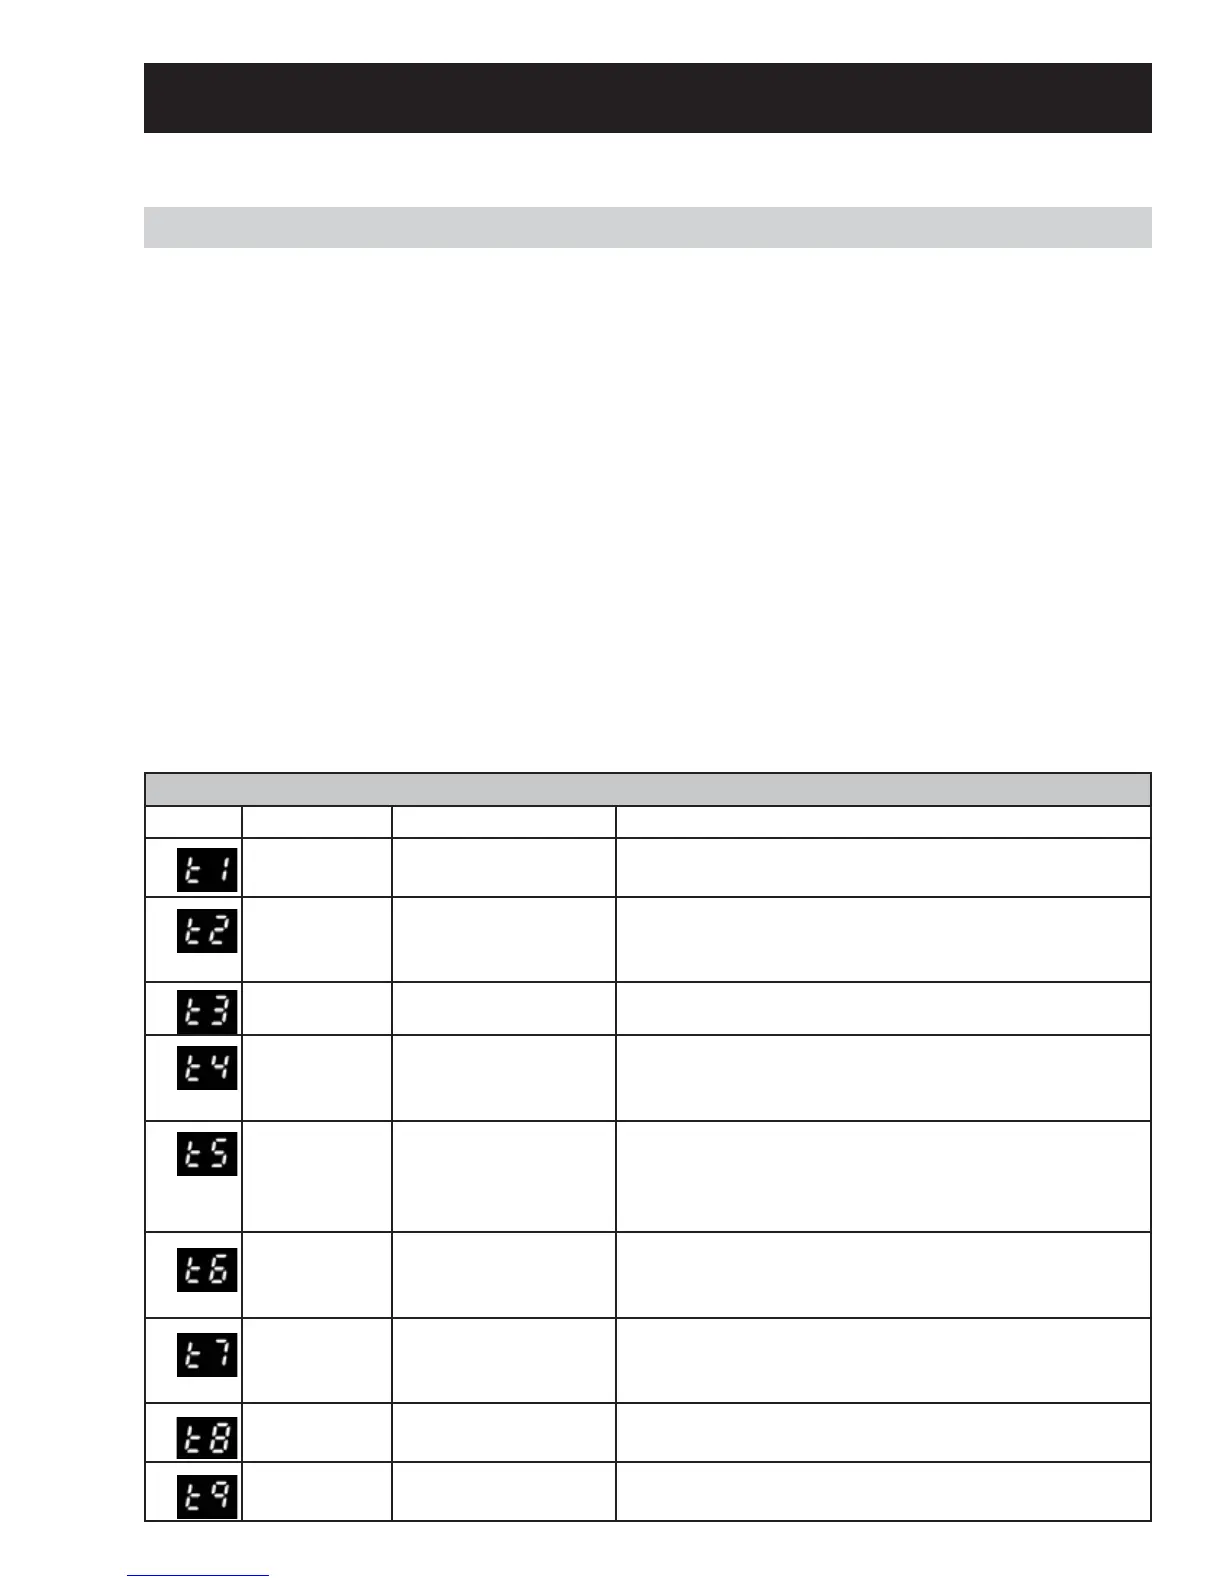
Service Test Mode
SERVICE TEST MODE
DISPLAY MODE PRESS START REMARK
t1 DRYER MODEL see DRYER MODEL
CODE
Second press start displays Jumper model.
t2 SOFTWARE
and EEPROM
VERSION
SOFTWARE VERSION
NUMBER
Software programed in the Board
t3 XML Check XML version number Checks Board Memory
t4 USER
INTERFACE
TEST
LIGHT ON ALL
SEGMENT
STOP WHEN RELEASE START
t5 ERROR CODE
see dryer
error code
table
Clears displayed error
code and displays
next most recent error
code.
See Section - Error Code (t5)
t6 OUTLET
THERMISTOR
Display the
Outlet thermistor
temperature
First start allows entering in the mode
t7 INLET
THERMISTOR
Display the
inlet thermistor
temperature
t8 MOISTURE
SENSOR
Display moisture
sensor voltage
t9 DOOR OPEN/
DOOR CLOSED
Displays “do” if the door is opened or “dc” if door is
closed.