GE Healthcare
- 4 -
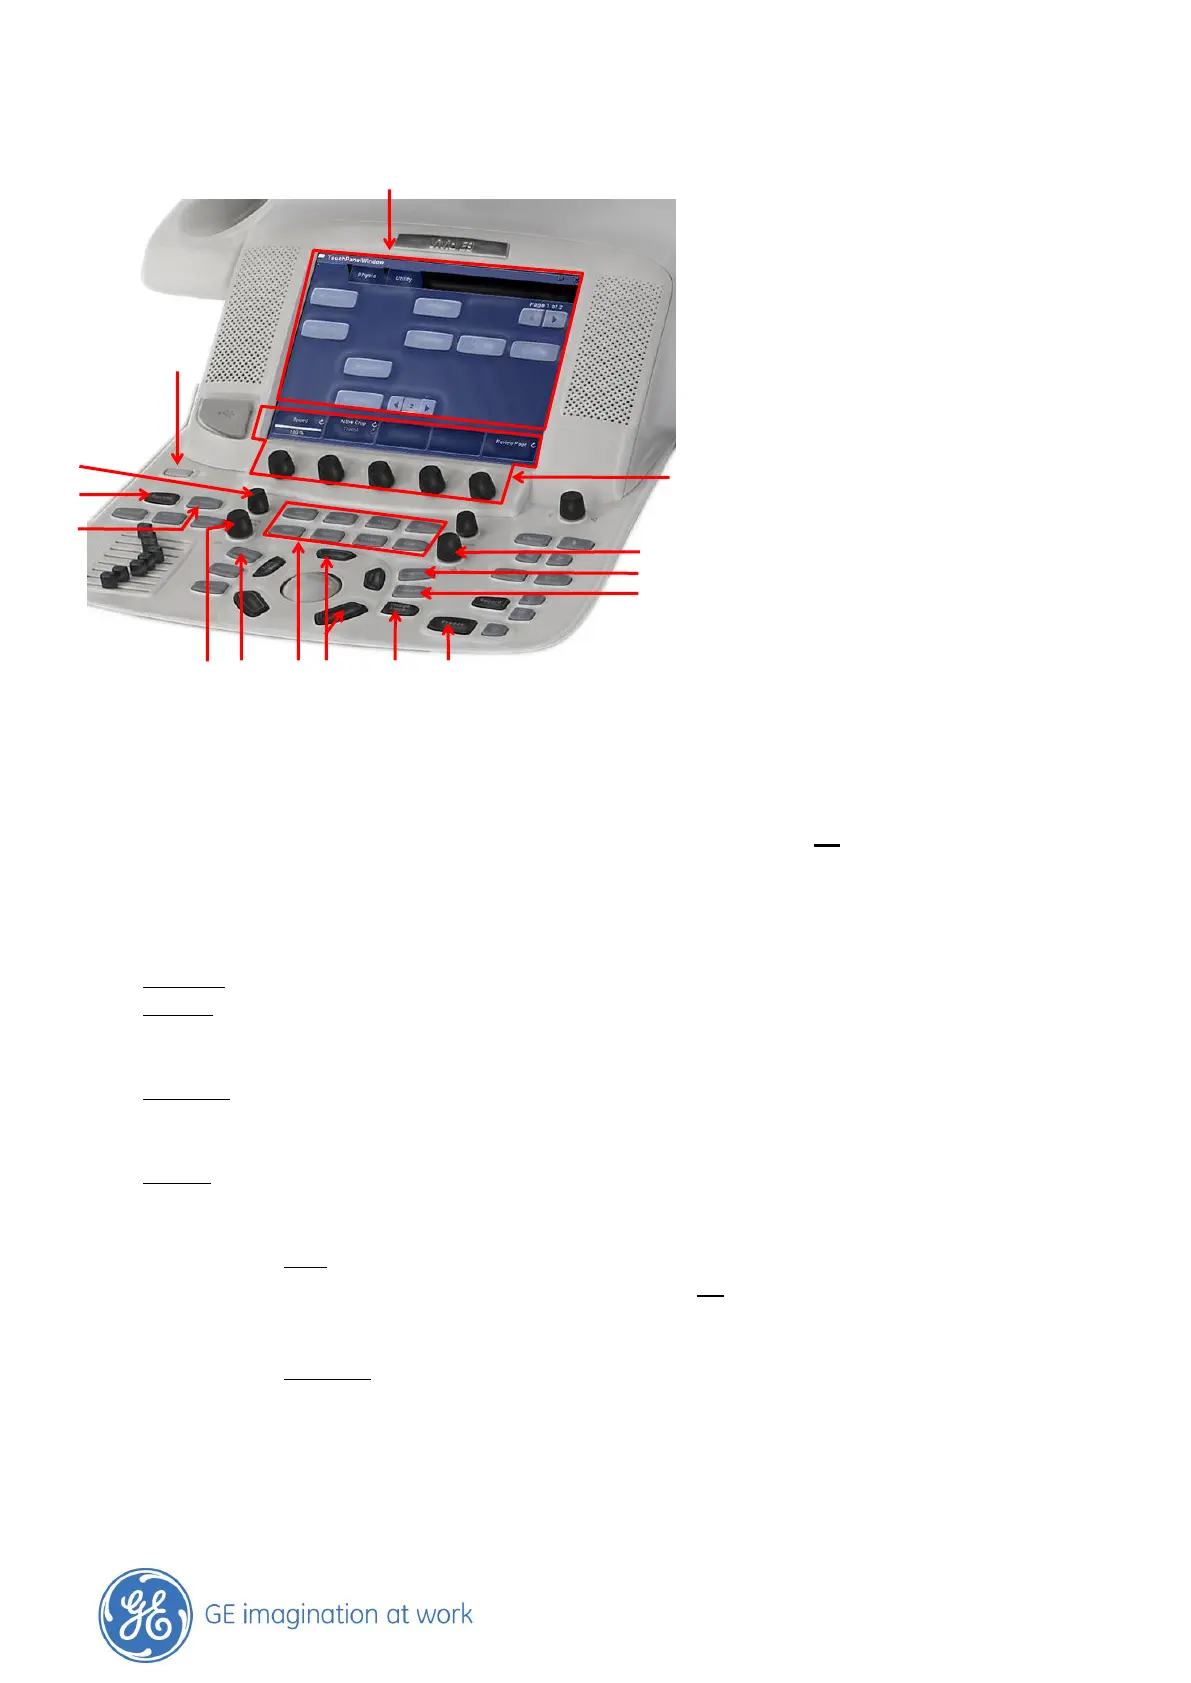
Switching on the system: Press the On/Off button (1)
Login on into the archive: Press the Patient (2) button. Select the Operator-add the Password-then press Log on
Create a new patient examination: Enter the patient data: Last name, first name, Pat.ID, Birthdate
Press Create Patient (9) if the patient is new OR
Select the patient from the list and Add Exam (9)
Select the probe: Press the Probe button (3), choose the probe and take the right preset from the list
Image optimization
2D image Depth (6)– 2D Gain (7)- TGC– Sector width (10)– Frequency (10)- Focus position (10)
M-Mode Press the Cursor button (5)- position the line on the right place- press the M-Mode button (4)
Active Mode Gain (8) - Horizontal sweep (10)
Press the 2D button (4) to go back to normal 2D imaging
Color flow While in the 2D press the CFM button (4)
Move the ROI with the trackball– change the ROI size by pressing Set (15) and use the trackball –
Active Mode Gain (8)
Doppler Press the Cursor (5) button– position the line on the right place– add PW/CW- Doppler (4)
Active Mode Gain (8)– Baseline (10)– Scale (10)- Horiz. Sweep (10)
Press the 2D button (4) to go back to normal 2D imaging
Image storage: Loop: while the image is running press the Image store button (14)
EITHER the loop is stored automatically OR
see the loop running on the screen and decide if it fits. If yes press the Image store
button (14) again. If not press the Freeze button (11) and start scanning again
Still frame: press the Freeze button (11) to stop the image, scroll with the trackball to select
an image and press the Image store button (14)
Measurements: Press the Freeze button (11)– scroll with the trackball if needed- press Caliper (12) for basic
measurements or the Measurements button (13) for measurement packages
Finishing the examination: Press the Patient (2) button - select End examination (9)
1. On / Off
2. Archive
3. Probe selection
4. Div. Modalities
5. Cursor
6. Depth
7. 2D Gain
8. Active Mode
Gain
9. Touchpanel
10. Rotation knobs
11. Freeze
12. Caliper
13. Measurement
14. Image store
15. Set button