28142 Rev 15 MAINTENANCE
Gentherm Global Power Technologies Page 60
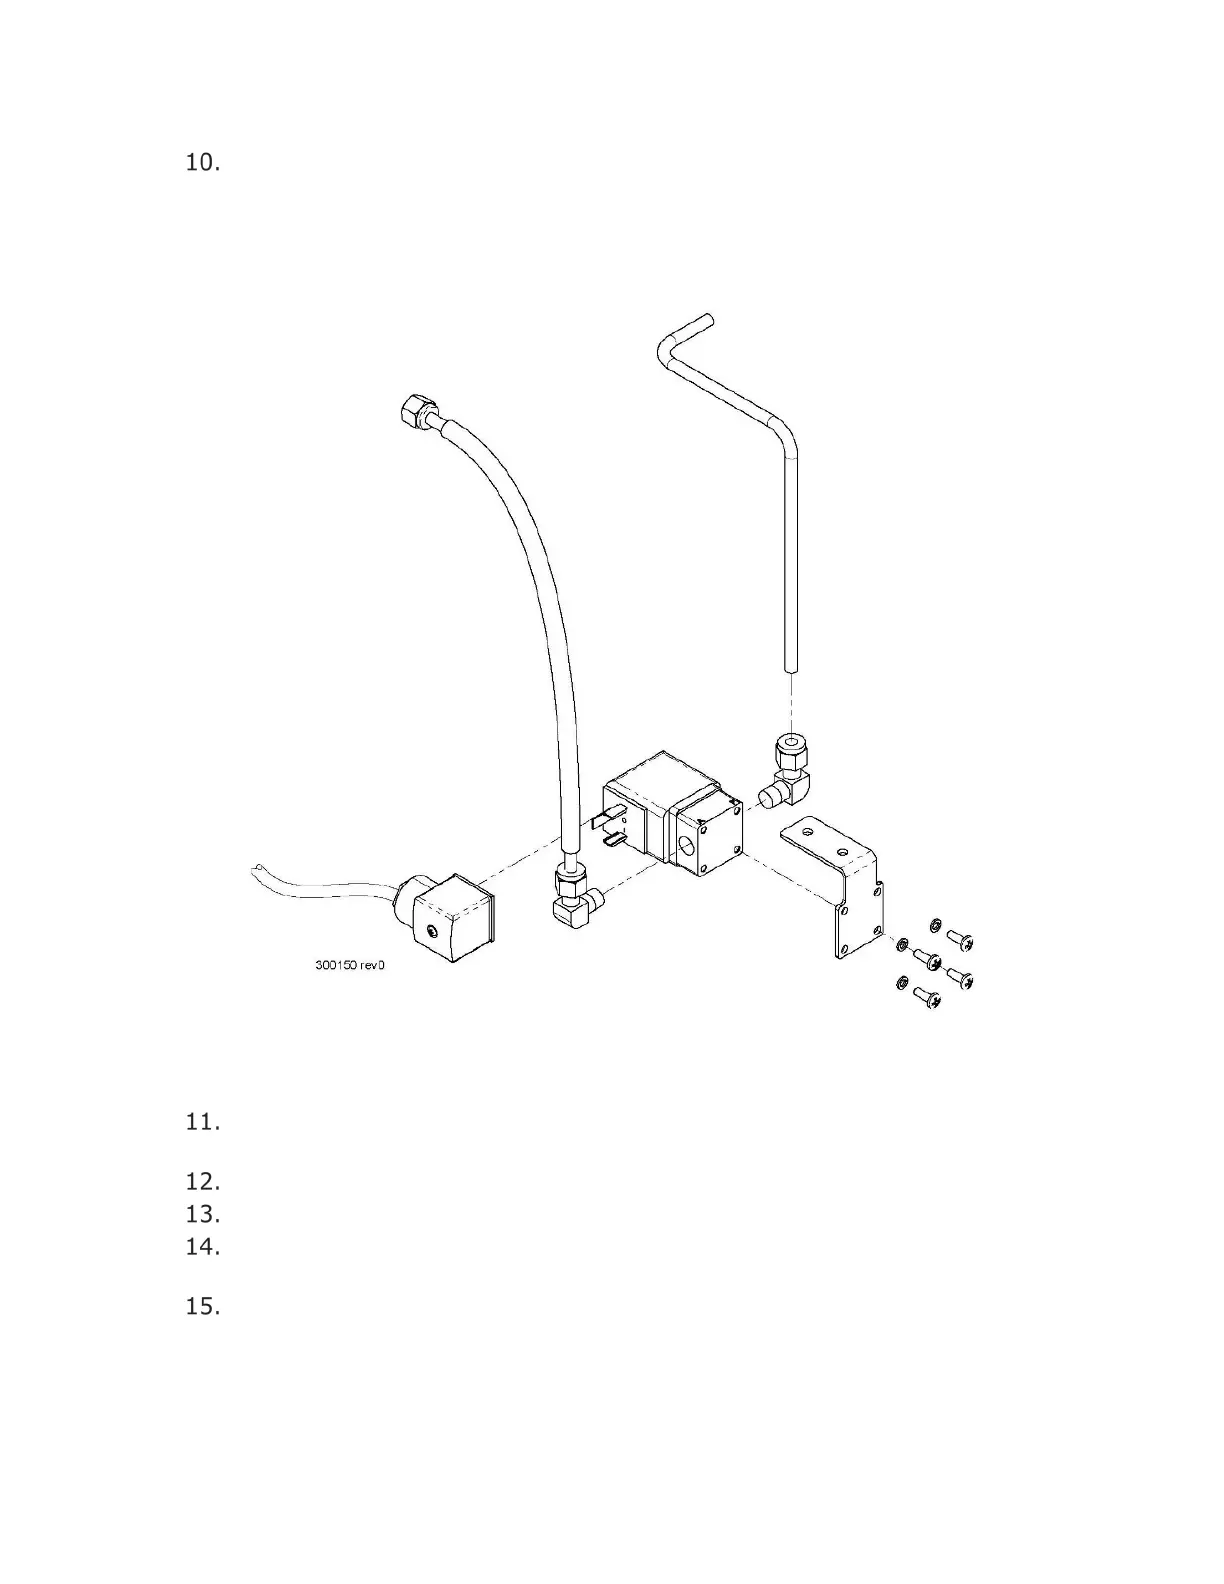
On the new solenoid valve, loosen the 5/8” retaining nut with a wrench and
orient the head as shown in
Figure 31. Take note of the P and A markings on
the valve body. The P port must be on the fuel system side of the valve, and
the A port must be on the burner side.
Figure 31 – Solenoid Valve Fuel System Connections
Install the elbow fittings on the new valve using a small amount of pipe thread
sealant – DO NOT USE TAPE ON FUEL SYSTEM FITTINGS.
Attach the valve body to the bracket using the 4 screws removed previously.
Re-connect and tighten the fuel lines on both sides of the valve.
Attach the connector onto the back of the valve coil and tighten the retaining
screw.
Apply fuel pressure and start the TEG. Immediately check all gas connections
using leak-detector fluid. Shut the TEG off again before tightening, adjusting,
or repairing any fuel system connections.
 Loading...