76
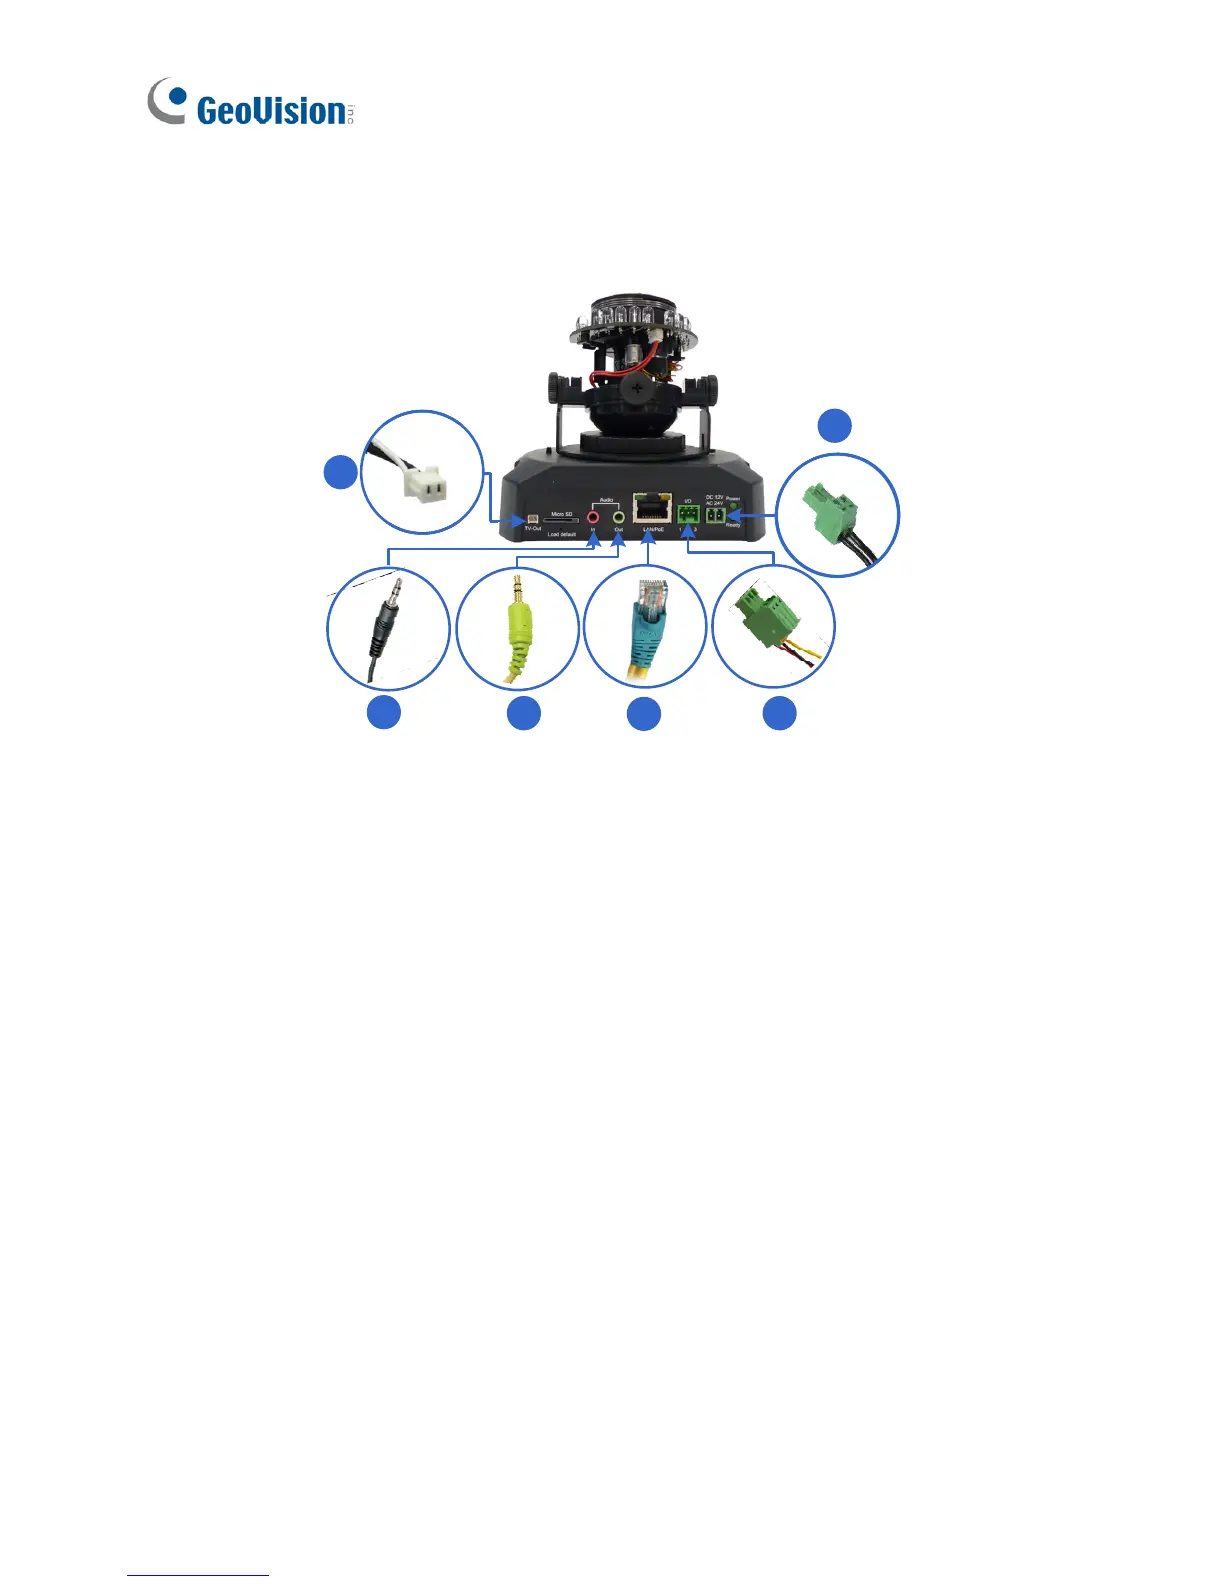
6.4 Connecting the Camera
3
3
2
2
1
5
4
1. Use a standard network cable to connect the camera to your network.
2. Optionally connect a speaker and an external microphone.
3. Optionally connect a monitor using a Video Out wire. Enable the
function by selecting the signal format in the TV Out field in the Web
interface. See TV Out setting, in the Video Settings section,
Administrator Mode Chapter, GV-IPCam H.264 User’s Manual on the
software CD.
4. Optionally connect to input / output devices. For details, see I/O
Terminal Block, Fixed IP Dome Chapter, GV-IPCam H.264 User’s
Manual on the software CD.
5. Connect power using one of the following methods:
• plugging the supplied power adapter to the power port.
• using the Power over Ethernet (PoE) function and the power will be
provided over the network cable.
6. The status LED of the camera will be on.
 Loading...