- 100 -
6-1-3 ConguringMicrophoneRecording
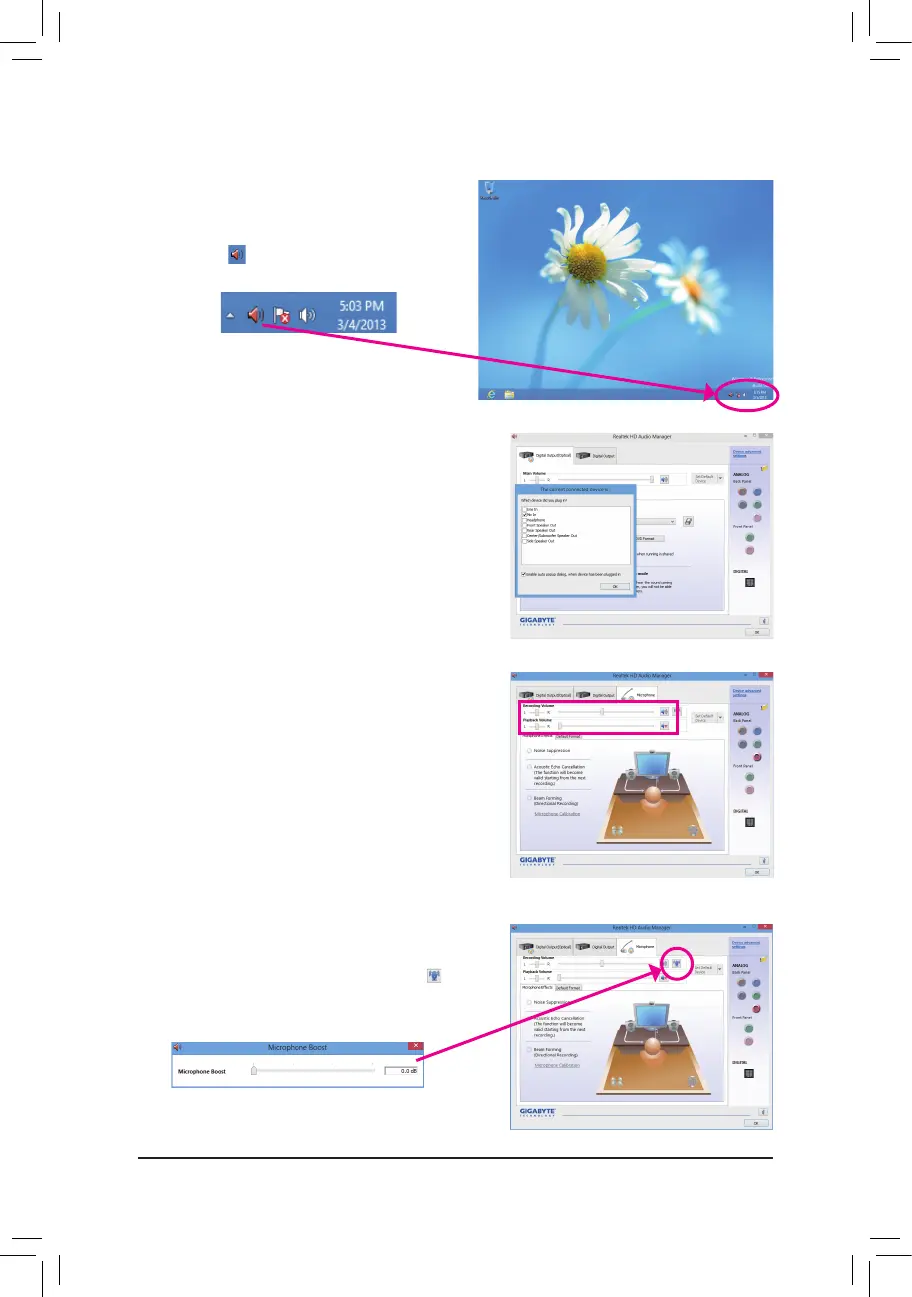
Step 2:
ConnectyourmicrophonetotheMicinjack(pink)onthe
backpanelortheMicinjack(pink)onthefrontpanel.
Then configure the jack for microphone functionality.
Note: The microphone functions on the front panel and
back panel cannot be used at the same time.
Step 3:
Go to the Microphone screen. Do not mute the recording
volume,oryou'llnotbeabletorecordthesound.Tohear
thesoundbeingrecordedduringtherecordingprocess,
do not mute the playback volume. It is recommended that
you set the volumes at a middle level.
Step 4:
To raise the recording and playback volume for the
microphone,clicktheMicrophone Boost icon on
the right of the Recording Volume slider and set the
Microphone Boost level.
Step 1:
Afterinstallingtheaudio driver,restart your computer.
Then switch to Windows desktop mode. The HD Audio
Manager icon will appear in the notification area.
Double-click the icon to access the HD Audio Manager.
 Loading...